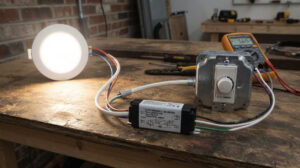
Choosing the best pot lights for vaulted ceilings trips up more people than you’d think. Most buyers pick a fixture that looks right, then discover the beams wash up the walls, the floor stays dark, or the lights fail inspection because insulation sits against the housing.
After spec’ing lighting for hundreds of sloped-ceiling projects, we’ve watched these same mistakes repeat again and again — and they’re all avoidable. This guide covers why vaulted ceilings need different fixtures, the specs that actually matter, the fixture types that work best, and the install and code details that save you from redoing the job.
Why Vaulted Ceilings Need Different Pot Lights
A vaulted ceiling is angled, so a fixture built for a flat ceiling aims its beam toward the wall instead of the floor. Choosing the right pot light starts with one number: your ceiling’s slope.
Understanding Slope and Why It Decides Everything
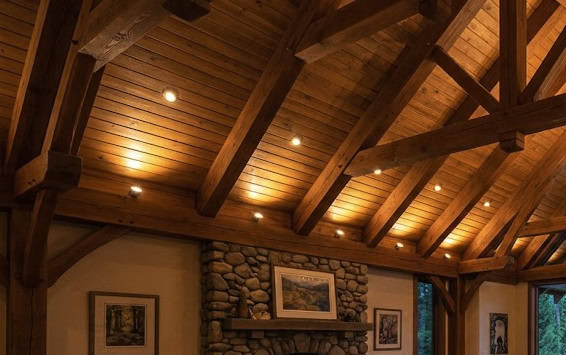
Ceiling slope is measured as rise over run. A 3/12 slope means the ceiling rises 3 inches for every 12 inches across — that’s the low-slope range. Cathedral and great-room ceilings usually run 4/12 to 8/12, which is steep-slope territory.
The steeper the ceiling, the more a fixed light throws its beam sideways. That’s why slope — not room size or style — decides whether you can use a standard fixture or need an adjustable one.
Why Standard Pot Lights Fail on Vaulted Ceilings
There’s a clear dividing line. At 3/12 or less, a standard fixed pot light is borderline acceptable. Past 3/12 — the range most cathedral ceilings fall into — you need an adjustable gimbal fixture.
We see homeowners get this wrong constantly. Someone eyeballs the ceiling, decides it “doesn’t look that steep,” and installs fixed lights in a 4/12 kitchen vault. The beams shoot up the incline, the countertop below sits in a dead zone, and the trim gaps leak glare. The fix is never cheap — every fixture comes out and gets swapped for an adjustable version, so you pay for materials and labor twice.
Here’s a no-tools check: stand on the floor and look up. If you can’t find a flat, level plane at the highest point, your slope is past 3/12 — go straight to adjustable fixtures.
What to Look for in Pot Lights for Vaulted Ceilings
Once you know your slope, five specs do the heavy lifting. Get these right and the rest is easy.
Slope Rating and Adjustability
This is the big one. A slope-rated housing is built for angled ceilings, so the trim sits flush and the socket stays level inside.
An adjustable gimbal goes further. You tilt and rotate the light head after install, then aim the beam wherever you want. On steep ceilings, that control is what saves you.
Our rule of thumb: fixed lights for flat and low-slope ceilings, gimbals for anything past 3/12.
Beam Angle
Beam angle controls how wide the light spreads. A narrow beam (around 25–35°) throws a tight, focused pool. A wide beam (60° or more) washes a large area.
On vaulted ceilings, go narrower than you would on a flat ceiling. Why? The extra ceiling height already spreads the light out before it reaches the floor. A tight beam keeps that light useful instead of scattered.
Lumen Output and Ceiling Height
Vaulted ceilings are tall. The higher the fixture, the more light you lose before it hits the floor.
So bump up your lumens. For a standard 8-foot ceiling, 600–800 lumens per light works fine. For a vault peaking at 12 feet or more, aim for 900–1,200 lumens per fixture to keep the room bright.
Color Temperature and Dimming
Color temperature sets the mood. Warm white (2700K–3000K) feels cozy — great for living rooms and bedrooms. Cool white (3500K–4000K) reads crisp and bright — better for kitchens and work zones.
Add dimming so you can dial the level up or down. Just confirm the driver and your dimmer switch actually play nice together. Mismatched pairs flicker and buzz.

IC-AT Rating for Insulated Ceilings
Here’s where safety comes in. Most vaulted ceilings sit right under the roof, packed with insulation. If insulation touches a non-rated housing, heat builds up — and that’s a fire risk.
You need an IC-AT rating: Insulation Contact and Air-Tight. IC means the housing handles direct contact with insulation. AT means it seals against air leaks, so you don’t lose heated or cooled air through the ceiling.
Never skip this on an insulated vault. Ever.
Best Types of Pot Lights for Vaulted Ceilings
Not every pot light works on a slope. The right type comes down to two things: how steep your ceiling is, and what you’re trying to light. Here are the four options that actually hold up on vaulted ceilings — and where each one shines.
Adjustable Gimbal Pot Lights
Adjustable gimbal pot lights are your best bet for steep vaults. You aim each head after you install it, so the beam points straight down instead of running up the slope. That makes them perfect over a kitchen island, dining table, or living room seating area — anywhere you need focused light on a 4/12-or-steeper ceiling. Want to spotlight a fireplace or a piece of art? Just angle the head right where you need it.
Slope-Rated Recessed Pot Lights
Slope-rated recessed pot lights use angled housings that match your ceiling. The trim sits flush, so you won’t see any awkward gap along the slope. They work great in open great rooms, bedrooms, and hallways where you want a clean, built-in look and even light overhead. Keep in mind: the beam is fixed. Use these on a moderate slope with a steady layout — not in rooms where you’ll want to re-aim the light later.
Surface-Mount LED Pot Lights
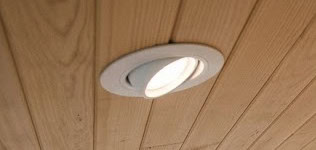
Surface-mount LED pot lights bolt straight to the ceiling. No recessed can needed. That makes them the go-to fix for thin cathedral ceilings or tight framing, where you simply can’t cut into the ceiling. They’re a smart pick for finished attics, sunrooms, and renovation jobs. Choose a low-profile model, and the fixture stays out of the way while still looking clean.
Track and Wire Pot Lights
Track and wire pot lights let you mount and aim several heads along one run. That gives you flexibility fixed recessed lights just can’t offer. Reach for them in oddly shaped rooms, long vaulted hallways, or spaces where you want to light up beams, artwork, or a gallery wall. They’re also handy when standard spacing won’t cover the room — or when you might rearrange the layout down the road.
Installation and Code Considerations
The right fixture still fails if the install is wrong. A few things matter most.
Spacing and Layout
Space your lights evenly and account for the height. A rough guide: divide the ceiling height by two, and that’s your spacing in feet. So a 10-foot ceiling gets lights about 5 feet apart.
Plan the layout before you cut. Moving a recessed can after the fact means patching drywall.
Fire Safety and Clearances
Give the housing its rated clearance from insulation and framing — unless it’s IC-rated for direct contact. Skip this and you risk overheating.
On insulated vaulted ceilings, only use IC-AT fixtures. Non-rated cans in contact with insulation trap heat and create a real fire hazard. When in doubt, stop and check the rating stamped on the housing.
Design and Aesthetic Tips
High ceilings look stunning — but they also swallow light fast. Get your pot light layout right, and the room feels warm and open. Get it wrong, and you’ll end up with dark corners and harsh hot spots. Here’s how to plan it well.
Spacing Pot Lights for Even Light
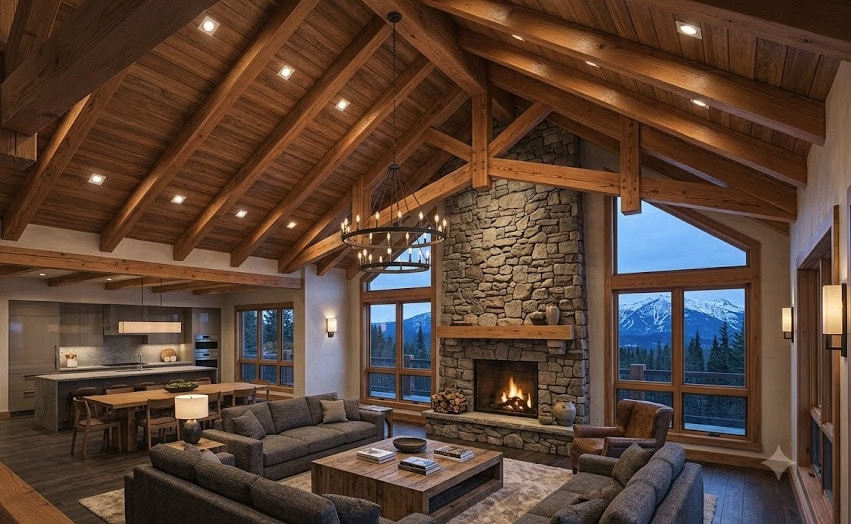
Start with spacing. A good rule of thumb: space your pot lights 4 to 6 feet apart, and set them about half that distance from the walls. On a vaulted ceiling, you’ll often need tighter spacing than usual, because the light travels farther before it hits the floor. Map the layout before you cut a single hole. That way you get even coverage instead of random bright patches.
Combining Pot Lights with Accent Lighting
Don’t rely on pot lights alone. Pair them with accent lighting — like wall sconces, pendants over an island, or a statement fixture at the peak — to add depth and stop the room from feeling flat. Your pot lights handle the general light. The accent pieces bring in warmth and draw the eye where you want it. Together, they make a tall room feel finished, not cavernous.
Choosing Pot Light Trim Finishes
Think about your trim finish, too. The trim is the ring you see around each pot light, and its color changes how much the fixture stands out. Pick a black or dark baffle trim to cut glare and help the light “disappear” into a high ceiling, or go white to blend with a painted surface. On a vaulted ceiling, less visible trim usually looks cleaner — your eye goes to the light, not the hardware.
Common Pot Light Problems and How to Solve Them
Even a great layout runs into a few headaches on tall ceilings. Most are easy to fix once you know the cause. Here are the three pot light problems that come up most often.
Solving Pot Light Heat Buildup
Heat buildup is the big one. Recessed pot lights trapped against insulation can overheat and shut off — or worse, cut their lifespan short. Use IC-rated (insulation contact) pot lights whenever the housing touches insulation, and stick with LED bulbs, which run far cooler than halogens. LEDs solve most heat problems on their own, so switch them out if you’re still running older bulbs.
Reducing Pot Light Glare
Glare is the next headache, and it’s worse on vaulted ceilings because the lights sit at odd angles right in your line of sight. Aim gimbal heads away from seating, add a deep-baffle or black trim to shield the bulb, and pick a warmer color temperature — around 2700K to 3000K — for a softer glow. Small tweaks here make a big difference in how comfortable the room feels.
Planning Pot Light Maintenance Access
Then there’s maintenance access. Changing a bulb 16 feet up is nobody’s idea of fun. Choose long-life LED pot lights rated for 25,000 hours or more, so you’re rarely up there — and plan for a telescoping bulb changer or scaffold before you install anything high. Think about access on day one. It saves you a lot of trouble later.
Safety and Codes
Installing pot lights on a tall ceiling isn’t just about looks — it has to be safe and up to code. Skip this step, and you risk failed inspections, insurance issues, or a real fire hazard. Cover these three bases before you buy or install.
Verifying Local Electrical Code for Pot Lights
Always check your local electrical code first. Requirements vary by region, so verify what your municipality demands for recessed pot lights, wiring, and dimmer compatibility before you order fixtures. In North America, that usually means following the NEC (National Electrical Code) or the CEC (Canadian Electrical Code). When in doubt, ask a licensed electrician — it’s cheaper than redoing the work.
Confirming Fire-Rating and Insulation Clearances
Next, confirm fire-rating and insulation clearances. Use IC-rated pot lightswhere fixtures contact insulation, and keep the required clearance around non-IC housings to prevent overheating. Cathedral ceilings often pack tight insulation right against the framing, so this matters more than on a flat ceiling. Check the pot light’s spec sheet for its exact clearance and fire-rating details.
FAQ
Should pot lights be on a dimmer for high ceilings?
Almost always, yes. A dimmer lets you dial the brightness up for tasks and down for a relaxed mood, which matters more in a large, tall room. Just confirm your pot lights and dimmer switch are compatible — not every LED works with every dimmer, and a mismatch causes flicker or buzzing.
How far in advance should I plan pot light placement?
As early as possible — ideally before drywall goes up. Planning placement during the framing or rough-in stage lets you run wiring cleanly and position each pot light exactly where you want it. Retrofitting into a finished vaulted ceiling is doable, but it’s slower and more expensive.
What if standard pot lights don’t fit my ceiling design?
That’s more common than you’d think on unusual angles, tight framing, or feature ceilings. When off-the-shelf fixtures won’t work, custom lighting solutions let you match the exact size, trim, beam, and rating your high ceiling needs. Our team can build to spec — so reach out with your project details and we’ll help you design pot lights that fit your ceiling perfectly.
Getting Pot Lights Right on High Ceilings
Getting pot lights right for vaulted ceilings depends on a few key factors: proper spacing, accurate lumens, suitable beam angles, and reliable IC-AT airtight ratings.
When chosen and installed correctly, pot lights deliver even, comfortable lighting without dark corners or harsh glare.
RC Lighting offers professional pot light solutions for all vaulted ceiling projects to fit diverse project needs. Whatever your ceiling specifications and lighting requirements are, we can provide matching fixtures for your space.
Share your project details, and we’ll help you get the ideal pot light setup with zero guesswork.