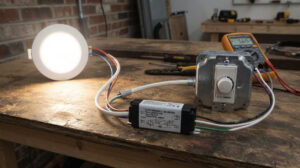
Want your yard to look amazing after dark without cluttering it with visible fixtures?
Outdoor in-ground lights sit flush with the surface, so they light up your trees, walls, and driveway while staying almost invisible during the day.
We have worked with homeowners and landscape designers on countless projects, and we keep seeing the same thing: the right in-ground layout transforms outdoor spaces far more than scattered path lights ever could. Good landscape lighting is not about adding more lamps. It is about placing the right beam in the right spot.
In this guide, we will walk you through practical ideas for trees, walls, and drives, then show you how to plan like a pro and pick fixtures that actually last. Let’s start with the basics.
What Are In-Ground Lights (And Where They Work Best)
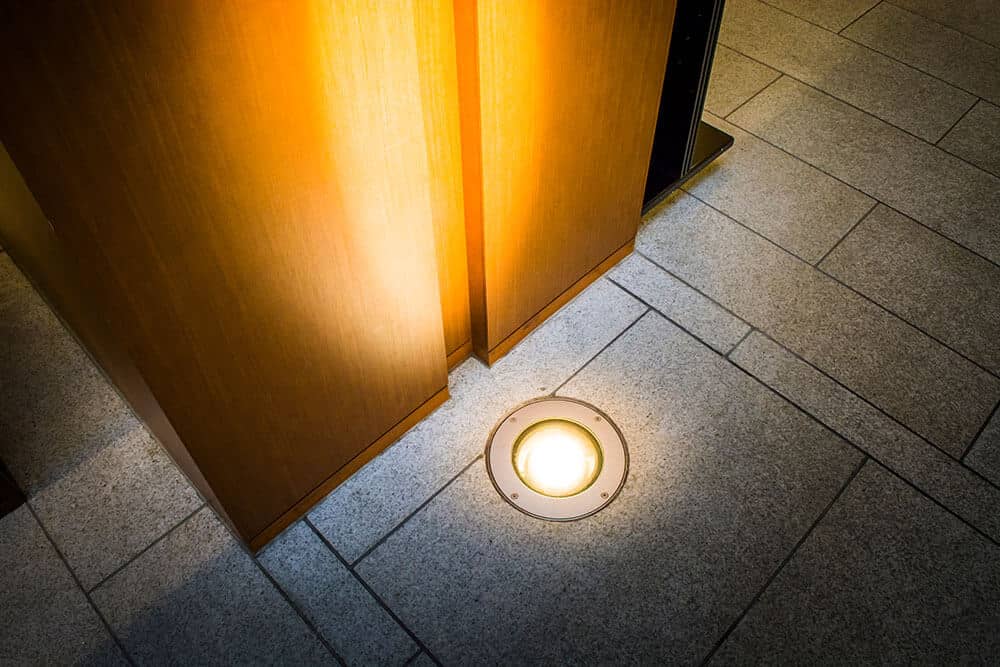
In-ground lights, sometimes called well lights, install directly into the soil, paving, or concrete. Only the lens sits at grade, so the light shines upward while the body stays hidden below.
That single feature changes everything about how a scene looks.
In-Ground Lights vs. Above-Ground Fixtures
Above-ground fixtures, like spike-mounted spotlights or path bollards, sit on top of the surface. You see them day and night. They work well when you want visible accents or safety markers along a walkway.
In-ground lights do the opposite. They disappear. Because nothing rises above the ground, they keep sightlines clean and let the light itself become the feature. For a modern, uncluttered look, that difference matters a lot.
Common Applications: Trees, Walls, Driveways, Water Features
You will find in-ground lights doing their best work in a few key spots.
Uplights accent tree canopies and bark to dramatic effect. When grazing textured walls and stone facades, they unveil layers of shadow and depth. They crisply define driveway and walkway edges without disrupting paving continuity. Many designers place them by water features too, letting light glow ripple across reflective surfaces.
Each of these jobs shares one thing. The fixture needs to stay out of sight while the effect stays front and center.
Why Some Scenes Only Work With In-Ground Lighting
Sometimes a spike light simply gets in the way. Picture a clean concrete driveway or a flush stone terrace. A protruding fixture would ruin the line and become a trip hazard.
In-ground lights solve that. They sit flush with the surface, so you can walk, park, or mow right over the general area. When you want a seamless, high-end finish, this is often the only option that works.
Outdoor In-Ground Lighting Ideas for Trees
Trees are where in-ground lighting really shows off. A well-lit tree becomes the anchor of the whole yard, and the effect looks dramatic yet natural.
Uplighting a Single Specimen Tree
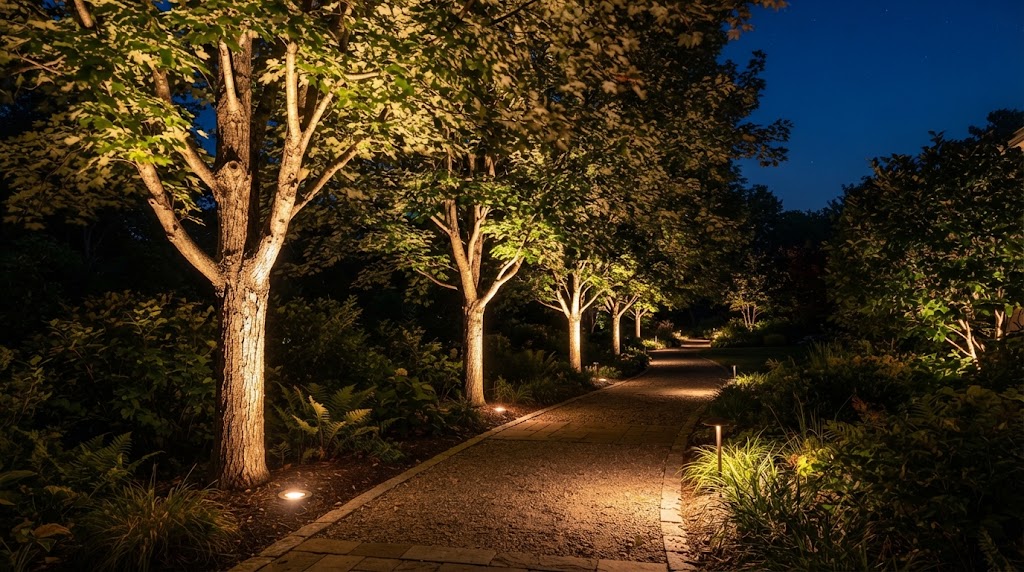
Start with your best tree. A specimen tree is the standout in your landscape, maybe a mature oak, a sculptural Japanese maple, or a tall palm. Uplighting means you aim the beam from below, so it climbs the trunk and washes into the canopy.
Place the fixture a short distance out from the base and angle it up along the trunk. This pulls out the bark texture and lights the branches from underneath, which is the look that reads as professional.
How Many Fixtures and How Far From the Trunk
One light rarely does a big tree justice. For a small ornamental tree, a single well-placed fixture can be enough. For a medium tree, two lights on opposite sides create balance and remove flat, one-sided shadows. Large canopy trees often call for three or more, spread evenly around the base.
Distance matters just as much as count. Set the fixture too close and you get a hot spot on the lower trunk while the canopy stays dark. Pull it out a bit, and the beam travels higher and spreads more evenly. As a rough starting point, place lights somewhere between one and three feet from the trunk, then adjust based on how tall the tree is.
Beam Angle Choices for Tall Trees vs. Shrubs
Beam angle decides how wide or tight your light spreads. A narrow beam, around 15 to 24 degrees, throws light far and keeps it focused, which suits tall trees where you want to reach high branches. A wider beam, roughly 36 to 60 degrees, spreads the glow over a broader shape, which works better for low shrubs and bushy canopies.
Match the beam to the plant, not the other way around. A wide beam on a tall trunk just scatters light and loses the drama up top.
Outdoor In-Ground Lights Ideas for Walls & Facades
Outdoor in-ground lights are one of the best tools for bringing a plain wall to life. Because you set them into the ground at the base and aim the beam upward, they highlight architectural features that stay flat and invisible during the day. Stone texture, brick joints, and clean render lines all come alive after dark.
This section shows you how to place outdoor in-ground lights along walls and facades, which beam effect to choose, and how to keep the fixtures hidden.
Grazing vs. Washing With In-Ground Fixtures
Outdoor in-ground lights give you two very different looks, and the difference comes down to placement.
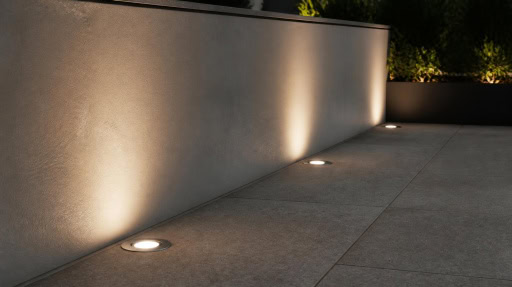
Grazing means you set the fixture close to the wall and aim the beam nearly straight up. The light skims across the surface at a sharp angle, so every bump, groove, and stone edge casts a shadow. This is the effect you want for rough stone, split-face block, or textured brick, because it makes the material pop.
Washing means you pull the fixture farther out and use a wider beam. The light spreads evenly and covers the whole wall in a smooth glow. This suits flat, smooth surfaces like stucco or painted render, where you want brightness without harsh shadows.
Pick grazing when texture is the star. Pick washing when you just want the wall to glow.
Spacing In-Ground Lights on Retaining and Stone Walls
Spacing controls how even your wall looks. Set the in-ground lights too far apart and you get bright pools with dark gaps between them. Set them too close and the effect looks busy and loses its rhythm.
For grazing on a textured wall, start with fixtures about one to two feet from the base, spaced roughly every three to five feet along the wall. Then step back and check the shadows. Adjust the spacing until the light reads as one continuous sweep rather than separate spots.
Retaining walls need extra thought. Because they often sit at the edge of a patio or driveway, you want the fixtures flush and out of the walking path. This is exactly where outdoor in-ground lights beat surface-mounted options, since these recessed lights sit level with the surface and never trip anyone up.
Height matters too. A short garden wall needs a tighter beam so the light does not shoot over the top and into your eyes. A tall facade can take a wider spread that carries the glow higher.
Hiding In-Ground Fixtures and Avoiding Glare
Glare ruins good wall lighting fast. If someone can look straight into the lens, the light stops being accent lighting and turns into an annoyance.
A few habits keep glare under control. Aim the beam onto the surface, not out toward the viewer. Choose in-ground fixtures with a recessed lens or a glare shield so the source stays hidden. Tuck lights behind low plants or into the edge of a bed when the layout allows it.
The goal stays the same across every wall. You want to see the light on the surface, not the fixture that made it. When you use outdoor in-ground lights to highlight architectural features this way, the wall becomes the feature and the hardware disappears.
Outdoor In-Ground Lights Ideas for Driveways & Walkways
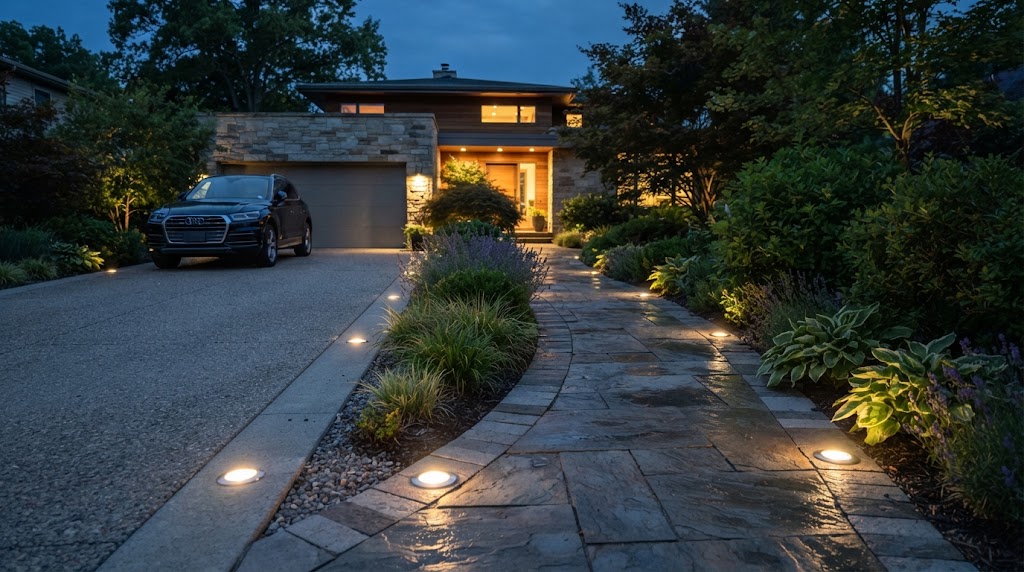
Driveways and walkways are where outdoor in-ground lights have to do two jobs at once. They guide people safely along the path, and they take real weight from feet, wheels, and sometimes full vehicles. That combination makes fixture choice and installation more demanding than anywhere else in the yard.
Spacing In-Ground Lights for Safe Guidance
Along a walkway, the goal is gentle guidance, not a runway. You want just enough light to read the edge of the path and any change in level.
Space walkway fixtures roughly every four to six feet, and always mark steps, corners, and grade changes with their own light. These are the spots where people trip, so they deserve extra attention.
Keep the light low and even. Bright, widely spaced pools create dark patches between them, and your eyes struggle to adjust as you walk from bright to dark. A steady, low-level glow reads as safer and looks calmer.
For driveways, you can space lights a little farther apart and use them to define the edges. This helps drivers judge the width at night, especially near gates, curves, and parking areas.
Choosing the Right Load Rating
This is the single most important spec for any fixture set into a driveway. If a light is only rated for foot traffic and a car rolls over it, the lens cracks and water gets in.
Look for a clearly stated load rating, usually given in tons or kilograms. As a rough guide:
- Walkways and patios: around 500 kg is enough for foot traffic.
- Shared paths where a car might occasionally cross: choose 1,000 to 2,000 kg for a safety margin.
- Driveways with regular vehicle traffic: choose a drive-over rating of 3,000 kg or more, matched to your vehicle weight.
When in doubt, size up. The cost difference is small compared to digging up a failed fixture later.
Installation Note
In our measured experience, the driveway is where customers pick the wrong fixture most often. Many people see IP67 and stainless steel on the label and assume the light is ready for a car. That is a costly mistake. Water resistance and load capacity are two completely separate specs, and one tells you nothing about the other.
For driveways, the numbers that actually matter are static load, impact resistance, face-cover thickness, glass thickness, housing structure, and the mounting sleeve. There is one thing most homeowners never think about. A car’s weight does not spread evenly across the lens. It concentrates through the tires into a small point load, which puts intense pressure on one spot. That is why a driveway light needs a purpose-built drive-over structure, not just a high IP rating.
Drainage, Sealing, and Getting the Install Right
Water is the quiet killer of in-ground lights. Even a well-rated fixture fails early if water pools around it and cannot drain.
Set every fixture on a bed of gravel so water moves away from the housing instead of sitting against the seal. Check the gasket and lens seal before you backfill, and never reuse a damaged gasket.
Keep the top of the fixture flush with the finished surface. A lens that sits proud of the paving takes direct impact from wheels and shovels. One that sits too low collects debris and standing water.
Finally, plan your cable runs before you dig. Use the correct outdoor-rated wiring and burial depth for your area, and leave a small service loop at each fixture so you can lift and inspect a light without cutting the cable. Good outdoor in-ground lights reward careful installation with years of quiet, reliable service.
Placement & Design Principles That Make It Look Professional
The difference between lighting that looks designed and lighting that looks scattered usually comes down to a few simple principles. You do not need a lighting degree to get this right. You just need a plan and the discipline to hold back.
This section covers how to layer light, why restraint matters, how to use beam angles for focal points, and a three-step method you can apply to any space.
Layering Light: Ambient, Accent, and Focal Point
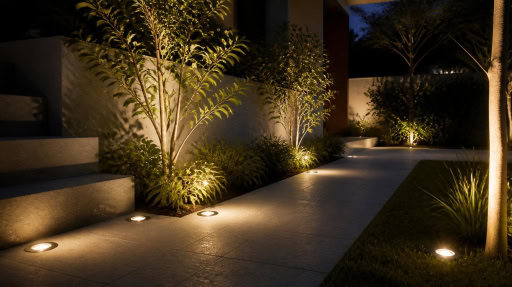
Good outdoor lighting works in layers, just like good interior lighting.
Ambient light is your base. It gives a soft, even wash so the space feels safe and usable. Low-level path and area lighting usually fills this role.
Accent light adds depth. This is where in-ground fixtures shine, grazing a wall or uplighting a shrub to create texture and shadow.
Focal point light draws the eye. It is the one feature you want people to notice first, such as a specimen tree, a sculpture, or an architectural detail.
When all three layers work together, the space feels balanced. When you only have one layer, it usually looks flat or harsh.
Why Less Is Usually More
The most common mistake is using too many fixtures. Over-lighting flattens a space, wastes energy, and creates glare that ruins the mood.
A well-lit garden or facade often uses fewer lights than people expect. Each fixture should earn its place by doing a specific job.
Before adding another light, ask what it contributes. If the answer is “nothing new,” leave it out. Dark areas are not failures. Contrast between light and shadow is what makes a scene feel intentional.
Start with fewer fixtures than you think you need. You can always add one later, but pulling out an over-lit scheme is harder.
Choosing Beam Angles to Create a Focal Point
Beam angle is your main tool for directing attention.
Use a narrow beam (10° to 24°) to pick out a single feature such as a column, statue, or tall tree. The tight beam concentrates light and makes that object the clear focal point.
Use a wide beam (36° to 60°) for ambient and fill lighting, where you want soft coverage rather than a spotlight effect.
The trick is contrast. If everything gets the same wide wash, nothing stands out. Reserve your narrowest beams for the one or two features that deserve the most attention, and let wider beams handle the rest.
A Simple Three-Step Planning Method
You can plan a professional-looking layout in three steps.
Step 1: Pick your focal points. Walk the space and choose the one or two features you most want to highlight. These get your narrow-beam accent lights.
Step 2: Add function and safety. Identify where people walk, where they gather, and where steps or level changes create trip hazards. Add ambient light here.
Step 3: Fill and balance. Step back at night and look for dark gaps or harsh spots. Add or adjust fixtures only where the scene actually needs it.
Test everything after dark before you commit to final positions and cable runs. What looks right on paper often needs small adjustments in real light.
Installation & Maintenance Tips
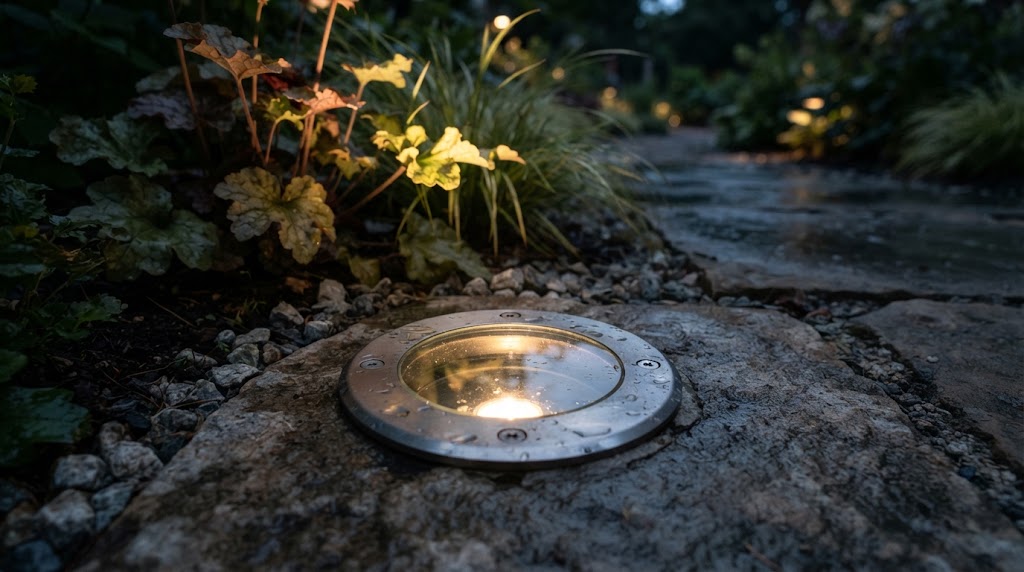
In-ground lights are buried, so getting installation and maintenance right saves you from digging fixtures back up later. This section covers cable depth, transformer sizing, lens care, and a seasonal inspection routine.
Always follow your local electrical code, and use a qualified electrician for any mains-voltage work.
Cable Depth and Utility Separation Basics
Low-voltage cable still needs proper burial to stay protected from spades, roots, and settling soil.
As a general guide, bury low-voltage landscape cable at least 150mm (6 inches) deep. Run it in conduit where it crosses under paths, driveways, or beds you will dig regularly.
Keep landscape cable separated from other buried services such as water, gas, and communications lines. Never run it in the same trench as those utilities, and cross them at a right angle rather than running parallel.
Leave a small loop of spare cable at each fixture. This service loop lets you lift and reposition a light later without re-running the whole line.
Sizing a Low Voltage Transformer
The transformer powers your fixtures, and undersizing it causes dim, flickering lights.
Use this simple method:
- Add up the wattage of every fixture on the circuit.
- Multiply the total by 1.25 to leave headroom. This safety factor prevents the transformer from running at full capacity.
- Choose a transformer rated at or above that figure.
For example, ten 5-watt fixtures total 50 watts. Multiply by 1.25 to get 62.5 watts, so a 75-watt transformer is a sensible choice.
For long cable runs, keep in mind that voltage can drop over distance, leaving fixtures at the far end dimmer. Splitting the load across separate runs or using a higher-tap terminal helps keep brightness even.
Cleaning Lenses and Preventing Water Pooling
Buried fixtures collect dirt, so a little maintenance keeps output bright.
Wipe lenses periodically with a soft cloth to remove soil, algae, and hard-water film. A dirty lens can noticeably cut light output long before the LED itself fades.
Check that water drains away from each fixture. If a housing sits in a low spot where water pools, silt and standing moisture shorten its life, even on a high IP-rated unit. Refresh the gravel drainage bed underneath if drainage has slowed.
Maintenance Note
In practice, in-ground fixtures rarely fail because the LED wears out first. The more common causes are poor drainage and seal failure. When a housing sits in a spot where water pools, moisture and silt work their way past the gasket over time, even on a high IP-rated unit. A clouded or dirty lens is the second frequent issue, since it quietly cuts light output long before anything actually breaks.
Checking drainage, keeping lenses clean, and confirming the seals are seated correctly at installation prevents most early failures. If a fixture dims or fogs internally, treat it as a moisture warning and inspect the seal before the problem spreads to the wiring.
Seasonal Inspection Checklist
A short seasonal check catches small problems before they become dig-up repairs.
- Spring: clear winter debris, check drainage beds, wipe lenses.
- Summer: trim plants shading or overheating against fixtures.
- Autumn: clear fallen leaves, confirm fixtures still sit flush after ground movement.
- Winter: check seals and connections before freezing weather, and confirm water is draining away from housings.
Run through the layout at night once per season too. A single dark fixture is often the first sign of a loose connection or a failing seal.
FAQs
How Many Lights Does One Tree Need?
It depends on the tree’s size and shape, but most trees need fewer lights than people expect.
A small to medium tree usually looks best with one or two fixtures. Place them at the base and aim the beam up through the canopy to highlight the trunk and branch structure.
For a large or wide specimen tree, two to three fixtures spaced around the base give more even coverage and reduce harsh shadows on one side.
Use a narrow beam angle to keep the light focused on the tree rather than spilling into the sky or onto nearby surfaces. Start with fewer fixtures, view the result after dark, and add one more only if a section stays too dark.
Are In-Ground Lights Really Waterproof? Is IP67 Enough?
In-ground lights are designed to resist water, but no fixture is truly “waterproof” forever. The rating tells you how much protection you get.
IP67 means the fixture is fully dust-tight and can withstand temporary immersion in water up to 1 meter deep for up to 30 minutes. For most in-ground applications in beds, lawns, and patios, IP67 is a sensible minimum.
If a fixture may sit in a spot that floods, pools, or stays wet for long periods, look for IP68, which is rated for continuous immersion.
Remember that the rating only holds if the seals stay intact and water drains away from the housing. Poor drainage and a damaged gasket will defeat even a high IP rating over time, so installation and maintenance matter as much as the number on the box.
Is 12V Safer Than 120V for Outdoor Lighting?
Yes. Low-voltage 12V systems are generally safer for outdoor and DIY installations than line-voltage 120V systems.
At 12V, the risk of a dangerous shock is much lower, which is why low-voltage landscape lighting is popular for gardens, paths, and areas near water. It is also easier to install, since low-voltage cable does not require the same conduit and burial depth as mains wiring.
The 120V side still exists at the transformer, which plugs into a standard outlet. That connection should be on a GFCI-protected circuit and, for anything beyond a simple plug-in transformer, handled by a qualified electrician.
For most residential and light commercial outdoor projects, a 12V system offers the best balance of safety, flexibility, and ease of installation.
Is Brass Really More Durable Than Aluminum?
For in-ground and outdoor fixtures, brass is generally the more durable choice, though it comes at a higher cost.
Brass resists corrosion extremely well and holds up in wet soil, coastal air, and constant moisture. Over time it develops a natural patina but keeps performing, which is why it is often used for premium, long-life fixtures.
Aluminum is lighter and more affordable. Quality aluminum fixtures with a proper protective finish perform well in most climates, but they are more vulnerable to corrosion if the coating is scratched or if they sit in harsh, salty, or constantly damp conditions.
If you want maximum lifespan in a demanding environment, brass is worth the investment. If budget matters more and conditions are mild, a well-finished aluminum fixture is a reasonable option.
Conclusion
Now that you know how to plan outdoor in-ground lights for trees, walls, and driveways, pick one area to start with rather than lighting everything at once.
Choose your best specimen tree or a single textured wall, set one or two correctly rated in-ground fixtures, and check the effect after dark before you commit to cable runs. Once that spot looks right, apply the same beam-angle and spacing principles to the rest of your property.
For step-by-step help on getting fixtures to survive burial and moisture, revisit the Installation & Maintenance section above, and pay close attention to drainage, sealing, and load ratings before you dig.
Talk to Us About Custom In-Ground Lights
If you are specifying in-ground lights for a project, the fixture you choose matters as much as where you place it. The right IP rating, an honest drive-over load rating, and corrosion-resistant materials such as brass or finished aluminum are what keep a buried light working season after season.
We design and manufacture outdoor in-ground lights and can tailor beam angles, load ratings, IP sealing, materials, and finishes to suit your specific site and application.
If you have a project in mind, contact our team to discuss a custom in-ground lighting solution. Tell us about your trees, walls, or driveway conditions, and we will help you specify fixtures built to last before you break ground.