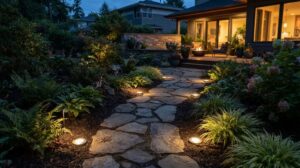
Path and area lighting projects hinge on measurable technical planning, from fixture dimensions and lumen targets to layout math and supplier documentation.
This article walks through fixture sizing, beam spread calculations, material selection, compliance checks and installation considerations. It lays out the formulas, terminology and specification criteria you need to build out a complete lighting layout for any outdoor site.
Quick Answer
Path and area lights serve two main jobs. They guide foot traffic safely after dark, and highlight landscaping or architectural features.
For most residential walkways, you can look for fixtures rated between 40 and 100 lumens. Wider commercial paths, parking areas, or building perimeters usually need higher output fixtures, often in the 100 to 300 lumen range, paired with wider beam spreads to cover more ground per fixture.
Projects involving ADA compliance, heavy foot traffic, or long cable runs typically call for commercial grade fixtures from the outset.
What Are Path & Area Lights?
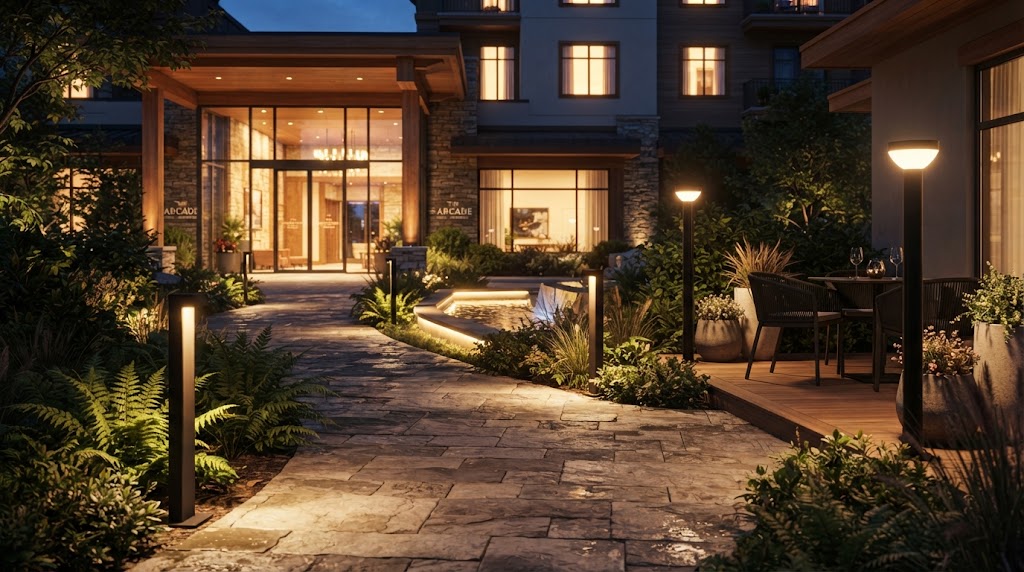
Path lights are fixtures placed along walkways to mark the edge of a path and light the ground directly in front of a person’s feet. Area lights cover a broader zone, such as a patio, parking lot, or building entrance, where the goal is even illumination rather than a directional line of light.
Why Use Path and Area Lighting?
The most obvious reason is safety. Well placed path lights reduce trip hazards on uneven ground, steps, or transitions between surfaces.
Wayfinding follows naturally from that. Lights spaced at consistent intervals help visitors and staff follow a route without relying on additional signage.
For commercial properties, path and area lighting also supports security. A well lit perimeter or parking area discourages loitering and gives security cameras usable footage after dark. Residential installations lean more toward curb appeal, but the underlying spacing and lumen principles apply to both.
What About Size and Lumens?
Fixture size and lumen output are related decisions, but they solve different problems. Size affects how a fixture looks in context and whether it gets obscured by plantings. Lumen output affects how much usable light reaches the ground. Getting both right means matching the fixture to the path itself, not just picking whatever looks appealing on a shelf.
A Few Simple Guidelines
Path width is the first thing to check before selecting fixture height. Narrow garden paths, typically 2 to 3 feet wide, work best with shorter fixtures in the 12 to 18 inch range, since taller fixtures tend to look out of scale next to a narrow walkway.
Wider walkways and driveways, generally 4 feet or more, can accommodate taller fixtures in the 18 to 24 inch range without looking oversized. Commercial paths often fall into this category.
Plantings also affect fixture selection. A fixture placed near dense groundcover or low shrubs should sit tall enough that foliage will not block the light source as plants mature. A good rule is to select a fixture at least a few inches taller than the expected mature height of nearby plantings, or to choose a narrower profile fixture that is easier to position between plants.
Lumen Ranges for Residential and Commercial Walkways
Residential pathways generally call for softer, lower lumen fixtures. Most garden paths perform well with output in the 40 to 100 lumen range, which is enough to define the edge of a walkway without overpowering the surrounding landscaping.
Commercial walkways need higher output to account for wider paths, higher foot traffic, and the need for more consistent visibility across a larger area. Fixtures in the 100 to 300 lumen range are common for this application, often paired with wider beam spreads.
| Fixture Type | Residential Lumen Range | Commercial Lumen Range |
|---|---|---|
| Low profile path light | 40 to 80 | 100 to 150 |
| Standard path light | 60 to 100 | 150 to 200 |
| Area light or spotlight | 100 to 200 | 200 to 400 |
| Bollard light | 80 to 150 | 150 to 300 |
These ranges are starting points rather than fixed rules. Local light levels, fixture spacing, and surface reflectivity all shift the ideal output up or down for a given site.
Lumen-to-Footcandle Conversion Example
Lumens measure total light output from a fixture, while footcandles measure how much of that light actually reaches a surface. This distinction matters because two fixtures with the same lumen rating can produce very different footcandle readings depending on beam spread and mounting height.
As a simplified example, a 100 lumen fixture with a wide beam spread mounted 12 inches above the ground might produce roughly 3 to 5 footcandles directly beneath it, with that number dropping quickly as distance from the fixture increases. A fixture with a narrower beam concentrates more of that light into a smaller area, producing a higher footcandle reading directly below it but less spread across the surrounding ground.
Manufacturer spec sheets sometimes include photometric data showing footcandle readings at specific distances. Checking this data, rather than relying on lumen output alone, gives a more accurate picture of how a fixture will actually perform on a given path.
How Many Path Lights Are Needed?
Fixture count comes down to three inputs: total path length, fixture beam spread, and whether lights go on one side or both. Once these are set, the math is simple arithmetic rather than guesswork.
Worked Example
Take a 50 foot path lit with fixtures that have a 6 foot beam spread, installed on one side only.
Add one beam spread to the total path length before dividing. This accounts for the light thrown at each end of the path, not just the space between fixtures.
50 + 6 = 56 feet. Divide by the beam spread: 56 ÷ 6 = 9.3, which rounds up to 10 fixtures.
Rounding up keeps the spacing even across the full length of the path rather than leaving a longer gap at one end.
Fixture Count Formula
The general formula follows the same logic as the worked example above:
Fixture count = (Path length + Beam spread) ÷ Beam spread
Adding one beam spread to the path length before dividing corrects for the fact that the first and last fixtures only cover half their beam spread toward the ends of the path. Skipping this step tends to undercount fixtures by one, which shows up as a dark patch at the start or end of a walkway.
For paths lit on both sides, the same formula applies per side, and the two fixture counts are added together. Staggering fixtures between the two sides, covered below, changes the spacing math slightly since fixtures no longer sit directly across from one another.
One Side vs. Both Sides
Lighting one side only means the basic formula gives the final count directly. A 50 foot path with a 6 foot beam spread needs 10 fixtures.
Lighting both sides means running the same formula once per side, then adding the results together — roughly 10 fixtures per side, or 20 fixtures total. This is the number most often underestimated during planning, since homeowners tend to budget for one side and add the second later without adjusting the fixture count.

Pools of Light vs. Continuous Illumination
Beyond one side vs. both, the desired lighting effect changes the fixture count independently of path length.
Pools of light occurs where each fixture creates a distinct circle of illumination with visible darker gaps between them, and this method works with the basic spacing formula as-is. This look suits garden paths and residential walkways where a layered, ambient effect is the goal, and it keeps fixture count on the lower end.
Continuous illumination delivers an unbroken line of light with no visible gaps. It requires overlapping beam spreads, so fixtures must be spaced closer than the basic formula suggests, typically at 70-80% of the beam spread rather than 100%. For the same 50 foot path, this can push the count from 10 fixtures up to 12-13 fixtures.
Commercial walkways and ADA compliant routes generally lean toward continuous illumination for consistent visibility, while residential garden paths more often use pools of light for aesthetic reasons. Staggering fixtures on both sides — alternating rather than mirroring their position — helps fill gaps between pools of light without needing the tighter spacing that full continuous illumination requires, offering a middle-ground option for count-conscious projects.
Useful Lighting Terms
Path light specifications use a handful of terms that directly affect fixture count, spacing, and comfort. Understanding them makes the calculations from the previous section easier to apply correctly on an actual site.
Ambient Light
Ambient light refers to the existing light level on a site before any path fixtures are added, they may come from streetlights, neighboring properties, porch lights, or moonlight.
A path with higher ambient light (near a street or a well-lit building) often needs fewer or dimmer fixtures to achieve a comfortable visual effect than an unlit rural or backyard path.
Measure ambient light on-site, at night, before finalizing fixture count. Skipping this step is a common reason installed lighting ends up looking either too dim to be useful or too bright and glaring against a darker surrounding.
Beam Spread
Beam spread is the width of the light pattern a fixture casts on the ground, usually listed in the product spec sheet as a diameter in feet or a degree angle.
This is the same number used in the fixture count formula from the previous section: A wider beam spread means fewer fixtures are needed to cover the same path length, while a narrower beam spread requires closer spacing to avoid dark gaps.
Direct Glare
Direct glare occurs when a fixture’s light source is visible at eye level, rather than the light being directed down toward the walking surface.
Beyond being visually uncomfortable, direct glare on a path is a safety concern. It can temporarily impair a person’s night vision, making it harder to see uneven ground, steps, or obstacles immediately after looking toward the fixture.
Shielded or shaded fixture housings direct light downward and reduce glare, which is why most path lights use a hood, cap, or downward-facing lens rather than an exposed bulb.
Color Temperature
Color temperature, measured in Kelvin (K), describes whether a light appears warm (yellowish) or cool (bluish-white).
2700K–3000K produces a warm, residential ambience that suits garden paths, front walkways, and most home landscaping.
4000K–5000K produces a cooler, brighter white light better suited to task lighting or commercial areas where visibility and consistency matter more than ambience — such as commercial walkways, parking area paths, or ADA compliant routes.
Metal Types and Finishes: What to Specify
Once spacing and lighting effect are settled, the remaining decisions are about the fixture itself — what it’s made of, how it produces light, and what style fits the property. These are construction choices, but they carry real cost and maintenance consequences over the life of the fixture.
Metal Types and Finishes
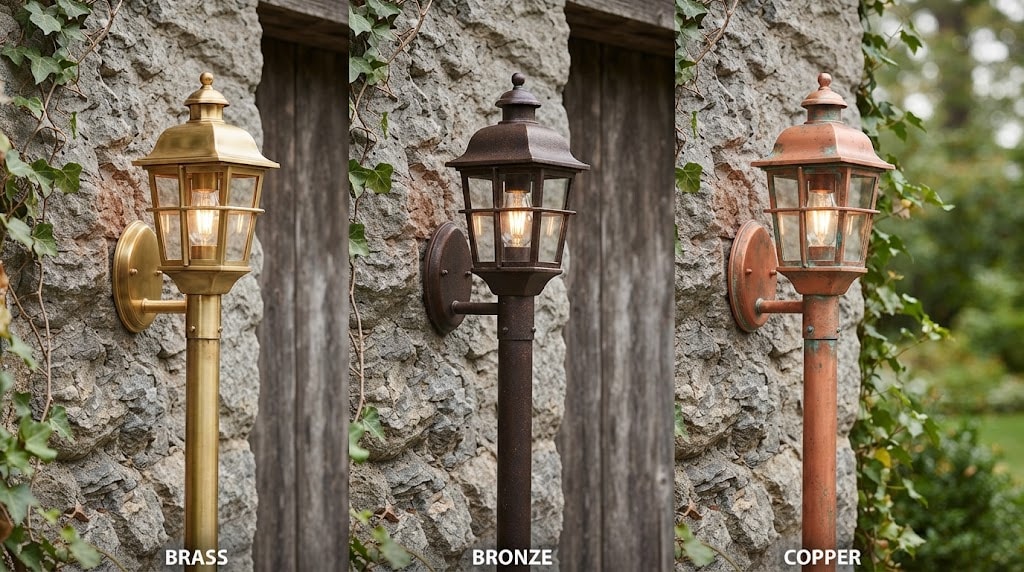
Brass, bronze, and copper are the three metals most commonly used in outdoor path light housings, and each ages differently outdoors.
Brass fixtures typically start with a bright, gold-toned finish and develop a darker patina over time as they oxidize, unless they’re lacquered to slow that process.
Bronze fixtures are often finished to already resemble an aged look from the start, so the visual change over time is less dramatic than with untreated brass.
Copper fixtures develop a distinctive green-blue patina over several years of outdoor exposure — a look some property owners specifically choose for, rather than try to prevent.
Durability and warranty terms often differ by finish, not just by base metal. A powder-coated or lacquered finish typically carries a shorter cosmetic warranty than the structural warranty on the fixture body, since coatings are more prone to wear in high-moisture or coastal environments than the underlying metal.
Lamp-Ready vs. Integrated LED
Path lights come in two light source formats.
Lamp-ready fixtures use a replaceable bulb — typically an LED lamp in a standard base — inside a fixture housing. If the light source fails, the bulb is swapped without replacing the entire fixture.
Integrated LED fixtures have the LED chip built directly into the fixture housing, with no replaceable bulb. The light source and the fixture are sold and serviced as one unit.
Lamp-ready fixtures generally suit long-term installations where the ability to replace a failed bulb without digging up or reordering the whole fixture matters — larger residential properties, and municipal or commercial jobs planned for a longer service life.
Integrated LED fixtures often suit lower-maintenance projects where a longer-rated LED lifespan reduces the likelihood of ever needing a mid-life replacement, and where a slimmer, more minimal housing design is part of the aesthetic goal.
Path Light Style Categories
Classic Path and Area Lights
Classic-style fixtures use simple geometric housings — cylinders, cones, or square caps — that suit a wide range of architecture without competing with it visually. These are a common default choice for residential properties without a strong existing design theme.
Decorative Path and Area Lights
Decorative fixtures incorporate more detailed housing shapes, textured caps, or ornamental bases, and typically pair well with traditional or historic-style homes and gardens where the fixture itself is part of the visual design.
Bollards
Bollards are taller, post-style fixtures that light a wider area at ground level rather than casting a narrow downward pool. They suit commercial walkways, parking area edges, and modern architecture where a stronger visual presence and wider light coverage are priorities.
Specialty Path and Area Lights
Specialty fixtures cover shapes and mounting styles outside the three categories above — including in-grade fixtures, hardscape-integrated lights, and custom architectural designs — typically selected to match a specific design requirement rather than a general property style.
Technical Specifications
Beyond spacing, style, and finish, a path light system needs to work safely as an electrical system. Here are the specs that matter most when comparing or ordering fixtures.
Voltage and transformer sizing. Most path light systems run on low-voltage 12V AC. Total connected fixture wattage should stay under the transformer’s rated capacity, with headroom for future additions. On longer wire runs, voltage drop can make end-of-run fixtures visibly dimmer — corrected with heavier-gauge wire, split circuits, or a more central transformer position.
Wire gauge. Heavier gauge wire (lower AWG) is needed for longer runs or higher total wattage to control voltage drop; lighter gauge works for short runs with few fixtures.
IP rating. Outdoor path lights typically need IP65 or higher for direct rain, sprinkler, or landscaping bed exposure. A lower IP rating is one of the most commonly overlooked specs during procurement, since fixtures can look identical regardless of actual sealing performance.
Compliance and certification. In the US, outdoor path light fixtures are commonly expected to carry UL or ETL wet-location listing, tested against UL 1838, the Standard for Low Voltage Landscape Lighting Systems. Local electrical code may also apply — low-voltage landscape lighting installation is typically addressed under Article 411 of the National Electrical Code (NFPA 70).
Warranty. LED, finish, and transformer warranties sometimes run on different timelines from the same manufacturer — worth checking at the component level before ordering.
Frequently Asked Questions
Should I choose solar or low-voltage wired path lights?
Low-voltage wired systems generally deliver more consistent output, since solar fixtures depend on daily sun exposure and lose brightness in winter or shaded locations. Wired systems also support higher lumen output for commercial applications. Solar fixtures work best for supplemental accent lighting or sites where running wire isn’t practical, rather than as the primary lighting for safety-critical walkways.
How many path lights can run on one transformer?
This comes down to total wattage rather than fixture count. A 300-watt transformer powering 3-watt LED fixtures could theoretically support 100 fixtures, but wire run length and voltage drop usually limit practical fixture count well before wattage capacity is reached. Multi-tap transformers with several output voltages help compensate for longer runs without needing a second transformer.
Do path lights need a timer or photocell?
Most transformers include a built-in photocell, timer, or both, so fixtures turn on at dusk and off at a set time or at dawn without manual switching. Smart transformers with app-based scheduling are increasingly common on commercial and higher-end residential installs, allowing schedule changes without physically resetting a timer dial.
How often do path lights need maintenance?
LED path lights need minimal upkeep, but lenses and housings should be wiped down once or twice a year to clear dirt, algae, or mineral buildup that reduces light output. Checking wire connections at transformer terminals annually helps catch corrosion before it causes flickering or dead fixtures, particularly in irrigated or coastal landscaping.
Conclusion
Selecting path and area lights requires several linked decisions. Match fixture height to path width, pick lumen output according to residential or commercial application, calculate fixture count for your actual layout, and verify technical specs including voltage, wire gauge, IP rating, and certification. These details ensure the lighting system stays safe and meets code requirements over time.
These choices cannot be evaluated separately. A fixture with correct lumen output will still fail prematurely if its IP rating is inadequate. Proper beam spread cannot compensate for poor fixture placement, which leaves dark gaps along walkways.
You should address sizing, spacing, and specifications together. Avoid selecting fixtures first and adjusting layout afterward. This approach prevents expensive rework once installation finishes.
Ready to Source Path and Area Lights That Match Your Spec?
Partner with us to get path and area lights built to the lumen output, IP rating, beam spread, and finish your project calls for — whether you need a standard product line or custom specifications to match a specific job. Contact our team with your outdoor space project details to get pricing, lead times, and a fixture recommendation suited to your layout.