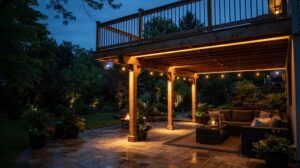
Ever powered up your underwater spotlights only to find the water looks flat, uneven, or barely lit? You are not alone. Most buyers pick a light based on price or looks, then wonder why the result falls short.
The problem usually comes down to three things: brightness, beam angle, and how well the fixture matches the water. We have seen the same fixtures shine in a clear pool yet vanish in a murky pond. Water clarity changes everything, so the right specs matter more than raw power.
That is exactly what this guide will help you get right. You will learn how to choose underwater spotlights by matching lumens, beam angle, IP ratings, and materials to your specific conditions. We will also walk through common use cases, safety certifications, energy options, and the mistakes buyers make most often.
Ready to light up your water the right way? Let’s dig in.
Why Underwater Spotlights?
Not all underwater lighting is the same. A flood-style light simply brightens the water, but an underwater spotlight does something more useful for commercial projects: it aims. That directional, focused beam is exactly what lets designers highlight a fountain jet, graze a pool wall, or spotlight a sculpture instead of washing everything in flat, even light.
For hotels, resorts, and landscape features, that control is the whole point. Spotlights create contrast, depth, and focal points, turning water into a design element rather than just a lit surface. The value shows up when the beam matches the feature you want to reveal.
Start with the setting, since each one uses that directional light differently.
Feature | How spotlights help | Why it matters for buyers |
Pools and spas | Graze walls and steps, define the swimming zone | Extend evening use and lift guest experience |
Fountains and water jets | Trace moving water and create motion effects | Deliver a nighttime showpiece |
Ponds and water features | Highlight focal points against dark water | Add depth and standout appeal to a property |
Best Underwater Spotlights for Pools and Spas
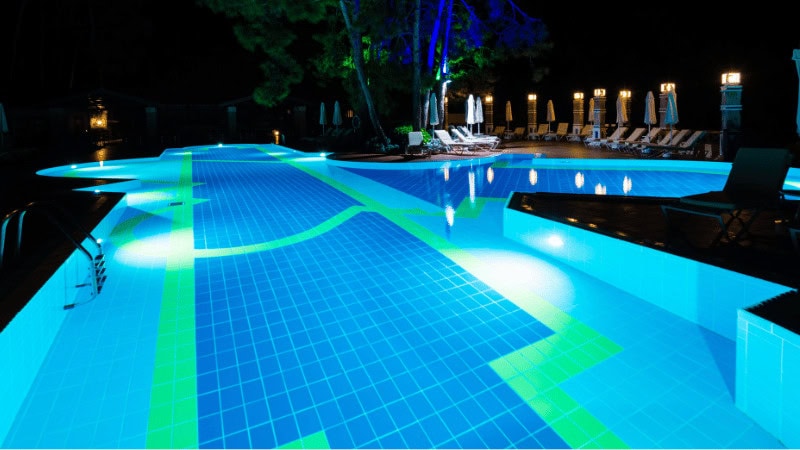
In pools and spas, the directional beam lets you shape the space instead of just lighting it. A spotlight can graze a basin wall, define steps and ledges for safety, or wash a single feature against dark water, effects a plain flood light can’t produce.
The payoff is both visual and commercial. A focused, well-aimed beam turns an invisible surface into a nighttime centerpiece, extends the hours guests enjoy the space, and gives a property real standout appeal in photos and reviews.
Lighting Fountains and Water Jets
Fountains are where spotlights do their most dramatic work. A concentrated beam can trace a rising water column, catch the movement of jets, or backlight spray to make the whole feature come alive after dark.
Because the light is aimed, designers can build layered, colored effects across multiple jets, the kind of coordinated display that makes a fountain a destination rather than a daytime-only feature.
Highlighting Ponds and Landscape Water Features
For ponds and decorative water features, the benefit is focus in the dark. Instead of a vague glow, a spotlight isolates a boulder, a plant grouping, or a cascade, creating a clear focal point that reads well from a distance.
For landscape and hospitality clients, that designed effect often justifies the fixture cost on its own. There’s a practical side too: fixtures built for full wet-location use lower the risk of early failure and fewer callbacks across a season. We cover how to check ratings, beam angles, and materials later in this guide.
Match Brightness and Beam Angle to Water Clarity
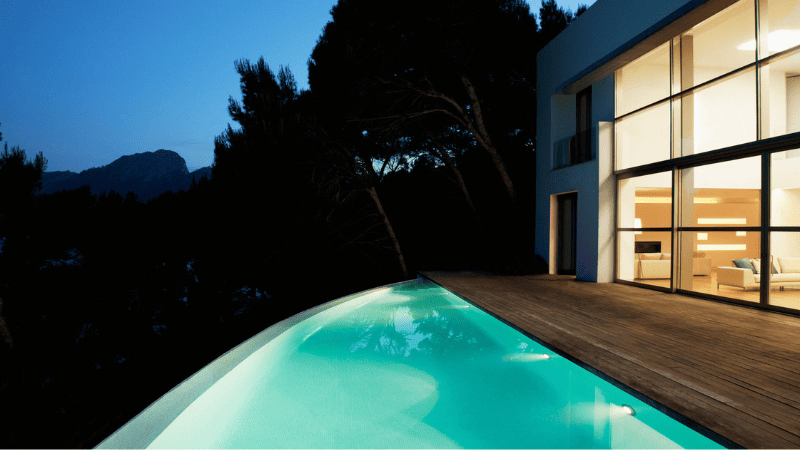
How Many Lumens Do You Need for Clear, Tinted, or Murky Water?
Clear water transmits light efficiently, so modest output creates a visible glow. Tinted or murky water scatters and absorbs light quickly, making the same fixture look far dimmer. Use this matrix as a starting point:
Water condition | Lumen strategy | Beam strategy |
Clear | Modest output (the 180-lumen class works for accent tasks) | Wide beams read well |
Tinted | Step up output; expect muted color | Medium beams |
Murky | Several fixtures over one big lamp | Narrow beams to cut haze |
Here’s how to read that table in practice.
In clear water, most of your light survives the trip, so you don’t need much. A fixture in the 100 to 300 lumen range is plenty for accent work, like a soft wash on a step or a low glow along a pool wall. When you want a real feature to stand out, step up to 600 lumens or more. A wide beam works well here because clear water won’t blur it, and the spread fills the space evenly.
Tinted water tells a different story. The tint scatters light and quietly drinks up color, so you lose both brightness and vividness. Plan on 600 to 1,200 lumens per fixture to keep the effect strong, and accept that reds and warm tones will read muted no matter what you do. A medium beam gives you a good balance, wide enough to cover the feature but tight enough to hold its punch.
Murky water is the hardest case, so it needs the most planning. A single big lamp just creates a bright, foggy blob near the source and fades fast. You’ll get a cleaner result with several fixtures at 1,000 lumens or more each, spread around the feature and aimed with narrow beams. The narrow angle cuts through the haze instead of lighting it up, so the beam reaches the target with something left to show.
The task matters too. A quiet garden pond needs far less output than a fountain you want guests to notice from across a terrace. When you’re unsure, size up. You can always aim a beam or dim it to soften glare, but you can’t add output to a fixture that’s already under the water.Narrow vs. Wide Beam Angle: What Works Best Underwater
Beam angle controls spread. A narrow beam concentrates output and carries farther, suiting deeper water or a submerged structure you want to highlight. A wide beam covers more area but loses intensity with distance, which suits ambient pond lighting. In murky water, a wide beam becomes a glowing wall of haze; a narrower beam cuts through.
Other Specs Effect on Water Appearance
Color Temperature
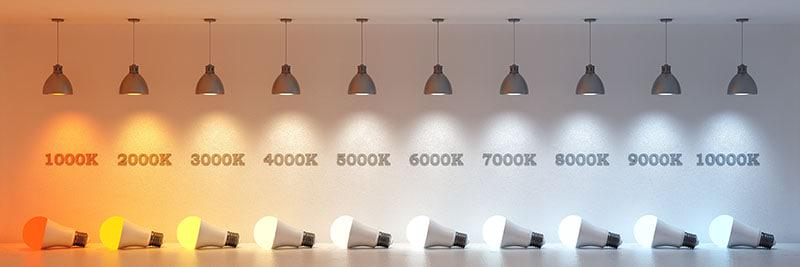
Color temperature sets the mood before anyone notices the fixture. Warm white around 2700K to 3000K feels inviting and relaxed, so it works well around pools and spas. Cool white near 5000K to 6500K sharpens clarity and brings out sparkle, which suits fountains and moving water. RGB fixtures go further and let you shift color to match an event or a season.
Water clarity bends color perception too. A vivid hue that pops in clear water can turn flat and gray once the water tints, because water filters out part of the spectrum as light travels through it. Marine researchers have documented how the full range of surface light fades and shifts underwater, and the same effect quietly reshapes every color you send into a pool or pond.
Water Depth and Light Attenuation
Depth eats brightness fast. Water absorbs and scatters light far quicker than air, so a beam loses useful intensity within the first few feet. Even a strong LED only reaches so far before it fades, and that limit catches a lot of buyers by surprise.
You have two good ways to fight it. Mount the light closer to the feature you want to show, usually within one to two feet of the target. Or spread the load across several lower-output units instead of leaning on one large lamp. For anything installed deep, pair it with a narrow, concentrating beam so the light arrives with something left to give.
Angle and Mounting Position
Placement decides whether a fixture looks polished or harsh. Aim the beam away from where people usually stand or sit, so they see the glow rather than the raw source. In a pool, tuck lights below steps, ledges, or a feature wall and let the light climb upward. In a pond, set the fixture beneath whatever you want to silhouette, like a boulder or a spray of plants.
Mounting hardware carries more weight than most buyers expect. Spike and stand mounts let you re-aim a fixture as the season changes or the planting fills in. Fixed brackets suit permanent installs where the target never moves. Pick the mount for how often you plan to adjust, not just for the first day of the project.
Safety and Build Specs Worth Checking Before You Buy
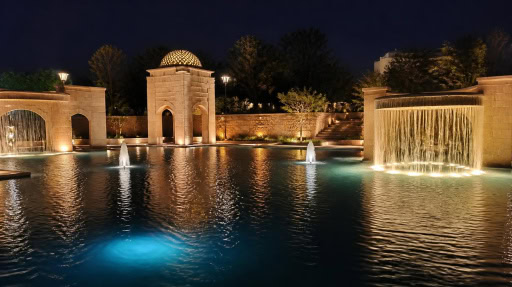
Why IP68 and IP67 Waterproof Ratings Matter
An IP rating tells you how well a housing keeps water out. It follows a global standard called IEC 60529, so the numbers mean the same thing across brands. IP67 handles brief immersion. IP68 handles constant submersion, and that’s what underwater spotlights built into a pool wall or a pond actually deal with. So match the rating to where the fixture sits. A light near a fountain’s edge faces less water than one mounted deep in a pool.
Corrosion-Resistant Materials: 316L Stainless Steel and Marine-Grade Bronze
The housing matters just as much as the LED inside it. A shiny finish might look nice, but chlorinated pool water eats through weaker metals over time. For full-time submersion, pick 316L stainless steel or marine-grade bronze. These metals hold up to constant moisture. When underwater LED lights stay submerged all year, corrosion resistance beats a pretty finish every time.
UL, CE, and ETL Certifications for Wet-Location Use
A UL, CE, or ETL mark means the light passed real safety testing. Always check that the listing covers wet or submersible use, not just dry indoor use. That approval confirms the electrical parts inside your underwater LED lights are sealed for water. It matters at home, and it matters even more for a business with guests near the water.
GFCI Protection and Marine-Grade Wiring: Safety Beyond the Housing
Even a well-sealed light needs a second layer of protection. Put the circuit on a ground-fault interrupter, or GFCI. If a fault happens, it cuts the power right away. You should also check the voltage range. Underwater spotlights that accept wide input, like AC85–265V, fit more easily into existing outdoor wiring. Use marine-grade cable, and let a qualified electrician handle the connections. The housing alone won’t keep the system safe.
12V vs 120V Underwater Spotlights: Energy Efficiency and Installation Cost
Low-voltage 12V systems lower the shock risk near water. They also cost less to install for small ponds and fountains, though they do need a transformer. Line-voltage 120V systems work better for large, permanent setups. But they call for stricter wiring and a professional install. Either way, GFCI protection is a must for any underwater spotlights.
LED Lifespan and Saltwater Maintenance: Extending Spotlight Service Life
A little upkeep goes a long way. Rinse your underwater LED lights with fresh water when you can reach them. Wipe algae and mineral buildup off the lenses so the light doesn’t slowly dim. Each season, check the gaskets and cable entries for wear. Catching a bad seal early costs far less than replacing a flooded fixture.
Common Mistakes to Avoid When Buying Underwater Spotlights
Judging brightness on its own. An LED light that dazzles in a clear pool can look weak in a tea-colored pond. That’s because suspended particles absorb the beam before it travels far. So think about the water, not just the lumens. In stained water, several spread-out fixtures usually read better than one overpowered lamp.
Ignoring the rating until after installation. A damp-location fixture will fail once it sits fully submerged. By then the fix costs real money. Compare the IP rating and the housing material first, before anything else.
Forgetting the long-term costs. An efficient underwater LED saves money over years of evening use. But that only holds true if its voltage and wiring match your site. So plan for transformers and cabling from the start. A little budgeting up front saves you a headache later.
FAQs
How far apart should I space underwater spotlights along a pool wall or pond edge?
A common starting point is one fixture every 4 to 6 feet for even accent lighting. Tighten that spacing when you want a continuous glow, and widen it when you’re picking out separate focal points. Beam angle changes the math too. Wide beams overlap sooner, so they let you space fixtures farther apart than narrow ones.
Do underwater spotlights work with pool automation systems like smart controllers or timers?
Many do, but compatibility depends on the fixture. Low-voltage LED units often tie into transformers that accept timers or app-based controllers. RGB and color-changing models sometimes use their own protocol, so check whether it matches your controller before you buy. If a smart setup matters to you, confirm the control method as a spec, not an assumption.
Can one transformer power multiple underwater spotlights?
Yes, as long as the transformer’s wattage covers the total draw of every fixture on the line, with some headroom left over. Running a transformer at its limit shortens its life and can dim the lights at the far end of a long cable. Add up the wattage of all fixtures, then size the transformer above that number. For long runs, ask your electrician about voltage drop.
Will underwater spotlights raise my pool’s algae growth?
Light can encourage algae, but the effect is usually small compared to sunlight, water balance, and filtration. To keep it in check, run the lights on a timer instead of leaving them on all night. Warm-white and cool-white beams both work fine here. Good water chemistry does far more to control algae than the color of your lighting.
Conclusion: Choose Underwater Spotlights That Fit Your Water
Great underwater lighting starts with matching the fixture to the water, not chasing the brightest lamp on the shelf. Clear, tinted, and murky water each ask for a different mix of lumens and beam angle. Get that balance right, and a plain pool or pond turns into the highlight of your outdoor space.
The build specs carry just as much weight. Pick the correct IP rating, choose corrosion-resistant materials, and confirm the safety certifications before you buy. Those choices decide whether your underwater LED lights run for years or fail after one season. A well-planned system saves you money, cuts callbacks, and keeps the water looking its best long after installation.
So think through your conditions first. Measure your water clarity, map your feature, and match every spec to the result you want. That upfront work is what separates lighting that dazzles from lighting that disappoints.
Ready to Light Up Your Outdoor Space With Underwater LED Lights?
At RCLight, we help you match the right underwater LED spotlights to your water, your feature, and the effect you want. From choosing the right specs to getting the fixtures to site, our technical team stays involved so the result holds up long after install.
Tell us about your project. Request a quote compare fixtures side by side, and turn your outdoor waterspace into a nighttime showpiece.