Running a fast-casual restaurant means balancing competing priorities. You need a warm, welcoming atmosphere for diners, sufficient brightness for efficient front-of-house service, and energy-efficient lighting to preserve operating margins. Thus, it’s important to find the right lighting plan.
We have seen this play out across dozens of quick-service and fast-casual fitouts, from burger joints to salad bars, where a simple lighting change lifted both the mood and the numbers. In this guide, we will walk you through the foundational rules, how to pick the right fixtures, smart layouts for every zone, time-based controls, multi-unit standardization, and the mistakes that cost operators the most.
Let’s start with why fast-casual restaurants need their own lighting playbook.
Why Fast-Casual Lighting Needs Targeted Design
Fast-casual is its own category, and your lighting has to reflect that. It is not a fast-food counter, and it is not fine dining either. Copying either one usually backfires.
The Middle-Ground Dilemma Between Fast Food and Fine Dining
Fast-food chains lean on bright, cool, high-output lighting. The goal there is speed and quick turnover, so the space feels energetic but rarely cozy.
Fine dining goes the opposite way, with dim, warm, dramatic lighting built for lingering over a two-hour meal.
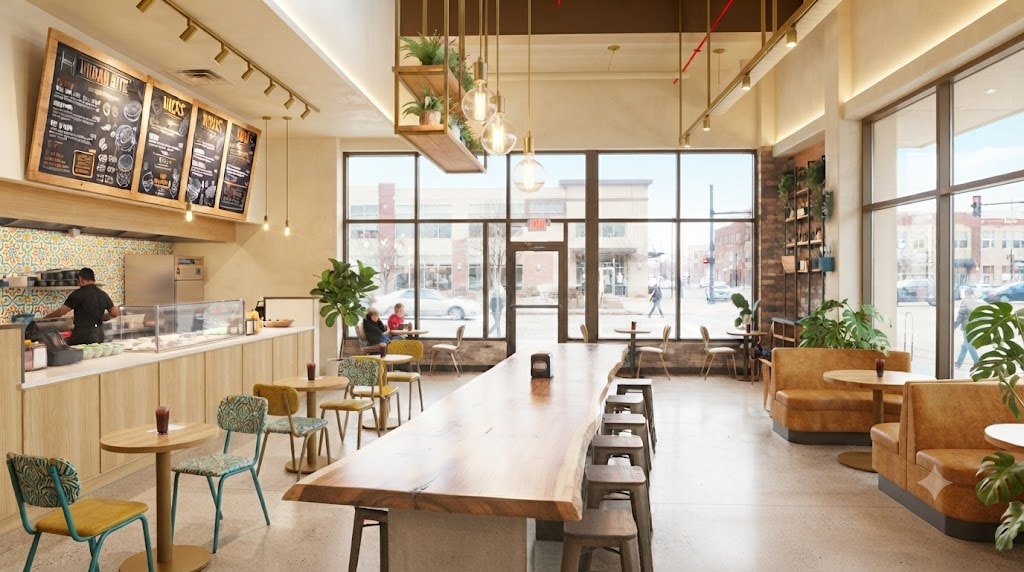
Fast-casual lives in between. Your guests want to sit and relax a little, take a nice photo of their bowl, and still feel the energy of a busy, efficient space. If you go too bright, the room feels clinical. If you go too dim, orders slow down and staff struggle at the counter.
The fix is a layered approach that gives you warmth where guests sit and clarity where work happens.
How Lighting Shapes Turnover, Customer Mood and Operating Expenses
Lighting quietly drives three things you care about most: how long guests stay, how they feel, and what you spend.
Turnover is where a lot of operators miss an easy win. Brighter, cooler light naturally signals energy and movement, which nudges guests to eat and go, so you turn tables faster during a packed lunch. Softer, warmer light does the opposite and invites people to linger, which suits a slow evening when you want higher spend per table.
The smart move is to control brightness by time of day rather than picking one setting and living with it. Push brightness up during peak rush to keep tables moving, then dial it down after the rush to protect the atmosphere.
Mood follows the same lever. Warm, well-placed light makes food look fresh and makes guests feel relaxed, which supports a better experience and repeat visits.
Operating expenses are the third piece. According to the U.S. Department of Energy, LED lighting uses far less energy and lasts far longer than traditional options, so the right fixtures cut both your power bill and your maintenance costs.
Get this balance right and you speed up tables when you need volume, keep a comfortable feel when you want spend, and hold your energy costs down the whole time.
That balance starts with two foundational rules, which we will cover next.
Foundational Rules: Balance Atmosphere & Energy Efficiency
Restaurant lighting always strikes a tricky tradeoff: vivid, inviting ambiance often comes with high power draw, while low-energy lights usually wash out food colors and create bland spaces. These core guidelines let venue owners and lighting designers deliver appealing dining environments without bloated monthly electricity bills, complying with IES and US commercial energy codes.
CCT & CRI Control
Color temperature and CRI directly shape how dishes appear to guests, and poorly calibrated specs force you to run overbright, power-hungry fixtures to compensate. High-CRI low-wattage LEDs tuned to food-friendly CCT ranges render fresh produce, meats and baked goods naturally. This targeted setup eliminates unnecessary extra lighting load, balancing mouthwatering food visuals and reduced energy use.
Tiered Light Output
Uniform full-bright ceiling lighting drains power and creates flat, lifeless interiors. Split illumination into dim base ambient lighting for overall atmosphere and low-watt focused spotlights for food counters and dining zones. Adjust each layer’s brightness to only meet its functional need, instead of running all fixtures at full power. This tiered power arrangement creates rich light-shadow depth for a premium vibe while slashing total lighting energy use, striking an ideal balance between immersive atmosphere and energy efficiency.
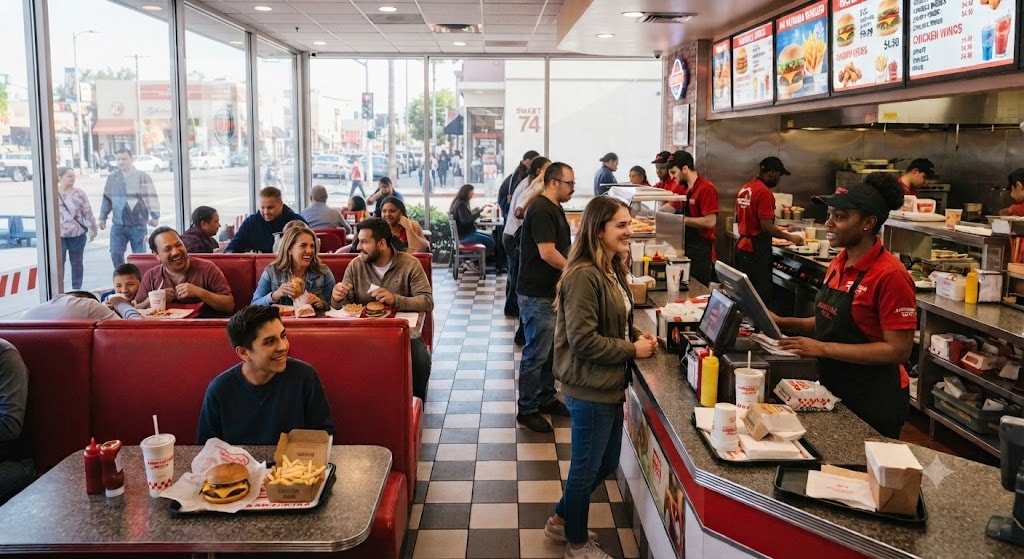
How to Select Suitable Lighting Fixtures
With your color and layering rules set, fixture selection is where you protect both your budget and your uptime.
Commercial LED Benefits
Skip residential-grade fixtures. They are not built for the long hours and constant switching a restaurant demands.
Commercial LED fixtures run cooler, last longer, and hold their color output over time. According to ENERGY STAR, quality LED products use around 90 percent less energy than incandescent lighting and last many times longer, which means fewer ladder trips and fewer surprise replacements during service. For a busy fast-casual venue, that lower maintenance load is often worth far more than the small savings you get from cheaper fixtures up front.
Key Fixture Specs: Lumens, Dimming Drivers and Beam Angles
Three specs shape how your lighting actually performs.
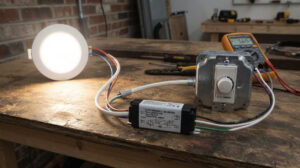
Lumens measure total light output, so match them to each zone rather than lighting everything at the same level. Beam angle controls how wide or narrow the light spreads, which matters for pendants over tables versus wide ambient coverage. Dimming drivers let you dial brightness up or down for different service periods, and this is the spec that trips up more operators than any other.
We see it happen often. To save a few dollars per fixture, operators buy non-dimmable drivers early on, and it feels like a smart cut at the time. Then the team wants softer light for dinner and brighter light for the lunch rush, and there is no way to adjust it, so the only real fix is replacing the entire fixture set at roughly double the original cost.
If you think you might ever want time-based brightness, and most fast-casual venues do, specify dimmable drivers from day one. It is a small premium that saves a full retrofit later.
IP Rating Requirements
IP rating tells you how well a fixture resists dust and moisture. The higher the second number, the better the water protection.
Indoor dining fixtures can run standard ratings, but kitchens, patios, and storefronts need more. For covered patios, use IP54 or higher, and for any fixture exposed to direct rain, go with IP65 or higher.
This one shows up in our failure reports more than almost anything else. When operators install indoor-rated fixtures outdoors to save money, those units often start flickering and burning out in batches within 6 to 12 months in coastal or high-rain regions, right when the warranty gets awkward. Matching the IP rating to the real conditions of each zone stays one of the cheapest ways to avoid a costly mid-season fixture failure.
Once your fixtures are chosen, the next step is putting them in the right places, starting with your indoor dining and bar zones.
Lighting Layout for Indoor Dining and Bar Zones
Getting the layout right here does more for repeat business than almost any other lighting choice.
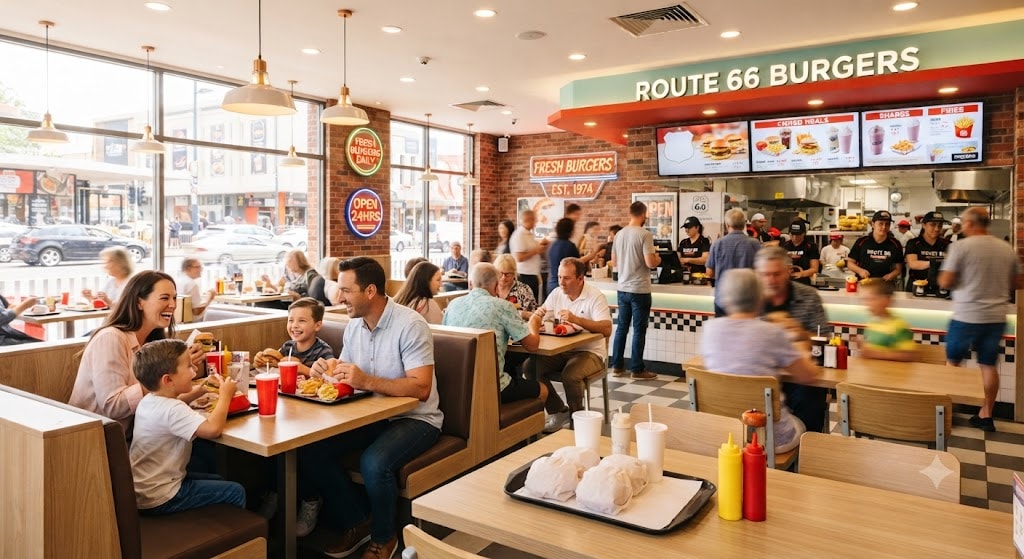
Ambient Lighting Setup for Uniform Base Brightness
Ambient lighting is your foundation. It sets the overall brightness that every other layer builds on.
The goal is even coverage with no dark corners and no harsh hot spots. Recessed downlights or surface-mounted panels spaced consistently across the ceiling usually do the job in a fast-casual room. Keep the spacing tight enough that light overlaps at the floor, so guests never walk from a bright patch into a shadow.
A common miss we see is under-lighting the perimeter, where operators light the center of the room well but leave the edges dim, so booths and wall seating feel like an afterthought. Push your ambient layout all the way to the walls. Those edge tables are often the ones guests prefer, and they should feel just as welcoming as the center of the room.
Pendant and Accent Light Placement
Pendants and accent fixtures are where your dining room gets personality. They also do real work, drawing the eye and defining zones.
Hang pendants over bar tops, communal tables, and hero seating at a height that lights the table without blocking sightlines. A good rule is to keep the bottom of the pendant roughly 30 to 36 inches above the tabletop, so guests get a warm pool of light and can still see across the table.
Use accent lighting to highlight the things you want guests to notice, like a menu board, a feature wall, or a signature counter.
Aim your accents at surfaces and features, not at guest eye level, because a poorly angled accent light shining into someone’s eyes can quietly ruin an otherwise great meal. Small aiming tweaks during install make a big difference, so take the time to walk the room and sit in the seats before you sign off.
Ideal Brightness Ratio Between Ambient and Focal Lighting
Contrast is what makes a room feel designed instead of flat. That contrast comes from the ratio between your ambient base and your focal points.
A practical lighting target is a 3-to-1 brightness ratio. Feature dining zones should be roughly three times brighter than surrounding ambient light. This elevates key spots without plunging the rest of the space into shadow.
A 10-to-1 ratio creates stark, stage-like contrast with jarring bright and dark zones. A flat 1-to-1 ratio blurs all visual layers, leaving no focal points to draw guests’ attention.
Here is a simple field check we use before opening. Stand at the entrance and scan the room, and if your eye naturally lands on a feature or a hero table first, your ratio is working, but if the whole room reads as one even wash, your focal lighting needs a boost. You want guests’ eyes drawn to the best parts of your space the moment they walk in.
With the dining room dialed in, the back of house is where lighting shifts from mood to pure function.
Functional Lighting Layout for Kitchen and Pickup Counters
Behind the counter, lighting is a safety and speed issue. Your team needs to see clearly to work fast and avoid mistakes, and the fixtures need to survive a punishing environment.
Recommended Footcandle Levels for Food Preparation Areas
Footcandles measure how much light actually lands on a work surface. This is the number that tells you if your team can really see what they are doing.
Prep and cooking areas need far more light than the dining room. A common target for food prep zones is around 50 to 75 footcandles at the work surface, which keeps cutting, portioning, and plating accurate. For general kitchen circulation you can run lower, but any spot where knives, hot surfaces, or detailed prep happen should stay on the higher end. Check your local health and safety codes too, since some jurisdictions set minimum lighting levels for food handling areas.
We often see kitchens that look bright from the doorway but fall short right at the cutting board, because overhead fixtures sit too far back and the staff’s own body casts a shadow on the work. Position task fixtures directly over the work surface, or add under-shelf lighting, so the light lands where hands and knives actually move.
Anti-Glare and Durable Fixture Selection for Workstations
Kitchen fixtures take abuse. Heat, steam, grease, and constant cleaning wear down anything not built for it.
Choose sealed, easy-to-clean fixtures with a high IP rating so grease and moisture stay out. Look for diffused or lensed fixtures to cut glare, because bare bright LEDs reflecting off stainless steel and wet surfaces cause eye strain over a long shift. Durability matters as much as brightness here, so avoid decorative or residential-grade units that will yellow, flicker, or fail under kitchen conditions.
A recurring problem in our service reports is grease buildup on open fixtures, which slowly dims output and becomes a cleaning headache, so sealed units with smooth housings pay for themselves in both light quality and labor. Spend a little more on the right kitchen-rated fixtures up front and you avoid replacements, downtime, and staff complaints later.
Once the back of house is safe and bright, your outdoor spaces are the next chance to add seats and hours.
Layout Strategy for Outdoor Patio and Storefront Lighting
Outdoor lighting does double duty. It extends your usable dining hours and works as a signboard that pulls people in from the street.
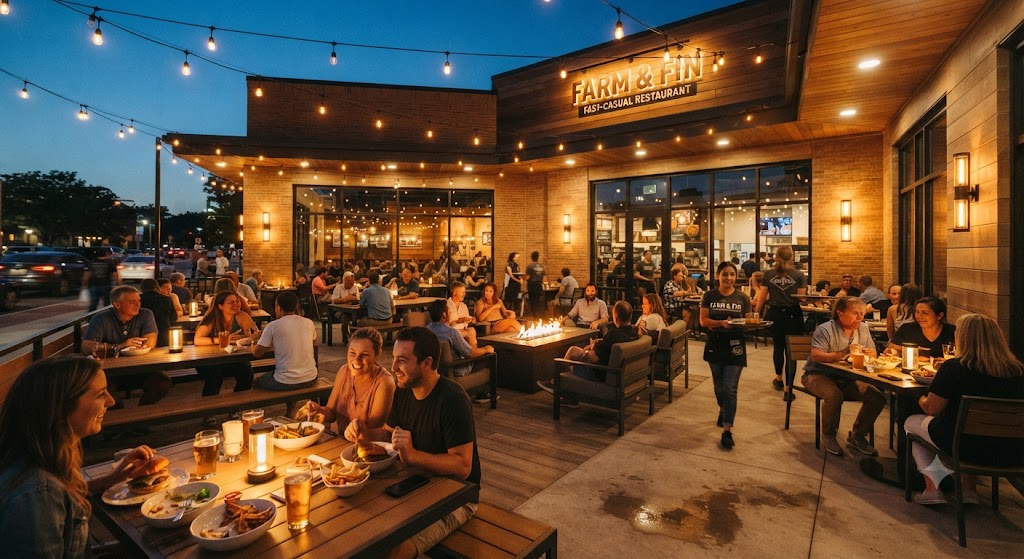
Warm Lighting Settings to Extend Outdoor Dining Hours
The right outdoor light turns a patio into prime seating well after sunset. Warmth is the key.
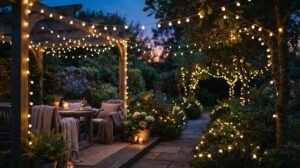
Stick with warm color temperatures outdoors, around 2200K to 2700K, to create a relaxed, inviting glow that encourages guests to linger. String lights, wall sconces, and low-level path lighting layer together to make a patio feel cozy rather than floodlit. Keep brightness moderate, since guests come outside partly for a softer, more relaxed atmosphere than the indoor counter.
In our experience, patios lit with cool white flood fixtures empty out fast after dark, because the space feels more like a parking lot than a place to enjoy a second drink. Warm, layered lighting is what keeps those outdoor seats full and turning over on a good evening.
Safety and Compliance Rules for Exterior Commercial Lighting
Outdoor lighting carries obligations that indoor lighting does not. Get these right to protect guests and stay on the right side of local rules.
Fixtures exposed to weather need proper IP ratings, IP65 or higher for anything facing direct rain, plus outdoor-rated wiring and drivers. Entrances, steps, and walkways need enough light to prevent trips and falls, which is both a safety and a liability issue. Many areas also enforce dark-sky or light-trespass rules, and the International Dark-Sky Association offers practical guidance on shielding fixtures and limiting glare that spills onto neighbors or the street.
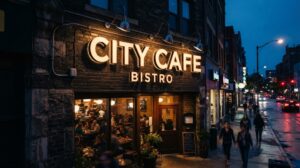
One compliance gap we see often is bright, unshielded storefront lighting that spills onto the sidewalk or neighboring properties, which draws complaints and sometimes fines in stricter municipalities. Use shielded, downward-facing fixtures so your light lands where you want it, on your patio and signage, not in a neighbor’s window.
With your indoor, kitchen, and outdoor zones mapped out, the final piece is controlling all of them across a full day of service.
Zoned Lighting Controls for Different Service Times
One brightness level cannot serve breakfast, lunch, and dinner well. Zoned controls let one space work for every daypart.
Build Adjustable Lighting Scenes for Breakfast, Lunch and Dinner
Group your fixtures into zones, then save a preset scene for each service period. Bright and energizing for morning and lunch, warmer and dimmer for evening.
Once scenes are programmed, staff switch with one tap instead of adjusting fixtures by hand. A common mistake we see is installing dimmable fixtures but never setting scenes, so the room stays at one level all day and the feature goes unused.
Document Lighting Parameters for Long-Term Maintenance
Write down each scene’s settings, the fixture models, and the driver specs, then keep it with your maintenance records.
When a fixture fails months later, this record lets you match the replacement exactly. Without it, we often see mismatched color temperatures creeping into a room, one warm patch next to a cool one, because nobody knew the original spec.
Standardized Lighting Packages for Multi-Unit Operators
For chains, consistency and cost control matter as much as looks. A standard package delivers both.
Create Unified Fixture Specifications for Chain Rollouts
Lock in one spec sheet: fixture models, CCT, lumen levels, and layout rules that every new location follows. This keeps brand look consistent and speeds up each build.
Standard specs also simplify ordering and stocking spares. A frequent issue we see is each location buying its own fixtures, which leaves a chain with mismatched rooms and a messy parts inventory.
Calculate Energy Savings and Return on Investment
Run a simple payback math: compare current energy use against LED plus controls, then divide the upgrade cost by annual savings. The ENERGY STAR resources can help benchmark commercial energy use.
Roll that per-store number across every unit and the ROI case gets strong fast, which is exactly what a multi-unit budget needs to see.
Frequently Asked Questions
Are LED fixtures worth the higher upfront cost?
Yes, for almost every operator. LEDs cut energy and maintenance costs, last far longer than older fixtures, and give you dimming and control options. The higher purchase price usually pays back within a couple of years through lower bills and fewer replacements.
Why does my food look worse under new lighting even though the room is brighter?
Brightness is not the issue, color rendering usually is. If your fixtures have a low CRI, dishes look flat and gray no matter how bright the room. Swapping to high-CRI fixtures over food areas fixes this without changing the light level.
How often do kitchen fixtures actually need attention?
More than most operators expect. Grease and steam slowly coat open fixtures and dim their output, so sealed, easy-to-clean units in the kitchen hold their brightness longer and cut down on cleaning labor over time.
Can I get custom lighting made for an unusual space or layout?
Yes. When standard fixtures don’t fit your ceiling height, hood layout, or brand look, custom lighting lets you match exact sizes, finishes, and mounting needs. It’s especially useful for signature dining areas, tricky kitchen spots, or keeping a consistent look across locations with different building conditions. Share your layout and requirements early, and a manufacturer can build fixtures to spec instead of forcing an off-the-shelf part to work.
Partner With RC Lighting For Fast-Casual Restaurant Lighting Plan
Good lighting is one of the highest-return upgrades a fast-casual operator can make. It shapes how guests feel, helps your kitchen team work safely, and quietly trims your energy bill month after month.
Start with one zone. Walk your dining room, kitchen, and patio, then note where the light falls short or feels wrong. From there, build a simple plan around the layers, footcandle targets, and control scenes covered in this guide. If you run multiple locations, lock in a standard spec early so every new store opens looking the same.
As a manufacturer focused on commercial LED lighting for the food service industry, we help operators spec fixtures, plan layouts, and standardize packages for single sites and chain rollouts. Our team can match the right lumens, CCT, and IP ratings to each zone in your space.
Ready to plan your lighting the right way? Request a free lighting consultation or download our commercial fixture catalog to compare specs and start your project with confidence.