Here are our 12 best outdoor lighting tips to help you get some quality lighting for your home.
LAYOUT AND DESIGN TIPS
Outdoor lighting is a significant challenge, whether working on a small-to-medium house or a large commercial building. The best way to start your journey is by planning the layout. Determine the area you want to cover, the types of lights you prefer, and the limitations of your outdoor space.
#1 Plan out your Lighting Area
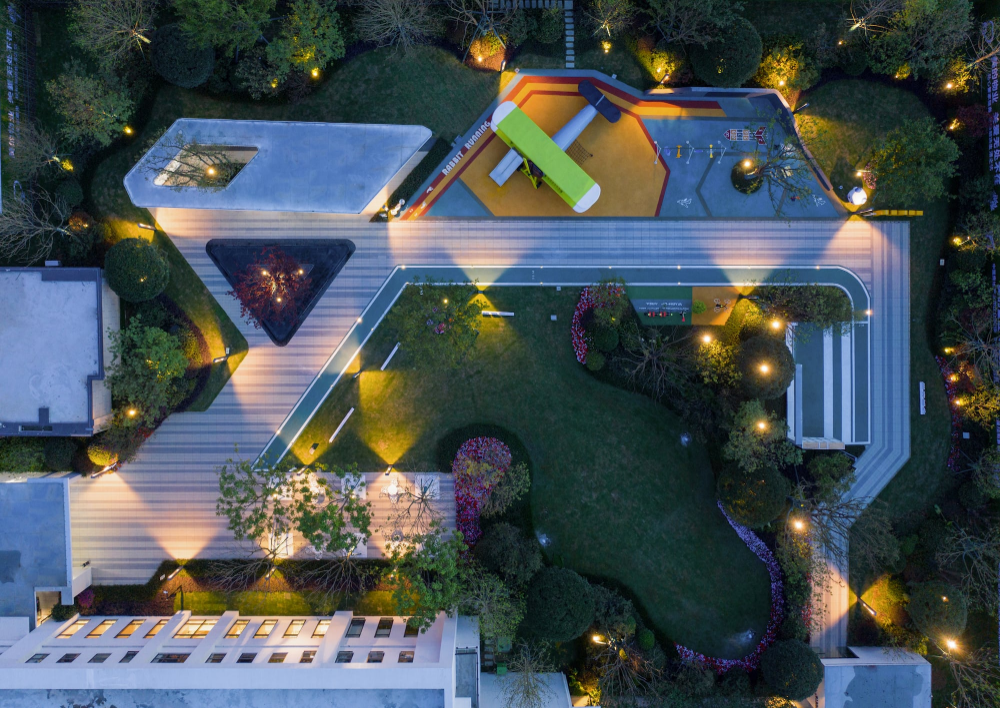
The first steps to getting quality outdoor lighting are planning and preparation. Make a rough lighting plan for your outdoor space and highlight the areas you want to illuminate. Doing so will help you imagine the final results.
Ensure everything is covered in the plan, including house walls, garden, fountain, ponds, pathways, steps, and yard area. You can also break the outdoor lighting plan into sub-sections for easier management. Make a garden and a deck lighting plan, then work on one section at a time.
#2 Facade Lighting vs. Pathway Lighting
Position Your Lights Against the Building Walls
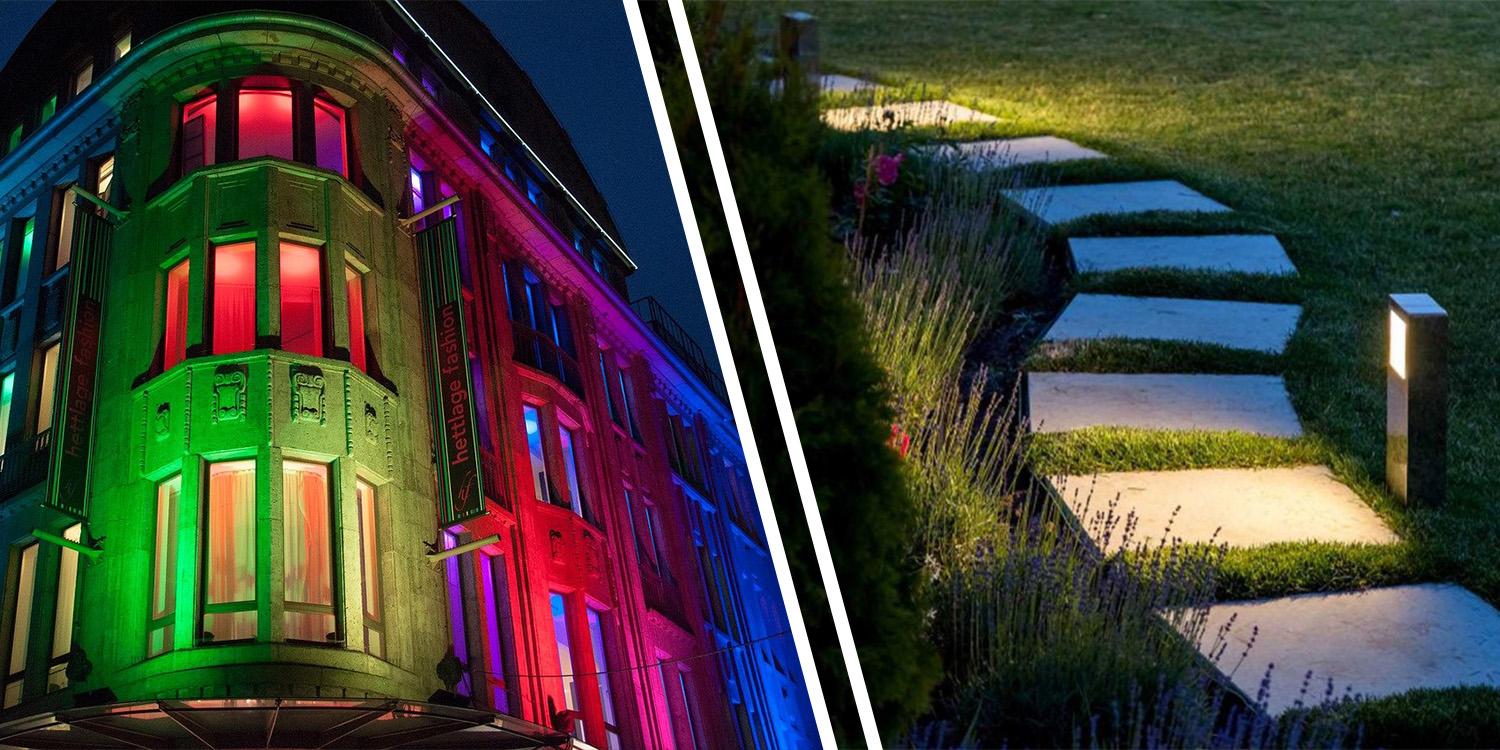
As no two buildings are alike, the design and architecture will determine your outdoor lighting. But as a general rule of thumb, there is a simple way to illuminate houses. Walls make up most of a building, so it is a good place to start. Place light fixtures along the outer walls of the building. Commercial buildings refer to this type of lighting as facade lighting.
Your facade lights should cover the exterior of the building, but there is no need to highlight any undesired areas. Additionally, you should avoid placing a light fixture below or above a window. If wall lights bleed into the building through a window, it will disrupt your indoor lighting steps.
Make Sure All Paths are Well Lit
Path lighting is a staple of outdoor lighting. There are three major pathways you need to consider, driveway, garden pathway, and house pathway. Path lights help to illuminate your walking and driving areas with minimal lighting.
Path lighting is not meant to be bold and prominent. Path lights are a practical solution to nighttime safety. You can use multiple small path lights close to one another to add visual intrigue to your pathways. For larger pathways, it is better to spread out larger wide beam lights for efficient coverage.
Bollard lights, post lights, spike lights, and even in-ground lights can be used for path lighting.
#3 Tree Lighting vs. Water Lighting
Trees are Excellent Hubs for Outdoor Lights
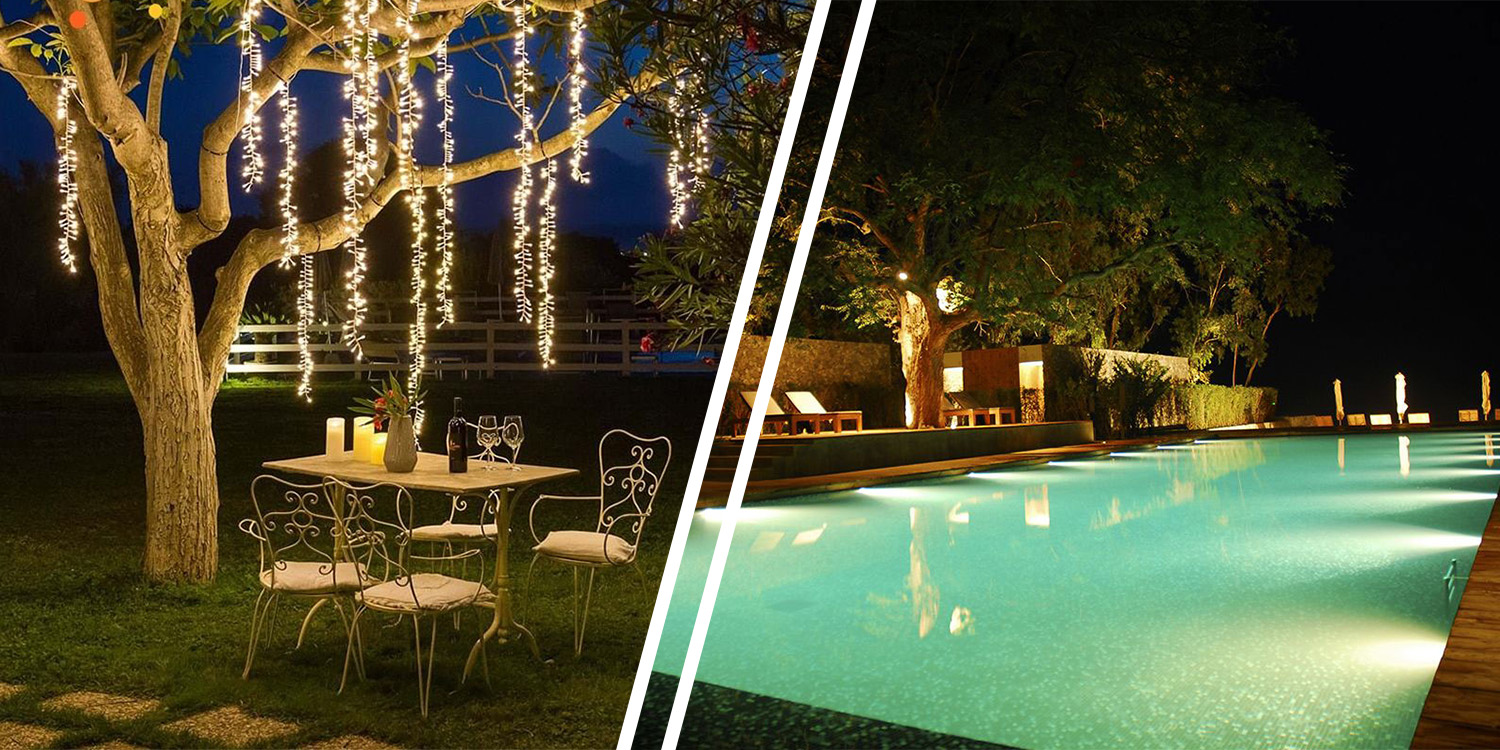
Trees are a part of your landscape lighting area. Instead of avoiding them and working around them, you should use them as a hub for your outdoor light fixtures. Trees can help hide ugly wires while simultaneously providing anchor points.
Trees are great for hanging lights off of them. You can fix your string lights between two adjacent trees or decorate each tree individually. Fairly lights are a common and easy way to light up your trees.
Water Lighting Techniques
Water is a unique material as it reflects and refracts lights unlike any other. There are two approaches to water lighting underwater and above-water lighting. Underwater lighting is best suited for pools and fountains. You can even use addressable RBG lights for underwater lighting. A light fixture placed inside the water will create an illusion that makes it seem like the water itself is glowing.
Above-water lighting is similar to path lighting and is best suited for narrow water streams and ponds. Water is a major part of landscape lighting but is unfortunately often neglected.
#4 Outdoor Light Colors and Total Estimation
Warm Color Lights are Ideal for Outdoor Sitting Areas
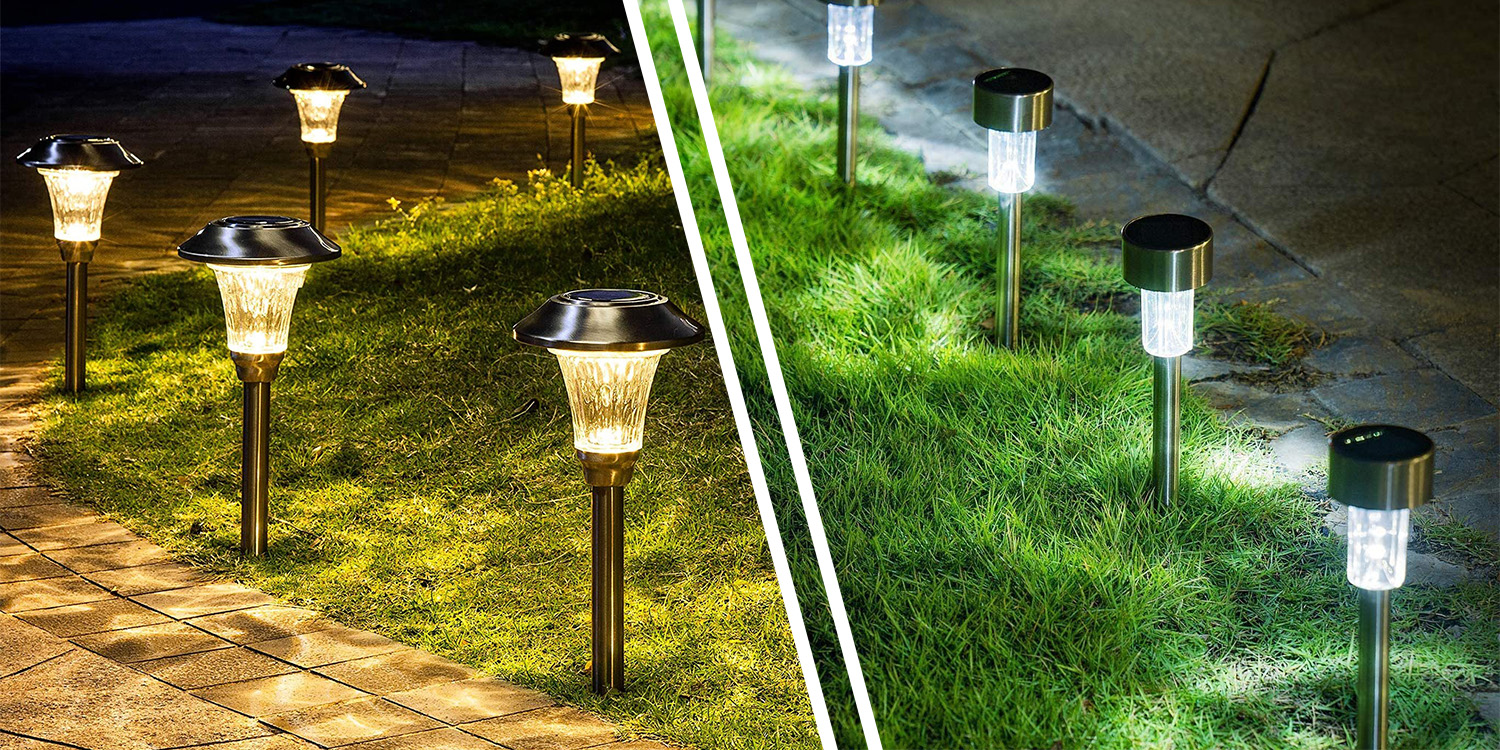
Lights come in two colors, warm yellows, and cool blues. Cool LED bulbs are best suited for indoor office lighting, where it brings maximum illumination to simulate sunlight. Warm LED bulbs have a soft, cozy feeling, like a bonfire, making them ideal for creating relaxing environments. Outdoor house lighting should pretty much always use warmer light bulbs.
Cooler lights are not recommended for house lighting, but they have an important place in outdoor lighting. Cool light bulbs are best suited to street lamps, outdoor bollard lights, and security lights.
Estimate the Total Number of Light Fixtures
Once your outdoor lighting plan is finalized, you can calculate the number of light fixtures. You can estimate the number of required outdoor lights by calculating the amount of path, garden, garage, and wall lights, then adding them together.
Whatever number you come up with, add 10% to it. People will often underestimate the number of lighting fixtures required for landscape lighting and end up ordering more fixtures. If this is too challenging for you, consult your electrician or contractor accordingly.
LIGHT FIXTURE TIPS
Light fixtures are a complicated bunch. Technically you can install any light fixtures in any environment, but the overall lighting quality will take a hit. To make the best of your outdoor setup, ensure that you use the correct lights for the concerned areas.
#5 Recessed Ceiling Lights vs. Recessed Step Lights
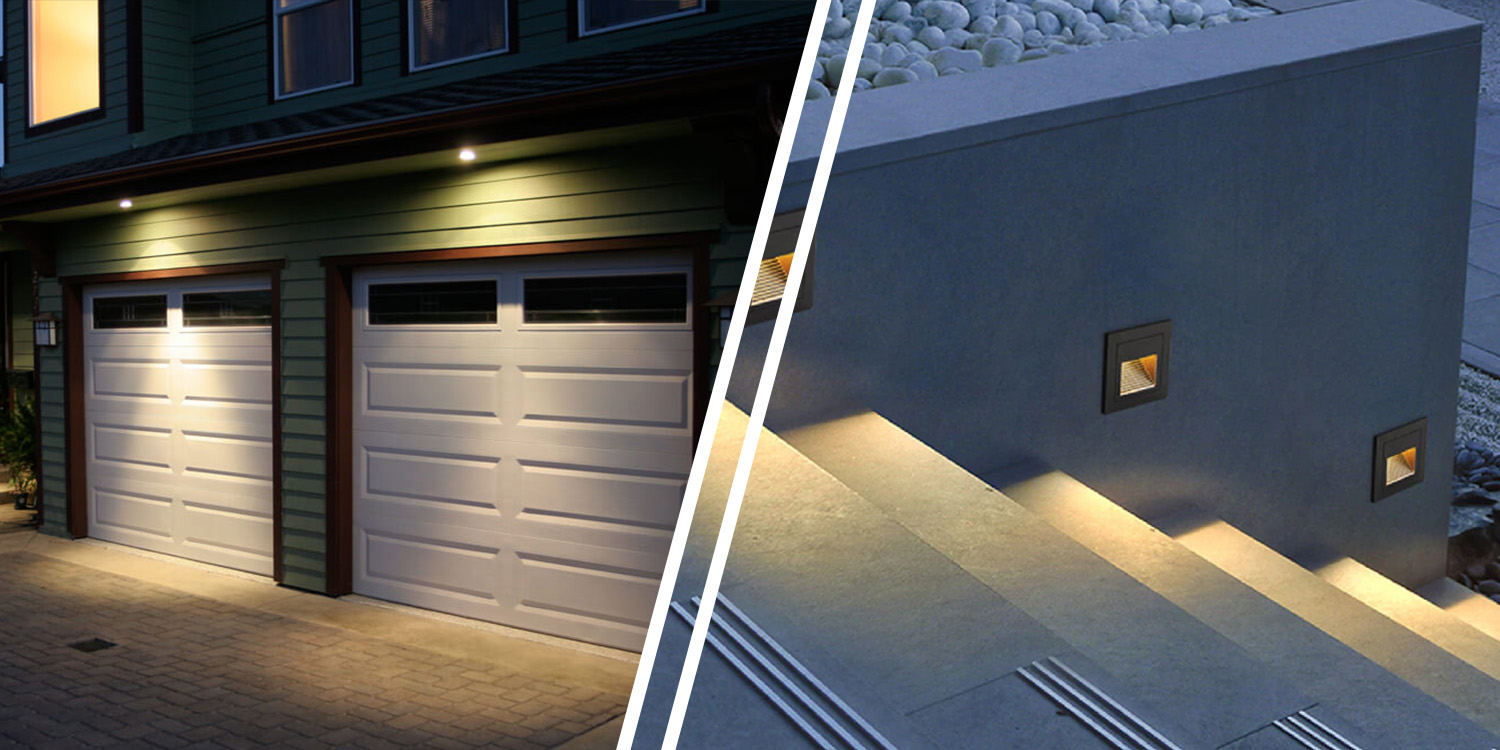
Use Recessed Lights for Garage Lighting
Garage lighting has the simplest solution, recessed lighting. Recessed lights are ideal for garages, as they don’t take up much space and they don’t interfere with your garage door.
A garage door is essentially a break in your wall lighting setup as you cannot put wall lights on the door or below it. Recessed lights act as replacement accent lights and illuminate the garage front while maintaining a low profile.
Use Step Lights to Illuminate Staircases
Stairs are another section of your landscape lighting setup that gets overlooked. Similar to path lighting, poorly light staircases are a safety hazard. There are a few approaches you can take with staircase lighting.
- Recessed Wall Lighting
If you have a wall connected to one side of your steps, you can put recessed lights into the wall. Each light would be parallel to a stair step and project light across your footsteps. This method is less viable for wide steps unless you have walls flanking both sides of your staircase.
- Recessed Step Lighting
This is by far the most elegant solution to staircase lighting. Here the LEDs are embedded into the front face of each step and directly illuminate the stairs. It is less intrusive than any other method and is generally the best looking.
- Small Post Lighting
Similar to a path lighting fixture, these small post lamps are installed on the edge of the staircase and gently light each step.
#6 Spike Lights vs. String Lights vs. Bollard Lights
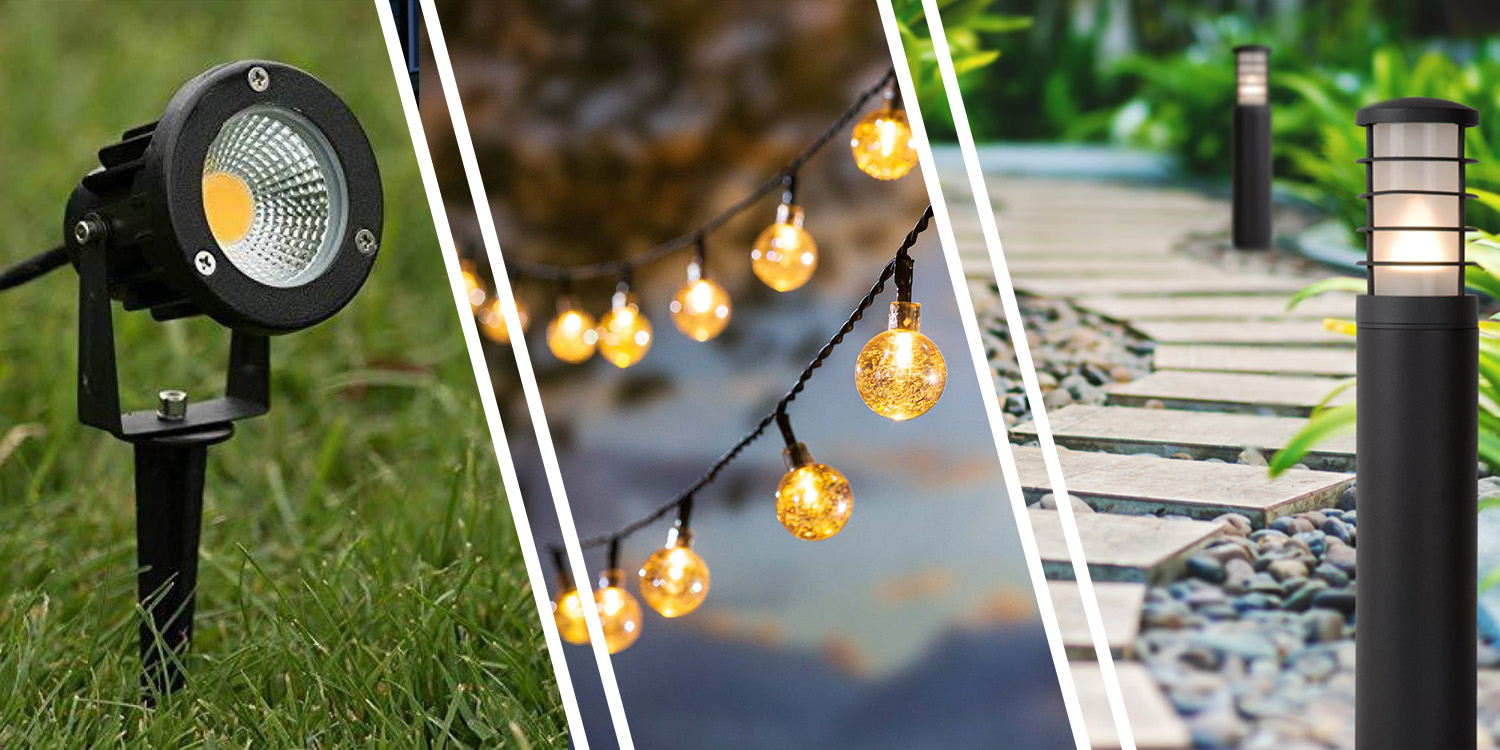
Spike Lighting is for Garden Beds
Spike lighting fixtures are regular spot and flood lights mounted on a sturdy metal spike for easy installation into soft ground. They are easy to adjust even after installation. Just pull the spike out and push them into a different part of the garden.
Spike lights are designed for gardens as they can only be installed on relatively soft ground. They do not require any additional mounting hardware or anchor points. The spikes are long enough to keep the light fixtures secure in place.
String Lights are for Outdoor Dining Areas
String Lights are small fixtures that are mounted to a long wire. String lights are preferred for their relatively easy installation in outdoor lighting.
Most landscape lighting fixtures require the installation of some form of mount or base to anchor the fixtures. String lights can simply be tied around two trees with zero hassle. Let the string lights hang above your dining area for soft, warm illumination over your tables.
You can use small fairy lights if you already have enough light through other fixtures. Or you can use bigger orb lights for maximum ambient illumination.
Bollard Lights are Best Suited for Pathway Lighting
Bollard lights are strong, sturdy fixtures with a LED element at the top. These fixtures are often preferred for their safety and protection features. You will see them deployed as street lights along walkways.
For residential buildings, bollards are best suited to driveways and garden pathways. They ensure that in the case of an accident, the car stays within the driveway. For gardens, it is a simple method to keep people from stepping on your flower beds,
INSTALLATION TIPS
Installation is actually the easiest step of this whole endeavor. You have done most of the hard work. Now it’s time to put it into action. This is where everything comes together into one cohesive style.
#7 Consider Different Lighting Styles
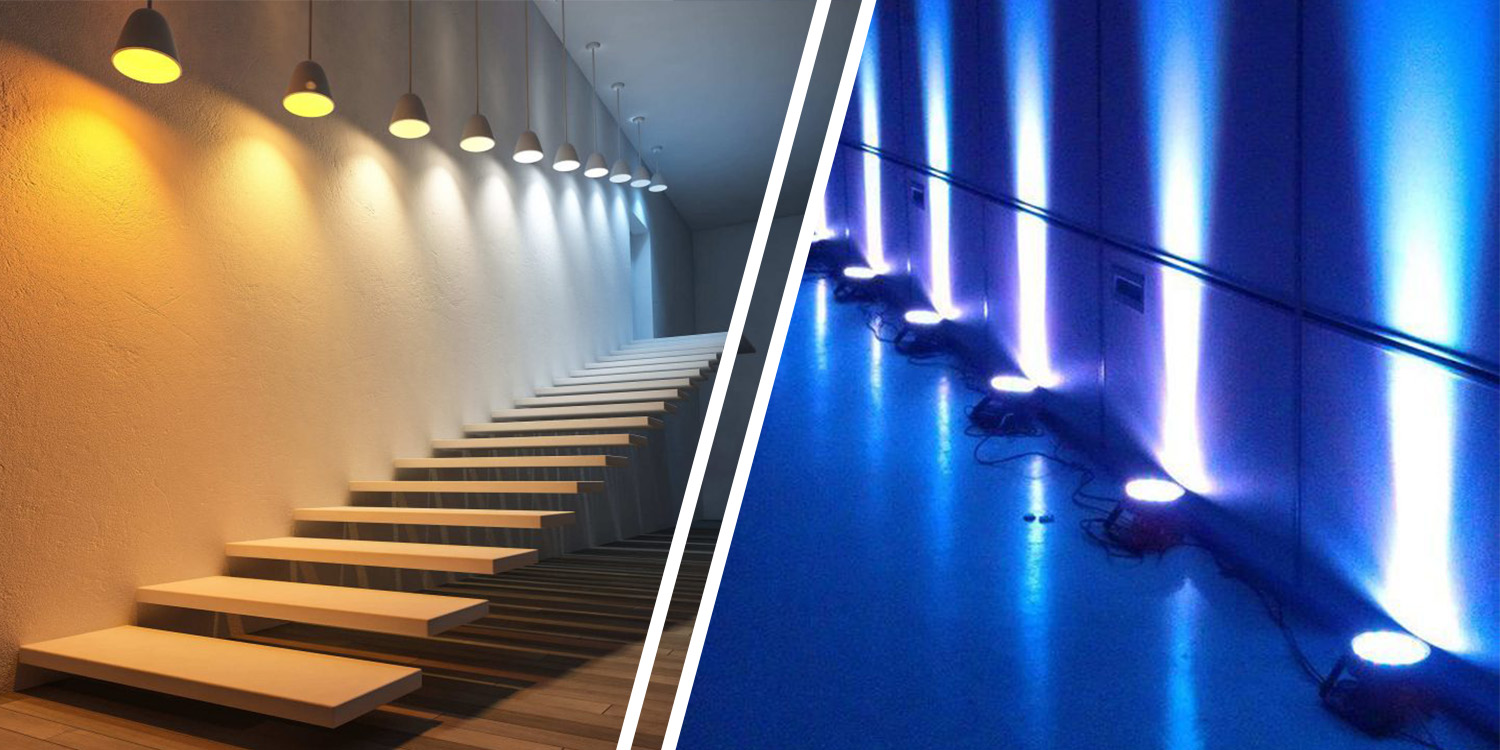
Outdoor lighting is a complex group of illumination styles and fixtures. Each section of your landscape has a particular preferred lighting style. Knowing the difference between each lighting style will help you get one step close to a quality lighting setup.
Up-Lighting
This style involves placing the fixtures at ground level and pointing them upwards.
- Highlighting – Placing fixtures around a tree, sculpture, or fountain base to highlight its best features.
- Wall-washing – Placing fixtures at the base of a wall and illuminating the wall from beneath.
- Shadow Casting – Place a fixture in front of a landscape element like bushes to cast unique shadows on the wall behind it.
- Silhouette – Place a fixture behind a landscape element like a tree to create a sharp silhouette.
Down-Lighting
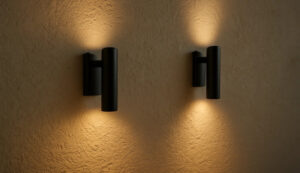
This style involves placing the fixtures above ground level, typically high on walls, and pointing them downwards.
- Accent Lighting – Illuminating objects from above to highlight desired areas.
- Moonlighting – Placing narrow beam fixtures high above objects like trees to create the illusion of direct moonlight.
#8 Beam Angles and Light Spacing
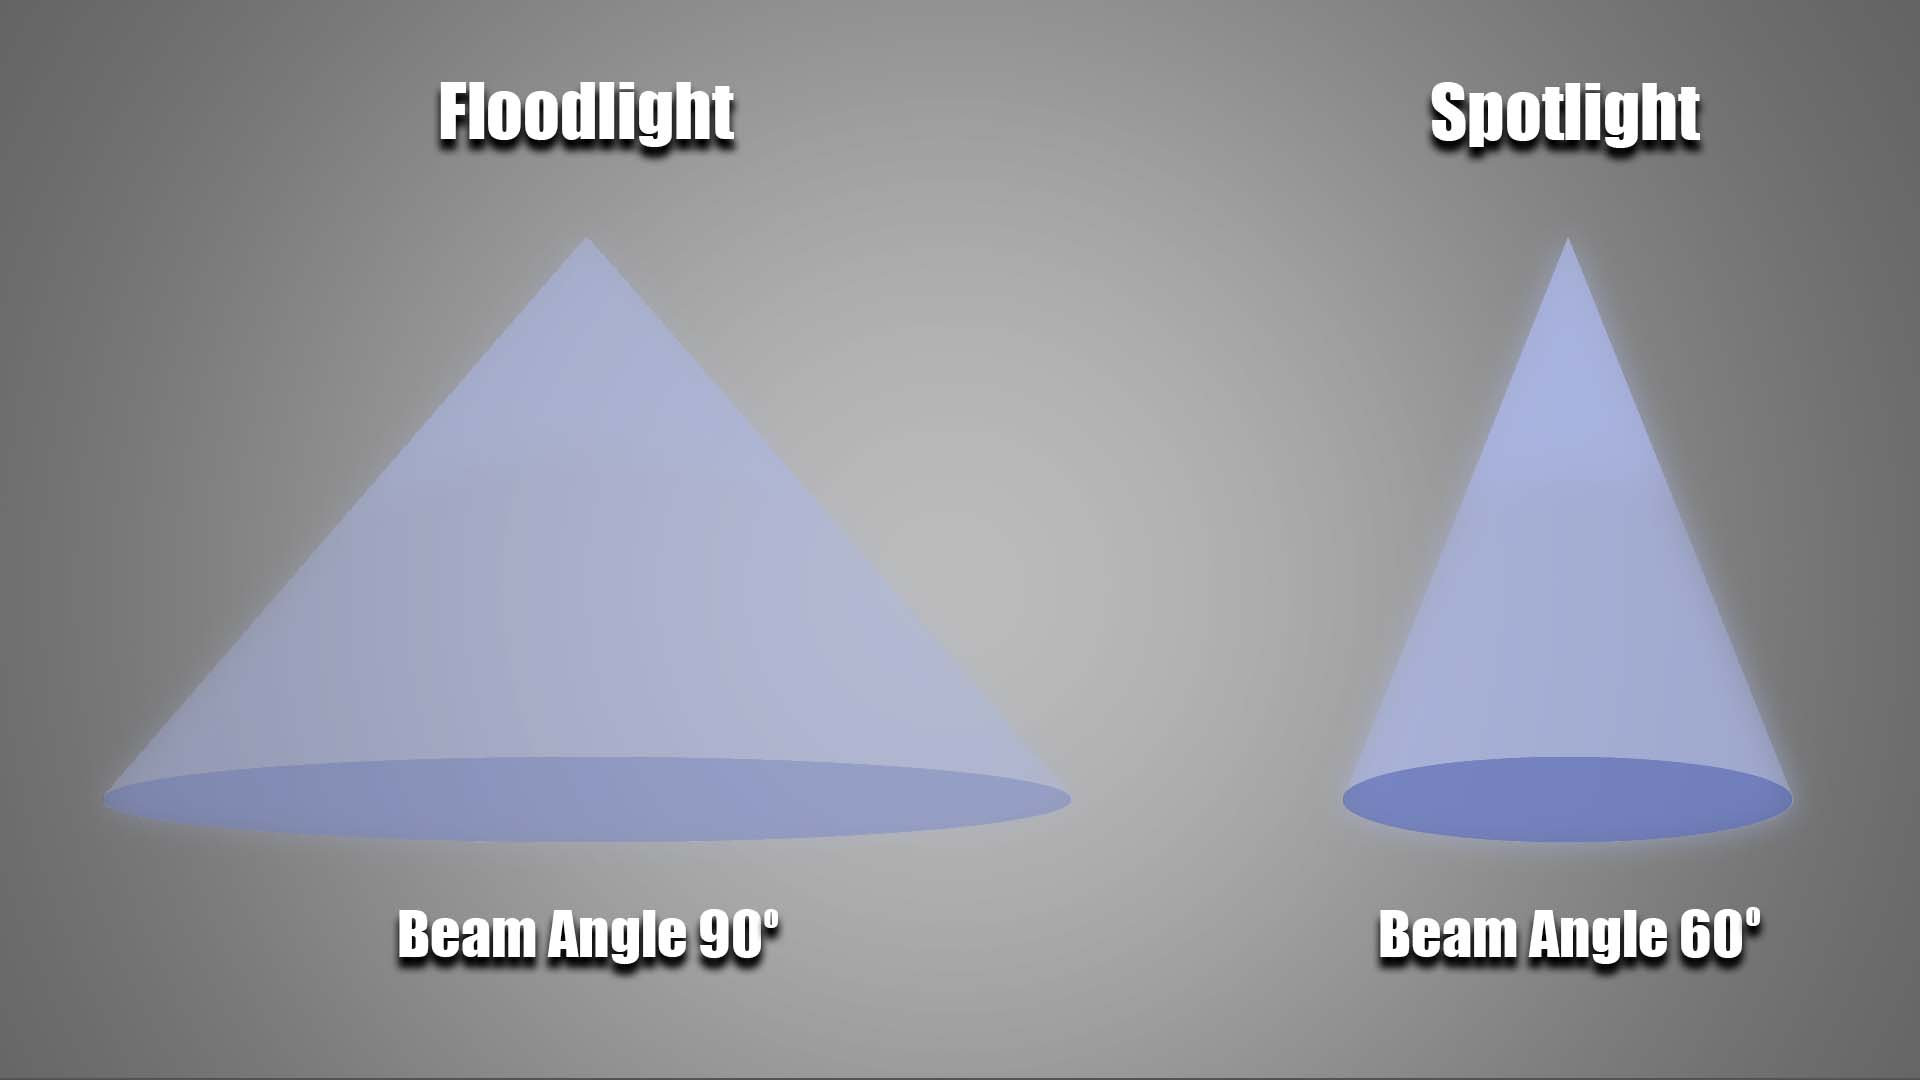
Beam Angles
Light fixtures come in various beam angles. Wide beam angles will have less concentrated light but have a larger coverage area. In comparison, narrow beam angles will have a highly concentrated light beam but have a very small coverage area.
Narrow beam angles often result in inconsistent lighting. The center of the light beam will have a bright spot, while the surround will have deep dark corners. During night time a bright beam angle will be harsh on your eyes, and it is best to avoid such hassle.
Wide beam angles have a soft, gentle light that is pleasing to the eyes. Fixtures with a wide beam angle will also provide some consistent ambient landscape lighting.
Proper Light Spacing
Narrow-angled fixtures need to be placed closer to each other to maintain an even coverage of the area, while wide-angled fixtures can be placed further apart. You should position lights in such a way as to maximize the light coverage without dipping into light pollution territory. You can keep your landscape well-lit and energy-efficient by adhering to proper light spacing.
Exterior lighting solutions don’t need to be overly bright, and it will create a negative effect on human health to be exposed to bright lights during nighttime. Indirect lighting from a well-spaced light source is generally more than enough illumination for any house or building.
#9 Light Bulbs and Wiring
Always Use LED Lights
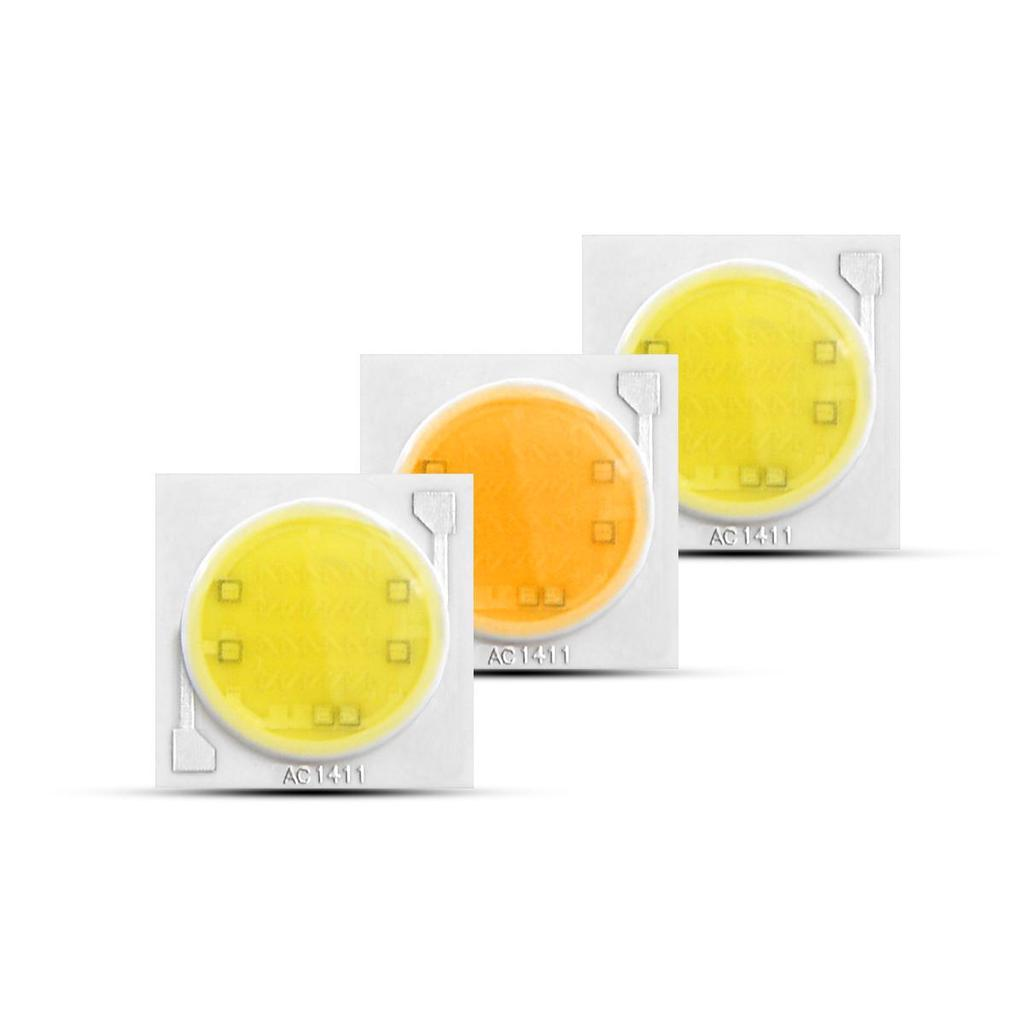
Though incandescent bulbs have their charm and appeal, they are not suited for outdoor use. These bulbs consume a lot of power and produce quite a lot of heat. Additionally, they are often susceptible to damage and have poor weather protection.
An LED bulb, by comparison, consumes less energy, has better impact protection and even has waterproofing capabilities. The cherry on top of the LED sundae is its excellent range of form factors. An LED unit occupies less space and can fit into any sized fixture.
Properly Secure the Underground Wiring
Exterior lighting has one major challenge, wire management. The larger your outdoor lighting area is the more cables, wires, and switches you will need. Your landscape lights will often be yards away from your deck lighting fixtures, and wires need to run across the entire outdoor space.
The solution to this problem is underground wiring. Bury your cables deep into the ground to protect both the wires and yourself. A standard depth for wiring in any outdoor space is 12 in., but you can get away with 6 in. if you have properly shielded cables.
BUYING TIPS
Buying fixtures is easy, but buying from a trustworthy company is a challenge. Products can often have defects, be different from their catalog picture, or end up with cheaper components. Before you contact a light manufacturing company, consider a few important factors.
#10 Always Check the Product Warranty and Safety Certification

Product Warranty
Your outdoor lighting fixtures will eventually burn out after a few years. Such is the nature of light bulbs. However, not all lights are created equal, and some are significantly higher in quality than others.
An easy way to determine the quality of a light fixture is by checking its warranty. Manufacturers that ship quality products will often have a 3–5-year warranty on all their products. In contrast to shady manufacturers that only offer 6-12 months of warranty.
Safety Certifications
When dealing with electrical components and products, safety should always be a major concern. Many countries around the world require electrical products to conform to health and safety standards.
ISO standards are common in North America, but Europe uses CE and RoHS standards to determine product safety. Make sure your supplier has the proper certification and that each product is within regulation.
If a product is not properly certified, it could be dangerous to use, and some countries won’t even allow you to import products without the necessary certifications.
#11 Request Samples before Placing the Full Order
A lot can go wrong trying to order lighting products from manufacturers and suppliers. Shipping delays, quality control issues, poor packaging before shipping, etc., are all major issues with importing electronics. Samples are a simple and easy way to determine product quality and shipping logistics.
Any manufacturer worth their salt will offer samples before actual order placement. Keep in mind that these samples are generally more expensive because of economies of scale. But at little upfront cost is worth it for the assurance of quality.
Some suppliers will offer free samples, but only after you place your order. This is a deceptive practice to get you to pay first without checking the product. You should always ask for samples before fully committing to a large order of outdoor lighting fixtures.
#12 Ensure Lighting Fixtures are IP Certified
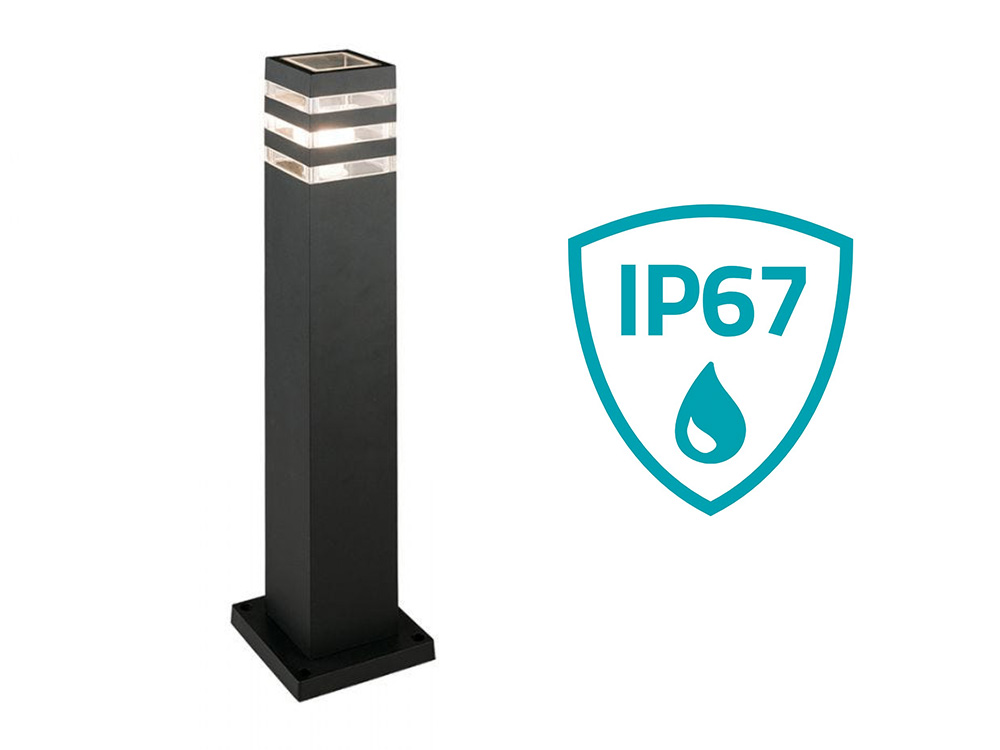
Exterior lights have to abide by a different set of quality standards as compared to interior lights. These outdoor lighting fixtures have to withstand high winds, rain, dust, and debris. The IP rating system verifies electronic devices for water and dust resistance. So, if you are looking for quality outdoor lighting gear, ensure that it is IP certified.
IP stands for “Ingress Protection” and is followed by two numbers. The first one tells you the dust resistance, and the second one tells you the water resistance of the product. Higher numbers reflect the harshness of the testing environment. The highest rating for electronic devices is IP68. However, you should be fine with IP65-rated fixtures.
Conclusion
We hope these outdoor lighting tips have given you the confidence to start illuminating your spaces. Outdoor lighting may seem difficult, but once you know the basics, it’s easy as pie. Proper planning cannot be understated as it is the foundation of your lighting setup. Try to divide your work into smaller chunks for easier management.
Once you have outlined the outdoor area, carefully select the lights best suited to your needs. But remember, before you start ordering your lights, you have one more hurdle to cross, finding a reputable supplier. Always ask questions about products and always request a sample.
Why Choose RC Lighting for Your Outdoor Lighting Solutions?
The driving force behind RC Lighting is our emphasis on perfection, quality, and sustainability. We offer several top-notch Indoor Lighting and Outdoor Lighting solutions. Our MOQs are low and our delivery times are fast.
If you are interested in OEM Lighting Services, look no further. We are proud of our strong customization capabilities, which you can check by requesting a sample first.
So don’t wait and light up your house with RC Lighting. Contact us Now!
