
Choosing between an integrated LED fixture and an LED-ready fixture affects more than upfront cost. It determines how you’ll maintain the fixture, whether you can retrofit it later, and how much labor you’ll spend over its lifetime.
As lighting technology and pricing shift in 2026, this guide breaks down the structural differences, lifecycle costs, and compatibility issues that buyers often overlook until after installation.
We’ll walk through what each fixture type is, when each makes sense, and what to check before you commit to bulk procurement.
What Are Integrated LED Fixtures?
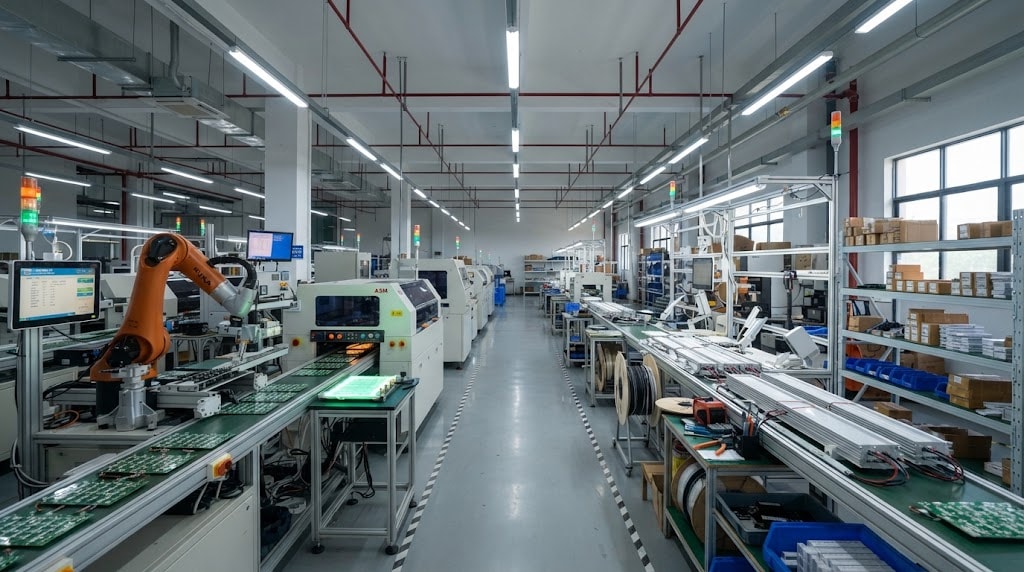
An integrated LED fixture combines the LED chips, driver, and housing into a single sealed unit. You cannot separate the light source from the fixture body. Integrated led light designs eliminate the need for replaceable light bulbs entirely.
The Structure of Integrated Systems
The LED chips are mounted directly onto the fixture’s circuit board during manufacturing. The driver converts AC power to the DC voltage LEDs need and sits inside the same housing.
This means the fixture ships as one complete assembly. There is no tube to insert, no ballast to bypass, and no separate light engine to swap out later.
The Permanent Nature of the Design
Because everything is built into one unit, integrated fixtures do not accept component swaps. When the LED chips degrade past useful brightness, you replace the entire fixture instead of just a bulb or tube.
This permanence simplifies installation but limits long-term flexibility. It is worth understanding before committing to large-volume orders, since replacement means replacing the whole unit, not an inexpensive set of light bulbs.
What Are LED-Ready Fixtures?
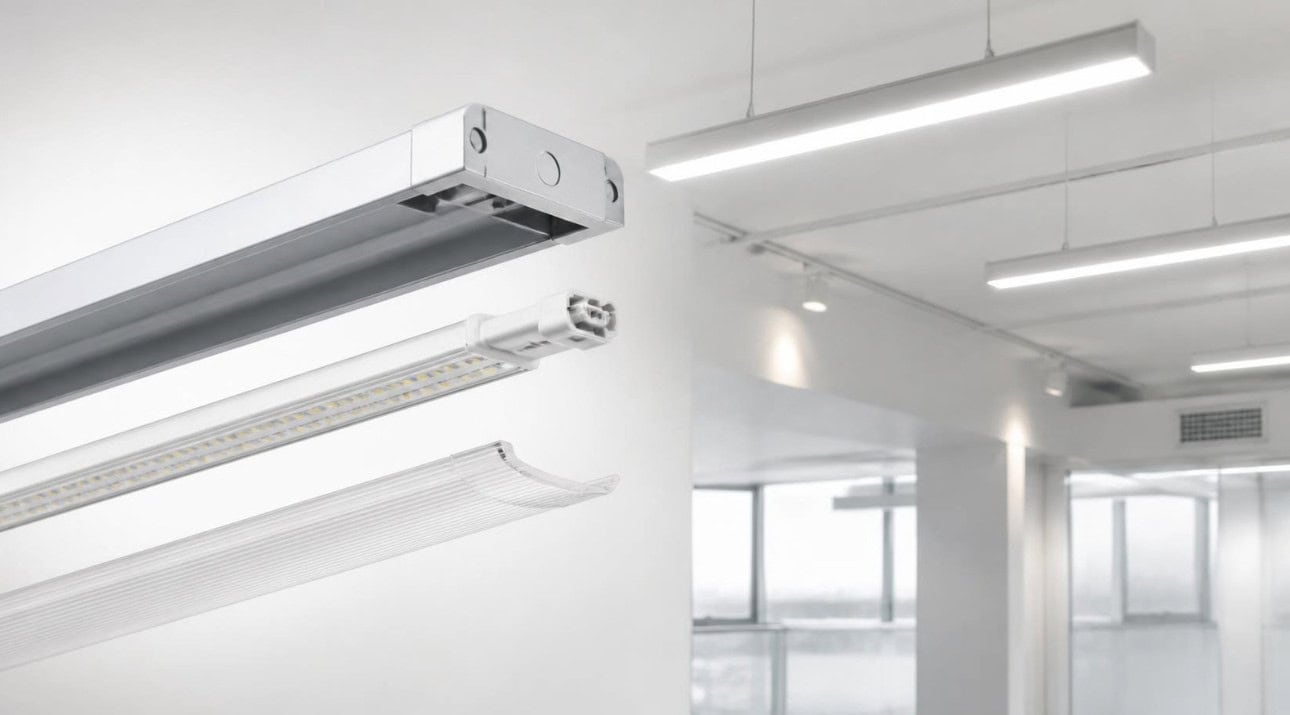
LED-ready fixtures are designed to accept separate LED tubes or light engines, similar to how older fluorescent fixtures accepted tubes.
The Modular Approach
The fixture itself is just a housing and socket system. You install the LED light source separately, and you can replace it again later without replacing the fixture body.
This modularity is the main appeal for facilities that want to upgrade the light source without a full fixture replacement. The demand for this setup has grown in 2026 as regional fluorescent phase out rules push businesses to update legacy lighting systems.
No Ballast Bypass Required
Ballast bypass is an operation for retrofitting old fluorescent housings. New LED-ready fixtures ship without fluorescent ballasts and connect line voltage directly to sockets. Installers do not need to remove or bypass a ballast on these new units.
Compatibility with LED Tubes: Verifying Base Type and Driver Voltage
Before buying LED tubes for a retrofit, confirm two things. The base type commonly G13 for T8 fixtures and the driver voltage range the tube expects. 2026 releases of double ended Type B LED tubes offer wider socket compatibility and reduce some older mismatching risks.
Mismatched base types will not seat properly. Mismatched voltage can cause tubes to underperform or fail prematurely.
Integrated LED vs LED-Ready: Pros, Cons & Side-by-Side Comparison
Integrated LED Pros and Cons
Pros:
- Superior thermal management. Housing and LEDs designed as one unit, with optimized internal heat sinks pulling heat away from the diodes efficiently, often extending lifespan.
- Slim, low-profile form factor. No bulky sockets, making the unit incredibly slim; ideal for sleek outdoor fixtures or low-profile shop lights in low-ceiling areas.
- Driver–LED matching for consistent performance. The driver is matched to the LED chips during manufacturing, so performance stays consistent over the fixture’s life.
- Sealed housings for harsh environments. Better resistance to dust, moisture, and temperature swings, useful for outdoor or industrial settings.
- Fewer electrical connections. Fewer connections mean fewer failure points overall.
- Single-manufacturer warranty. The whole fixture is covered by one manufacturer, simplifying warranty claims.
Cons:
- Single-point failure kills the whole fixture. If any single component fails (a diode or the internal driver), the entire fixture becomes useless; individual parts cannot be replaced.
- LED degradation means full-fixture replacement. When LEDs degrade over time, you replace the entire fixture rather than a single component.
- High replacement cost and effort. Replacing a large integrated unit (e.g., high bay lights ~30 ft above a warehouse floor) requires significant labor and equipment.
- Higher upfront cost. Runs higher than a comparable LED-ready housing.
- No post-purchase upgrades. Cannot change color temperature or brightness later, and cannot upgrade the light source independently as LED technology improves, without buying a completely new fixture.
LED-Ready Pros and Cons
Pros:
- Easy, low-cost maintenance. Keep the existing fixture housing and only replace the tube or light engine; if a tube burns out, snap in a new one for a few dollars. The housing remains functional for decades, lowering the material cost per upgrade.
- Flexibility to upgrade the light source. To get brighter light or a different color temperature (e.g., for LED garage lights), you only need to purchase different tubes, rather than entirely new housings.
- Faster retrofit projects. Retrofits move faster since you’re not tearing out entire fixtures.
- Wide availability of replacement tubes. Tubes are widely available from multiple suppliers, which helps with spare parts sourcing.
Cons:
- Bulkier than integrated models. The fixtures must accommodate standard tube sizes and physical sockets, making them less sleek.
- Shorter tube lifespan and suboptimal thermal design. Tubes dissipate heat less efficiently inside the enclosed glass/plastic tube, and because tube and fixture often come from different manufacturers, the thermal design isn’t co-optimized.
- Ballast bypass wiring errors. These are common and cause early tube failure.
- Compatibility must be verified. Compatibility varies by base type and driver voltage, so buyers must verify specs before ordering in bulk.
Side-by-Side Comparison Table
| Factor | Integrated LED | LED-Ready |
|---|---|---|
| Lifespan | 50,000–100,000 hrs (full fixture L70) | 25,000–50,000 hrs (tube L70; housing lasts longer) |
| Upfront cost | Higher per fixture | Lower base fixture cost; tubes sold separately |
| Maintenance | Most units need full replacement; premium versions allow component swap | Swap only LED tube; reuse fixture housing |
| Aesthetics | Slim, uniform housing | Bulkier; visible tube/socket design |
Dimming and Flicker Compatibility: What Buyers Overlook
Dimming compatibility is one of the most overlooked specs in this comparison. Integrated fixtures usually list a specific dimmer type — typically TRIAC or 0-10V — and pairing the wrong dimmer causes flickering or a limited dimming range.
LED-ready systems carry extra risk here. Since the tube’s driver and the fixture’s bypassed wiring come from different sources, flicker often shows up only after installation, not during initial testing.
Before ordering, ask suppliers for their DLC Qualified Products List entry or flicker performance data referencing NEMA SSL 7A percent flicker and flicker index. This is especially important for commercial spaces where flicker complaints can trigger costly callbacks.
Lifecycle Costs and Procurement Considerations
Calculating Total Cost of Ownership (TCO): Labor, Replacement, Disposal
Sticker price tells you almost nothing about long-term cost, because it ignores labor, replacement frequency, and disposal fees. A fair comparison requires calculating cost per operating hour instead.
Start with labor cost. Divide the fixture’s total cost, including installation, by its rated lifespan in hours. For integrated fixtures, this is a one-time calculation since you replace the whole unit at end of life. For LED-ready systems, you need to add tube replacement labor every time the tube burns out, and this typically happens two to three times over the same period an integrated fixture would last.
Replacement frequency matters even more once you factor in access difficulty. If your facility has fixtures mounted 25–30 ft up in a warehouse, sending a technician up on a lift every few years to swap tubes adds real cost that a spec sheet never shows. Integrated fixtures concentrate this cost into one larger replacement event, so budgeting is more predictable. LED-ready spreads smaller costs across more service visits, which can strain maintenance schedules if you manage many fixtures at once.
Disposal cost is often left out of TCO calculations entirely, even though it shouldn’t be. LED tubes and integrated fixtures may both contain electronic components subject to disposal regulations, and these rules vary by region. Since bulk disposal across a facility-wide retrofit can trigger recycling fees, you should confirm local e-waste requirements before finalizing your budget.
Certifications to Request from Suppliers
Certification isn’t optional for commercial and industrial buyers, since it directly affects rebate eligibility and code compliance. Before placing an order, request documentation for the following:
- UL Listing. Ask for this on both integrated and LED-ready fixtures. For LED-ready systems, confirm that the tube and fixture combination was tested together rather than separately, since tested-together combinations perform more predictably. You can verify listings directly through UL’s product certification database.
- DLC Qualification. If your project depends on utility rebates, confirm the exact model appears on the DesignLights Consortium Qualified Products List. Rebate programs frequently reject claims when the documentation doesn’t match the model actually ordered, so this step protects your rebate budget.
- ENERGY STAR certification. This applies mainly to indoor fixtures. Check the ENERGY STAR certified lighting product list to confirm eligibility before your project depends on it.
- IP rating documentation. This becomes essential for outdoor or wet location fixtures. Confirm the rating against IEC 60529 ingress protection standards so you know exactly what conditions the fixture can withstand.
Warranty Terms and What They Should Cover
Integrated fixtures typically carry a single warranty covering the entire unit, often for 5 to 10 years, since one manufacturer controls the whole assembly. Even so, you should confirm whether the driver is covered separately, because drivers commonly fail before the LED chips degrade.
LED-ready systems introduce more warranty risk, since the tube manufacturer and fixture manufacturer are often different companies. When a failure happens, this split responsibility can lead to each party blaming the other instead of resolving the claim.
Before placing a bulk order, ask suppliers these three questions directly. Does the warranty cover the tube, the fixture housing, or both. Is the warranty voided if the ballast bypass wiring wasn’t performed by a licensed electrician. What is the claims process if a failure occurs within the warranty period, including whether it results in replacement, credit, or repair.
Getting these answers in writing before the order ships protects you if a problem shows up after installation.
Which Type of LED Fixture Is Best for You?
When to Choose Integrated Fixtures
Integrated fixtures make the most sense when you want predictable performance without ongoing maintenance decisions. Since the LED chips, driver, and housing are matched by one manufacturer, you avoid the risk of mismatched components causing early failure.
This matters most in a few specific situations. If your facility has fixtures in hard-to-reach locations, such as high ceilings or outdoor areas that require a lift to access, integrated fixtures reduce how often someone needs to climb up there. Since the entire unit is replaced as one event rather than serviced repeatedly, your maintenance schedule becomes simpler to plan around.
Outdoor applications add another layer of consideration, because integrated fixtures are sealed as a complete unit during manufacturing. This sealing process is relevant for wall packs and other exterior fixtures exposed to moisture and temperature swings, since the seal quality directly affects how well the fixture resists water intrusion over time.
When to Choose LED-Ready Fixtures
LED-ready fixtures work best when you’re managing an existing fluorescent installation and want to control costs over time rather than replacing everything at once.
Since the fixture housing stays in place and only the tube changes, this approach lowers the upfront cost per fixture, especially when you already have a large volume of compatible housings installed. This makes LED-ready a practical choice for facilities converting fluorescent lighting in phases rather than all at once.
Flexibility becomes another advantage here, since different tube brands can be swapped in as long as they match the fixture’s ballast configuration or bypass wiring. If your organization already has an established relationship with a specific tube supplier, LED-ready lets you continue that relationship without replacing the entire fixture.
However, this flexibility comes with a tradeoff. Because tube and fixture manufacturers are often different companies, you take on more responsibility for confirming compatibility before ordering in bulk, which is why the certification and warranty checks covered in the previous section matter more for LED-ready purchases than for integrated ones.
Quick Decision Snapshot
Use this summary to match your situation to the right fixture type.
| Your Situation | Recommended Fixture Type |
|---|---|
| New construction or full retrofit | Integrated |
| Hard-to-reach or high-ceiling locations | Integrated |
| Outdoor wall packs exposed to weather | Integrated (sealed unit) |
| Existing fluorescent housings in good condition | LED-ready |
| Phased retrofit across a large facility | LED-ready |
| Established relationship with a tube supplier | LED-ready |
| Minimal maintenance staff available | Integrated |
| Budget spread across multiple fiscal years | LED-ready |
Installation & Maintenance: Complete Checklist
Both integrated LED fixtures and LED-ready housings require a licensed electrician for the initial hardwiring. But what happens after that installation is where the two paths diverge.
Installing Integrated LED Systems
An integrated LED fixture is a sealed, single-piece unit — the LED chips, driver, and heat sink are permanently enclosed in one housing. The electrician hardwires the fixture directly to the building’s power supply; there is no plug-in option, as commercial building codes prohibit removable connections on permanent fixtures.
Maintenance is effectively zero — just wipe the exterior to remove dust. When the unit eventually reaches end of life (typically 50,000–100,000 hours), the entire fixture must be replaced, which may require an electrician again depending on mounting height.
One thing to plan for: because the entire fixture is replaced as a unit, the exact same model may be discontinued by the time it fails. That means the replacement could have different dimensions or mounting requirements, potentially turning a simple swap into a small retrofit job. Always keep a record of the installed fixture’s model number so you can check availability before the unit actually dies.
Managing LED-Ready Housings
The empty LED-ready housing also requires a licensed electrician to hardwire it to the building’s power. But once the housing is wired and mounted, it becomes a permanent part of your building’s infrastructure — and all future maintenance is user-serviceable. When an LED tube dims or burns out (typically 30,000–50,000 hours), you simply pull out the old tube and slide in a new one, just like replacing a fluorescent lamp. No tools, no electrician, no downtime.
One safety rule you must never overlook: LED-ready housings accept only direct-wire (ballast-bypass) tubes. Inserting a ballast-compatible tube will instantly destroy it and can create a fire hazard from short-circuit overheating. Always verify the packaging states “direct-wire,” “ballast bypass,” or “Type B” before purchasing.
While the initial housing cost may be slightly higher, replacement tubes cost a fraction of a full integrated fixture — and there’s zero labor cost across dozens of swaps. When you do replace a tube, don’t throw the old one in the trash. LED tubes contain small amounts of electronic components and should be recycled through a local e-waste or commercial lighting recycling program. Many suppliers also offer trade-in or take-back programs for spent tubes.

What to Check After Installation
Regardless of which system you choose, walk through these items once the electrician is done:
- Flicker test: Turn off all other lights and observe each fixture for visible flicker. Flicker indicates a driver or wiring issue that should be fixed before the electrician leaves.
- Color temperature consistency: Verify all fixtures in the same space output the same color tone. Even within the same product line, manufacturing batches can shift by a few hundred Kelvin.
- Dimmer compatibility: If the fixtures are on a dimmer, confirm the dimmer is LED-rated. Legacy dimmers designed for incandescent loads can cause flicker, buzzing, or premature driver failure.
- Tighten and verify: Ask the electrician to show you the wire connections at the junction box. Loose wire nuts are the most common cause of intermittent LED failure in new installations.
FAQs About Integrated vs LED-Ready Lights
Does an integrated LED fixture output more light compared to a fluorescent tube setup?
Not automatically. Light output is determined by lumens, not by whether the fixture uses an integrated design or a replaceable tube. A poorly made integrated unit can actually produce fewer lumens than a well-specced tube-based fixture.
The real advantage of integrated designs is spatial efficiency. Manufacturers can pack more diodes into a slimmer housing, making it easier to reach high lumen output without a bulky fixture body. This matters most in low-clearance installations where a thicker tube housing simply won’t fit.
Instead of assuming one format is brighter than the other, compare the delivered lumens per watt listed on the LM-79 test report. That number tells you far more than the fixture category alone.
How do I compare quotes when suppliers list specs differently?
Different manufacturers report specs using different baselines, which makes side-by-side comparison harder than it should be. One supplier might list initial lumens, while another lists lumens at 25,000 hours — a meaningful difference that isn’t obvious unless you check.
To standardize your comparison, ask every supplier for the same four numbers: delivered lumens (not just wattage), efficacy in lumens per watt, L70 lifespan rating, and CRI. Request this data from the fixture’s LM-79 test report rather than the marketing spec sheet, since LM-79 results are independently measured under standardized conditions.
If a supplier can’t produce an LM-79 report on request, treat that as a red flag before placing a bulk order.
If my LED-ready tube supplier discontinues the model, is the housing still usable?
Usually yes, but with a caveat. LED-ready housings follow standardized socket and base configurations (like G13 for T8), so most Type B direct-wire tubes from other manufacturers will physically fit as long as the base type and voltage range match.
The real risk isn’t fit — it’s warranty and performance consistency. If your original tube supplier discontinues the model, a replacement from a different brand may have a slightly different color temperature, CRI, or beam angle, which can create visible inconsistency across a large space.
To reduce this risk, keep a record of the tube’s base type, voltage range, and CRI on file, and confirm with any new supplier that their replacement matches those specs before ordering in bulk.
Should I test a small batch before committing to a full facility retrofit?
Yes, and this is especially important when switching suppliers or fixture models for the first time. A small pilot batch — typically 10 to 20 units installed in a representative area — lets you catch problems before they scale across your entire facility.
During the pilot, run each fixture for at least two to four weeks under normal operating conditions. Check for flicker under full load, confirm dimmer compatibility if applicable, and verify that color temperature is consistent across units from the same batch.
Pay attention to any early driver failures during this window, since driver issues that show up in the first month often indicate a batch-wide manufacturing problem rather than an isolated defect. Catching this in a 20-unit pilot is far cheaper than discovering it after installing 500 units.
Conclusion
The right choice between integrated and LED-ready fixtures depends on details specific to your facility — mounting height, in-house maintenance capacity, certification requirements, and how many fixtures you’re planning to install. Use the comparison above to match your project needs against each option before you finalize a decision.
Once you’ve identified which type fits your project, the next step is sourcing fixtures that meet your specs. RC Lighting manufactures both integrated and LED-ready fixtures, with documentation available to support your procurement process.
Contact our team with your fixture count and project specs to get a quote.