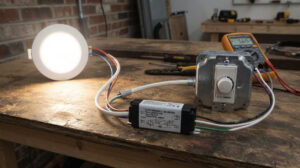
Want to turn the space under your deck into a functional area once the sun goes down? Under-deck lighting fixes one of the most frequent outdoor renovation headaches. Many shaded spaces stay dark and go unused, making them unfit for hosting guests, storing items, or serving as a secondary outdoor living area.
This guide explains how under-deck lighting differs from regular landscape lighting. It covers which fixture types work with various ceiling cavities, and what checks you need to complete before running wiring behind the joists.
We will also go over code requirements and moisture protection details. These elements distinguish long-lasting installations from systems that break down within a single season.
Start with why under-deck lighting needs its own dedicated planning process.
Why Under-Deck Lighting Deserves Its Own Planning Approach
From Shaded, Unusable Space to an Outdoor Living Room
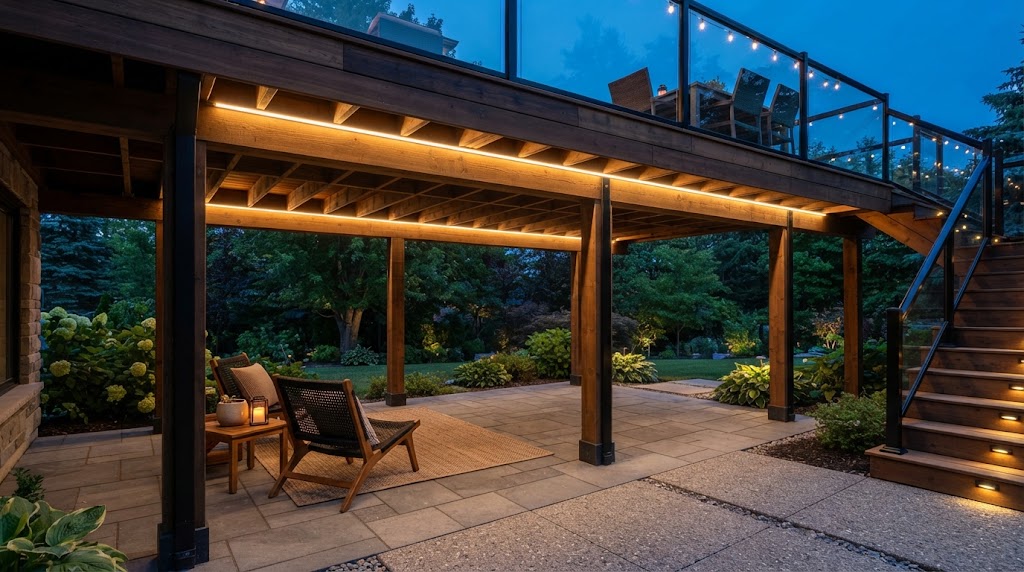
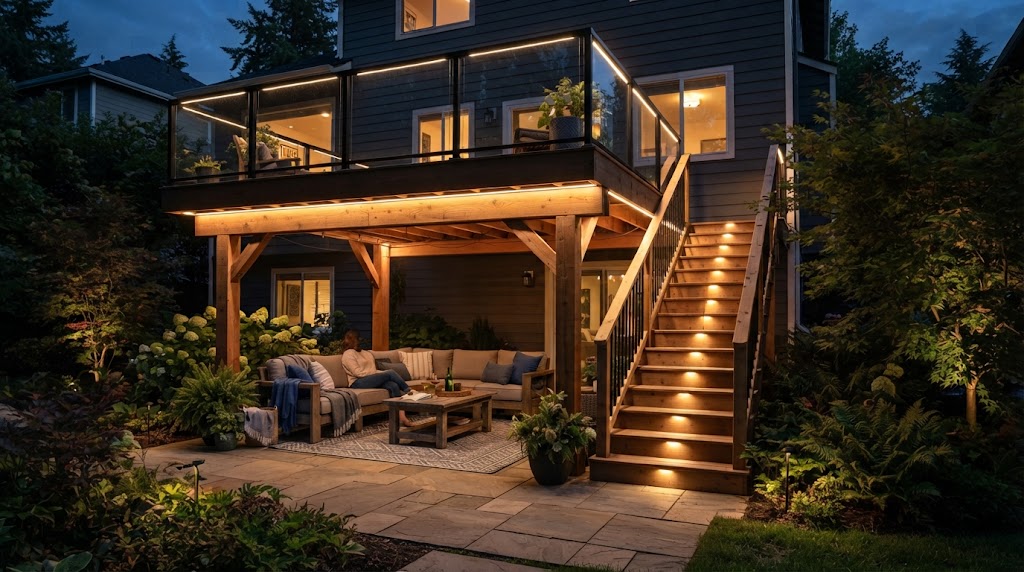
The area under a raised deck is often the most overlooked square footage on a property. It stays cool and shaded during the day, but without lighting, it will become pretty much unusable once the sun goes down.
This is where lighting does the real work. A few well-placed downlights turn that dead zone into a space people actually want to sit in after dark, whether that’s a covered patio, an outdoor kitchen extension, or just extra seating.
The difference between a deck with lighting and one without usually isn’t the structure itself. It’s whether anyone can see well enough to use it once the sun sets.
What Makes Under-Deck Lighting Different From Yard or Landscape Lighting
Under-deck lighting isn’t quite the same as landscape lighting, even though both sit outdoors. Landscape fixtures are built for open-air exposure to rain and direct sunlight. Under-deck fixtures sit in what’s called a damp location instead. They’re shielded from direct rain by the deck above, but they still deal with humidity, splashback, and temperature swings.
This distinction matters when you’re picking a fixture. A fixture rated only for dry indoor use won’t hold up here. But going with a fully wet-rated landscape fixture is often more than the application actually needs.
The ceiling cavity above adds another layer no yard fixture has to deal with. Joist depth, insulation, and wiring routes all shape which product actually fits.
Under-Deck Lighting Types and Layout Strategies
A well-planned recessed deck lighting setup is the foundation of functional, comfortable under-deck illumination. The selection of fixture types and reasonable layout directly determines the lighting uniformity, practicability and overall aesthetics of the outdoor deck space.
Recessed Downlights vs. Mini Recessed Downlights
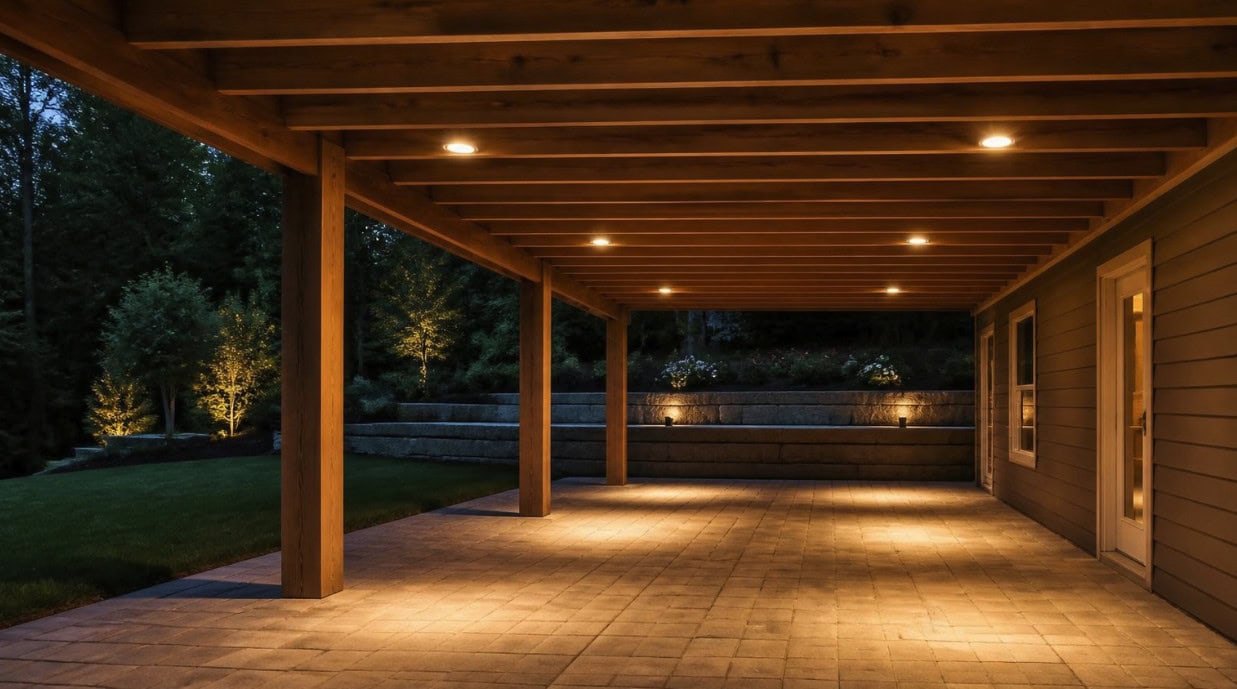
Recessed LED downlights are the most common choice for under deck lighting. They sit flush with the ceiling, direct light straight down, and work well as the main light source across seating or dining areas.
Within this category, the real decision usually comes down to standard size versus mini size, and in practice, cavity depth is what decides this before anything else. Standard recessed downlights typically need at least 80mm of clearance above the ceiling line.
Mini recessed fixtures can work with much less, often fitting into cavities as shallow as 35 to 50mm, and some ultra-slim models squeeze into 25 to 30mm. On under-deck projects, joist height tends to settle this question before wattage or beam angle even come up for discussion.
It’s worth being clear about one thing here: mini downlights are not just smaller versions of standard fixtures. They put out noticeably less light, so if they’re used as the main source across a large area, the fixture count climbs fast, and so does the wiring and driver count needed to hit the same coverage a standard layout would reach with far fewer points.
Once cavity depth rules one option out, purpose becomes the next filter. Standard downlights, usually 8 to 15W, cover more ground per fixture and suit general lighting well. Mini downlights, typically 2 to 6W, are a better fit for accent work like stair edges or railing highlights rather than carrying a space on their own.
Recessed Linear Lighting for Zoning Seating, Grilling, and Storage Areas
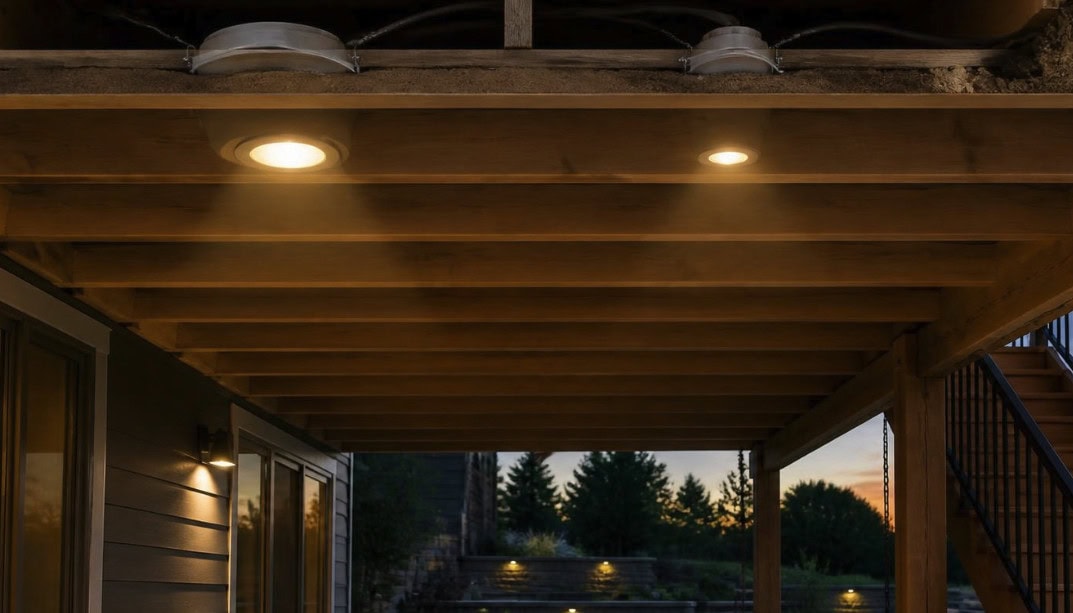
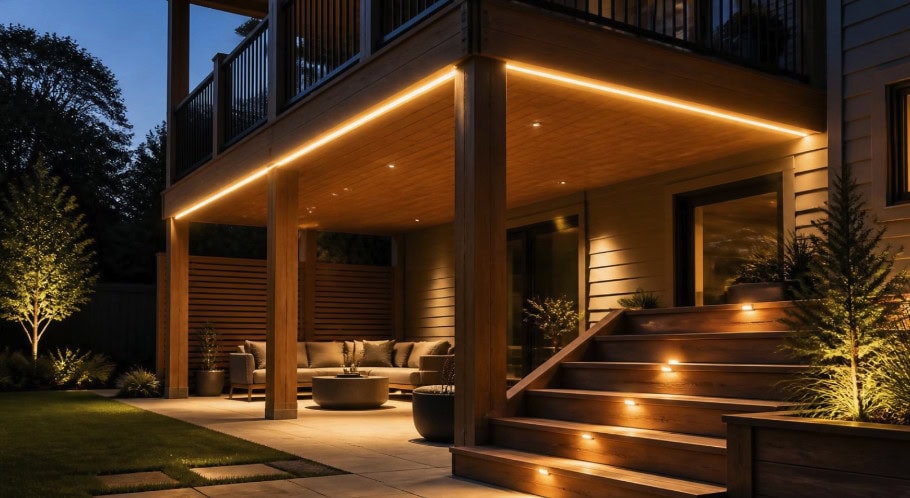
Linear fixtures work differently than point-source downlights. Instead of a single pool of light, they cast an even line, which makes them useful for defining zones rather than just lighting a room.
Under a deck, this often means running a linear fixture along the edge of a grilling station, a storage wall, or a walkway, separating it visually from the seating area without adding a physical divider.
Linear fixtures also help reduce the number of individual fixtures needed to cover a long, narrow space, which can simplify wiring compared to spacing out several separate downlights.
Adjustable Accent Lighting and RGB/Tunable-White Options
Not every fixture under a deck needs to point straight down. Adjustable or gimbal-style fixtures let you angle light toward a stone wall or a textured beam, pulling out shadow and depth that flat, straight-down lighting can’t.
RGB and tunable-white fixtures take this a step further. A warm, dim white suits a quiet dinner. A brighter tone, or a soft color wash along the ceiling line, fits a weekend get-together. The same fixtures handle both, just on a different setting.
These options usually cost more and need compatible controls, so they work best as an accent layer added to a base of standard or mini downlights, not as the main light source.
Layout Patterns for Even, Glare-Free Illumination
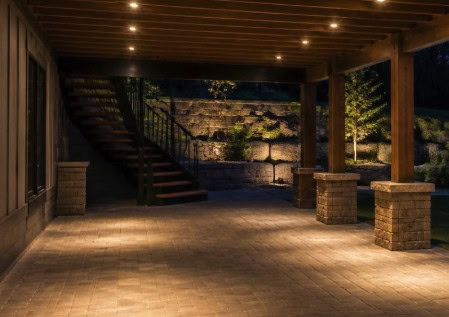
Spacing matters more under a deck than in most indoor ceilings, mainly because the ceiling height is often lower and closer to eye level. A layout that would look fine in an 8-foot indoor ceiling can feel harsh or glary under a 7-foot deck soffit.
As a general starting point, fixture spacing should relate to both the beam angle of the fixture and the joist spacing underneath. Wider beam angles allow for greater spacing between fixtures, while narrower beam angles need tighter spacing to avoid dark gaps between pools of light.
Running fixtures parallel to the joists, rather than crossing them, also tends to simplify wiring and keeps the layout visually consistent from below.
Specifications, Power, and Controls Explained
Layout gets the lights in the right spots. Specs decide whether the system survives the season and whether it’s something you can spec again on the next job.
IP Ratings and Housing Materials for Outdoor and Coastal Use
IP65 covers most under-deck installs where rain and dust are the main exposure. If the project sits near the coast or gets direct wash-down from sprinklers, go up to IP66 and pair it with marine-grade or powder-coated aluminum housing. Standard aluminum starts pitting from salt exposure within a season or two in those conditions.
Mounting hardware matters just as much as the housing. A sealed IP66 fixture with standard-grade screws will rust at the mounting point long before the housing fails. If you’re sourcing from a supplier, ask directly whether stainless hardware is included or sold separately. Don’t assume it matches the housing rating.
Low-Voltage vs. Line-Voltage Power Options
Most under-deck jobs run on low-voltage systems, either 12V or 24V, through a transformer. It’s the safer option in a damp environment and the one most homeowners expect when they ask for deck lighting.
Line-voltage, at 120V, comes into play on bigger commercial patios or multi-zone builds where long wire runs would otherwise lose too much voltage. It needs a licensed electrician and has to meet stricter local code, so it’s usually reserved for larger projects rather than a standard residential retrofit.
If your work spans both residential and light commercial jobs, ask your supplier whether the same product line comes in both voltage configurations. Switching suppliers between project types just adds friction you don’t need.
Dimming and Smart Control Options for Deck Lighting
For most deck jobs, keep the controls simple. A transformer paired with a photocell for dusk-to-dawn operation, or a basic timer, handles the majority of residential installs. If a client wants more flexibility, a smart dimmer or app-based control (similar to Lutron Caséta) lets them adjust brightness or set schedules without touching the wiring again.
Multi-zone control, where the seating area dims separately from the stair lighting, mostly comes up on larger commercial patio jobs. That’s where a protocol like DALI can justify its cost. On a typical residential or small commercial deck, that level of control is more than the project needs.
One thing worth checking before you order: confirm the driver’s dimming compatibility (0-10V, TRIAC, or ELV) up front. Mismatched drivers and dimmers are the most common cause of flickering callbacks on deck lighting jobs.
Choosing Color Temperature and Beam Angle for Different Zones
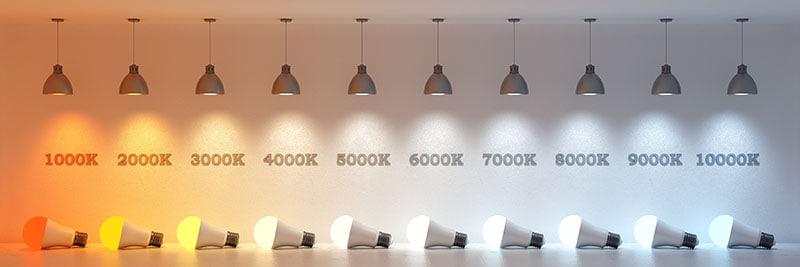
Warm white, around 2700K to 3000K, fits seating and dining areas under the deck where the goal is a relaxed feel at night. Cooler white, 4000K and up, works better for stair treads, walkways, and grill stations, where visibility matters more than mood.
Beam angle should follow your spacing plan, not the other way around. Narrow beams, 15° to 25°, concentrate light and need tighter spacing to avoid dark gaps between joists. Wider beams, 40° and up, cover more ground per fixture and give a flatter, more even wash across open seating zones.
If you work with different client aesthetics regularly, ask your supplier whether color temperature is field-selectable on the same SKU. Some LED fixtures now ship with a CCT switch built in, which cuts down on the number of SKUs you need to stock.
Installation, Compliance, and Long-Term Care
New Construction vs. Retrofit Installation
Which fixture system you can use for deck lighting often comes down to the construction stage, not preference.
New construction gives you open access to the joist cavity before the decking goes down. A rough-in plate can mount directly to the joist, giving the fixture a real structural anchor instead of relying on spring clips alone.
Wiring runs freely through the open cavity. Drivers and transformers can sit centralized in a dry section of the joist bay, with each connection point in its own weatherproof junction box, in line with NEC requirements for wet and damp locations.
A rough-in plate paired with a canless wafer fixture, or a standard IC-rated housing, has become the go-to approach for deck lighting on most North American outdoor ceiling projects. It’s mostly replaced the older can-style housings that never fit well in tight joist cavities anyway.
Retrofitting an existing deck takes that option off the table. You’re limited to canless wafer-style fixtures that fit through a pre-cut hole and hold in place with spring clips instead of a bracket.
Wiring gets fished blind through the cavity. When that’s not possible, surface-mounted conduit becomes the fallback, which affects both the look of the job and how much moisture reaches the fixture opening over time.
Since there’s no dry, enclosed cavity to protect the driver, retrofit fixtures need their own IC and Wet Location ratings rather than depending on the joist bay for protection. This is also where most deck lighting callbacks show up on coastal or high-humidity jobs.
Cutting into an existing deck surface tends to let moisture reach the gasket seal more easily than a sealed rough-in install does. Seal quality carries more weight on a retrofit fixture than it would on new construction.
Three things usually decide which approach fits a given deck lighting project:
Future flexibility. Once a rough-in layout gets boarded over, those fixture positions are locked in. If a client’s furniture layout, grill station, or seating area might still change, don’t commit every position to a permanent rough-in plan.
Cavity depth and existing obstructions. Joist height sets how much room you have to work with. Insulation or crossing utility lines inside the cavity can rule out certain positions before wiring even starts.
Project timeline. Rough-in work needs the electrician and framing crew working in sequence during construction. Retrofit work runs independent of that sequence, which is why it’s the default for adding lighting to an already-finished deck.
Either way, the wiring has to meet NEC requirements for wet and damp locations. Fixtures should also carry ENERGY STAR-qualified IC-rated certification for airtight, insulation-contact performance.
Sealing Wire Penetrations Against Moisture
Every spot where a wire passes through decking boards or joist material is a place water can get in. Weatherproof grommets and sealed junction boxes at each penetration point stop water from tracking down the wire into the fixture or driver.
Silicone sealant on its own isn’t a substitute for a proper gasketed fitting. Sealant tends to crack within a season or two of sun and temperature swings, while a gasketed penetration holds up for the life of the fixture.
It’s worth confirming this detail with your deck lighting supplier rather than sourcing grommets separately and hoping they match.
Transformer and Driver Load Limits
Transformers and drivers have a maximum load rating. Running a deck lighting system too close to that limit shortens component life and raises the odds of flicker as fixtures age.
A basic load calculation adds up the total wattage across all fixtures on a circuit and keeps it under about 80% of the transformer’s rated capacity. That leaves room if a client wants to add more fixtures down the line.
Some local codes also require GFCI protection for outdoor low-voltage transformer locations. That varies by jurisdiction, so check local code rather than assuming a national standard covers it.
Lumen Maintenance and Warranty Coverage
LED fixtures don’t burn out the way old bulbs did. They lose brightness gradually over time, a process called lumen depreciation.
Most quality outdoor LED fixtures used for deck lighting are rated to hold 70% of their original output, known as L70, somewhere between 30,000 and 50,000 hours.
For anyone sourcing fixtures across multiple projects, it’s worth reading the warranty terms closely. Some manufacturers only cover the LED chip, while driver and housing failures, which happen more often than the LED itself failing outdoors, fall outside the warranty.
A supplier that backs the driver, housing, and LED with one full warranty cuts down on the callbacks you’ll deal with on projects you’re not planning to revisit every year.
Coordinating Color Temperature Across Zones
Deck lighting rarely stands alone on a project. It usually needs to read consistently alongside stair lighting, railing-mounted fixtures, or post-cap lights on the same structure.
Mixing color temperatures across these zones, say 3000K under the deck against 5000K on the stairs, creates a visibly disjointed look at night even if each fixture works fine on its own.
Standardizing on one color temperature across the whole project, or intentionally zoning warmer tones for seating and cooler tones for stairs and walkways, is worth locking into the spec sheet before you order. It’s a lot easier to fix on paper than after everything’s installed.
FAQs
Do you need a permit to install under-deck lighting?
Most jurisdictions require a permit when the work involves running new electrical circuits, even for low-voltage systems tied to a transformer. Simple plug-in or battery-powered accent lights usually don’t trigger this requirement. Check with your local building department before starting, since permit rules vary significantly by city and county, and skipping this step can create problems during a future home sale or insurance claim.
Can under-deck lighting be installed on composite decking, or does it only work with wood?
Under-deck lighting fixtures mount to the joists above, not to the decking material itself, so composite, PVC, and wood decking all work the same way from a lighting standpoint. The one difference worth noting is that composite decking often runs cooler and doesn’t absorb moisture the way older wood decking can, which reduces (but doesn’t eliminate) the need for gasket protection at penetration points.
Will under-deck lighting attract bugs at night?
Warm white LEDs (2700K-3000K) attract fewer insects than cooler white or blue-heavy light sources, since bugs are drawn to shorter wavelengths and UV output that most quality LED fixtures don’t emit. If bug activity is a concern for a client, sticking to warmer color temperatures in seating areas, rather than defaulting to cooler white throughout, is a simple adjustment that doesn’t affect fixture selection or wiring.
Does under-deck lighting need special care in cold or freezing climates?
Quality IP65/IP66-rated fixtures are built to handle freeze-thaw cycles without damage, since the sealed housing keeps moisture out of the electrical components. The main risk in cold climates comes from ice buildup on the fixture lens, which can crack lower-quality plastic diffusers over repeated freeze-thaw cycles. Choosing fixtures with tempered glass or impact-rated polycarbonate lenses, rather than basic acrylic, holds up better long-term in regions with harsh winters.
Getting the Details Right the First Time
Under-deck lighting works when the fixture matches the cavity it’s going into, not the other way around. That means checking joist depth before choosing between standard and mini downlights, matching IP ratings to how exposed the space really is, and deciding early whether you’re working with an open cavity or fishing wire blind through a finished deck.
None of these decisions are complicated on their own. But skipping any one of them, whether it’s sealing a wire penetration properly or sizing the transformer with room to spare, tends to show up later as a callback rather than a clean install.
The projects that hold up long-term are the ones where fixture selection, wiring method, and moisture protection all get planned together before the first hole gets cut. Get that sequence right, and the space under the deck stops being wasted square footage and starts earning its keep.
Sourcing Fixtures That Match the Job
Specs on paper only mean something if the fixture in hand actually performs the way the datasheet says. IP ratings, driver compatibility, and lumen maintenance all come down to how the product was actually built, not just what’s printed on the box.
That’s usually where working with a manufacturer directly, rather than piecing together fixtures from different sources, starts to pay off. It’s easier to get straight answers on housing material, dimming compatibility, or warranty coverage when you’re talking to the people who actually build the product, and it’s easier to stay consistent across projects when you’re not switching suppliers every time a spec changes.
If you’re speccing an under-deck lighting job and want to double-check a fixture against your cavity depth, IP requirements, or driver setup before you order, reach out. A quick conversation upfront usually saves more time than sorting out a mismatch after installation.