2×2 and 2×4 LED panels dominate commercial drop ceiling lighting. At first glance, the choice appears simple: pick the size that fits your existing grid.
Yet this single decision impacts more than layout. It determines how evenly light fills the room, how your ceiling structure supports fixtures, and how easy future repairs or replacements will be.
This guide compares 2×2 and 2×4 LED panel lights across real-world performance factors, and we will share key spec checks to review with suppliers before you finalize your purchase.
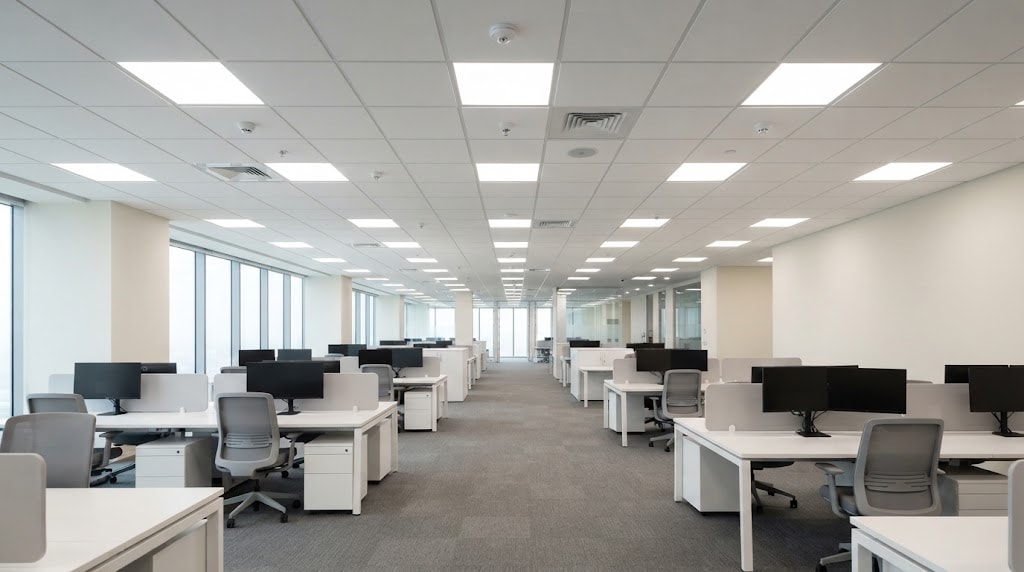
2×2 vs 2×4 LED Panel Lights: Key Differences
When selecting commercial or office lighting, 2×2 and 2×4 LED flat panels are the two most common sizes. Let’s take a look at the differences between them.
Physical Footprint and Actual Ceiling Cutout Dimensions
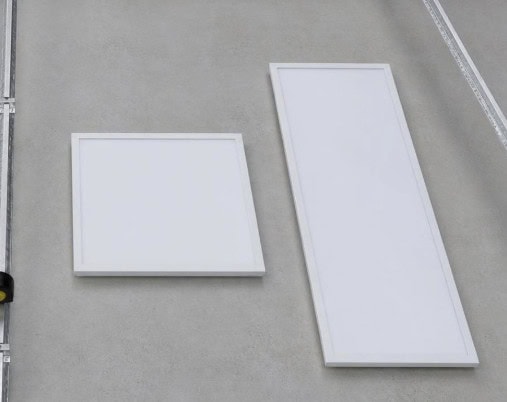
A 2×2 panel typically measures 23.75″ x 23.75″, built to drop into a standard 24″ x 24″ T-bar ceiling grid module.
A 2×4 panel measures roughly 23.75″ x 47.75″, spanning two grid modules along its long edge.
Even small deviations in your ceiling grid spacing can affect fit. It’s worth measuring your actual grid before ordering, not just assuming a “standard” size will match.
Typical Lumen and Wattage Ranges by Size
2×2 panels generally produce 2,800 to 4,200 lumens, drawing 20 to 40 watts.
2×4 panels typically output 4,000 to 6,500 lumens at 30 to 50 watts.
These ranges overlap more than most buyers expect. A high-output 2×2 can match a standard 2×4 in total lumens, which means wattage and lumens alone won’t tell you which size is right for your space.
Why Size Alone Doesn’t Determine the Right Choice
Two panels with the same total lumen output can still look different once installed. Large 2×4 panels have sharper edge falloff, which means light drops off faster near the panel’s border.
In rooms with light-colored, reflective walls, this can create faint bright bands where two panels meet. Darker walls sometimes show the opposite effect: subtle shadow bands between fixtures.
A standard light meter won’t catch this, since it takes a single-point reading rather than capturing what the eye sees across a room. The effect tends to show up more in smaller spaces, generally under 20 feet on the shorter side, where a 2×4’s long edge creates a harder visual boundary.
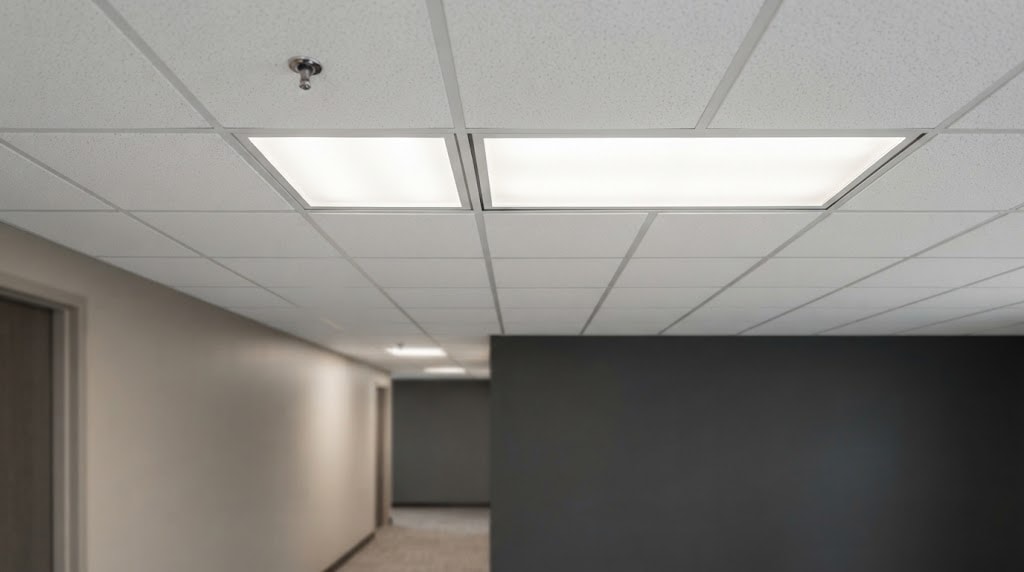
Confirm Panel Lights Fit With Your Ceiling System
Before comparing brightness or light quality, you need to confirm the panel will physically sit correctly in your space. Here’s how to check.
Identify Your Ceiling Type
Most panels are designed for one of three ceiling conditions: a suspended T-bar grid, a hard ceiling requiring surface mount, or an existing fluorescent troffer being retrofitted.
Confirming which category your space falls into narrows your panel options before you start comparing specs.
Check the Grid Profile Width Before Ordering
Most commercial buildings use a 15/16″ exposed T-bar grid, which accepts standard 2×2 and 2×4 panels without modification.
Some older buildings use a narrower 9/16″ grid profile. Panels sized for 15/16″ grids won’t sit flush in this system, so you’ll need panels or adapter kits specifically rated for narrow-profile installation.
Verify Retrofit Compatibility With Existing Troffers
If you’re replacing older fluorescent fixtures, the existing troffer housing often stays in place. Many 2×2 and 2×4 LED panels are designed to drop into standard troffer frames, which reduces demolition work.
Older troffers sometimes have deeper housings or different wiring knockouts, though. Check the manufacturer’s retrofit compatibility list before ordering in bulk to avoid mismatched housings.
Measure Multiple Grid Openings, Not Just One
Spec sheets list nominal sizes, but actual ceiling grids vary slightly between buildings and even between rooms in the same building.
In our field surveys, actual grid module spacing often differs by half an inch or more from the nominal 24″ x 24″ or 24″ x 48″ listed on spec sheets. This is more common in buildings that went through partial ceiling renovations, where new grid sections were added without perfectly matching the original spacing.
Before finalizing an order, measure at least three grid openings in the room and use the smallest measurement as your reference. This simple step avoids the common problem of ordering panels that are technically the right size but don’t drop cleanly into every opening.
Compare Light Performance When Both Sizes Fit
When both 2×2 and 2×4 panel lights physically fit your ceiling grid, the decision comes down to how each performs against your room’s actual lighting requirements. Here’s what to check before specifying either size.
Photometric Layout: Lux Targets and Spacing-to-Mounting-Height Ratio
Different spaces have different lux targets. Offices typically target 300-500 lux, while retail and detail-oriented tasks often require 500-750 lux at the work surface.
Spacing-to-mounting-height ratio (SHR) determines how far apart fixtures can be placed before light levels drop unevenly between them. A lower SHR means fixtures need to be closer together to maintain even coverage, which affects how many panel lights a room actually needs regardless of size.
Color Temperature (CCT) Selection by Application
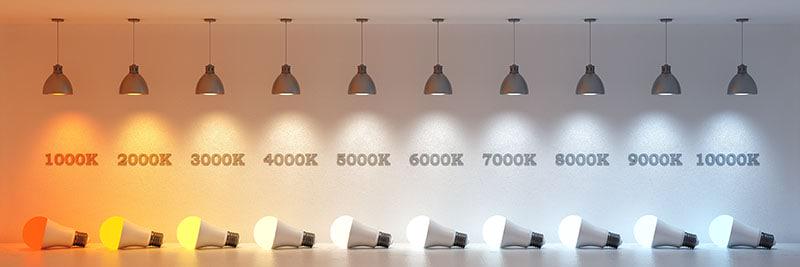
Panel lights commonly come in 3500K, 4000K, and 5000K color temperatures. 3500K suits offices and lounges where a warmer tone feels more comfortable, while 4000K to 5000K works better in warehouses, retail spaces, and task-focused areas.
Mixing color temperatures in the same room, even from the same manufacturer, often creates a visible mismatch. It’s worth specifying one CCT across an entire project rather than per fixture.
CRI 90+ Requirements for Retail and Healthcare
CRI (Color Rendering Index) measures how accurately a light source shows true colors compared to natural light. Standard panels usually offer CRI 80, while higher-spec panels offer CRI 90+.
Retail displays, healthcare exam rooms, and print or design work generally require CRI 90+ to avoid distorting color-critical details. Standard CRI 80 is usually sufficient for offices, hallways, and storage areas.
UGR <19 for Office Spaces with Screens
UGR (Unified Glare Rating) measures how much a fixture’s brightness disrupts visual comfort, particularly for people looking at screens. Lower UGR values indicate less glare.
Offices with heavy screen use typically require panel lights rated UGR 19 or lower. Panels without a UGR rating listed on the spec sheet often haven’t been tested for this, which is worth asking a supplier about directly before ordering.
Fixture Staggering to Avoid Dark Spots
Placing all panel lights in a uniform grid pattern doesn’t always produce even light. Rooms with irregular shapes, partitions, or furniture obstructions can end up with dark spots between fixtures if spacing isn’t adjusted.
In lighting layout reviews across multiple commercial retrofits, dark spots most often appeared in rooms where the original fluorescent layout was copied exactly for the new LED panels, without adjusting for the fact that LED panels distribute light differently than fluorescent troffers.
Staggering fixture rows, rather than placing them in a strict straight-line grid, has resolved uneven lighting complaints in several projects without adding any extra fixtures.
Choosing the Right Size for Your Commercial Space
Once performance requirements are settled, size selection usually comes down to room dimensions and how many fixtures you want to install. The two sizes solve different problems.
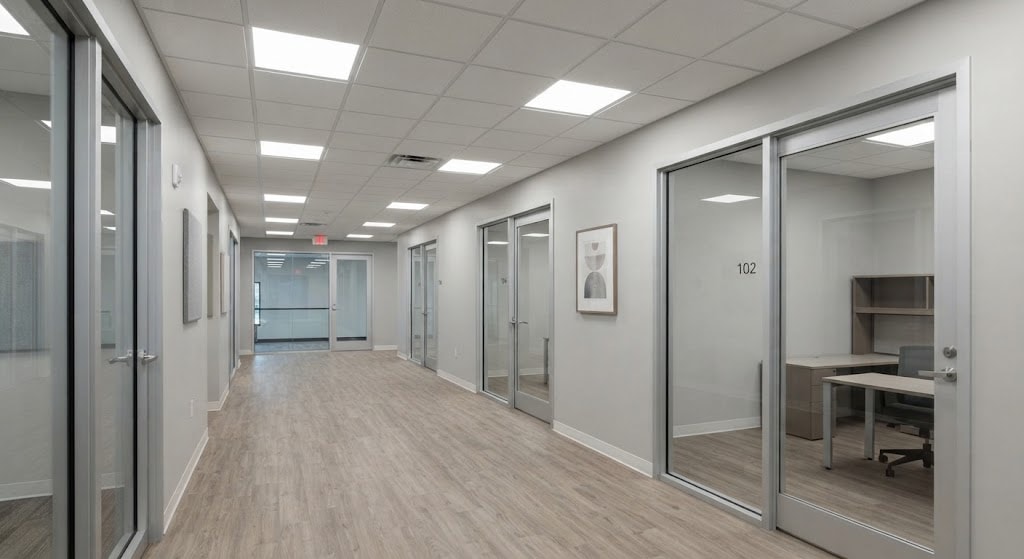
2×2 for Small Offices, Corridors, and Partitioned Rooms
A 2×2 panel works well in rooms under roughly 250 square feet, plus corridors and partitioned spaces. Its smaller footprint makes it easier to place fixtures around partition walls and doorways without crowding the grid.
Because each fixture covers less area, you get finer control over placement. That matters in offices with private rooms, where a single oversized panel can leave one workstation bright and another dim.
Handling weight is also lower, which simplifies installation in ceiling spaces with limited clearance above the grid.
2×4 for Open-Plan Offices, Classrooms, and Large Rooms
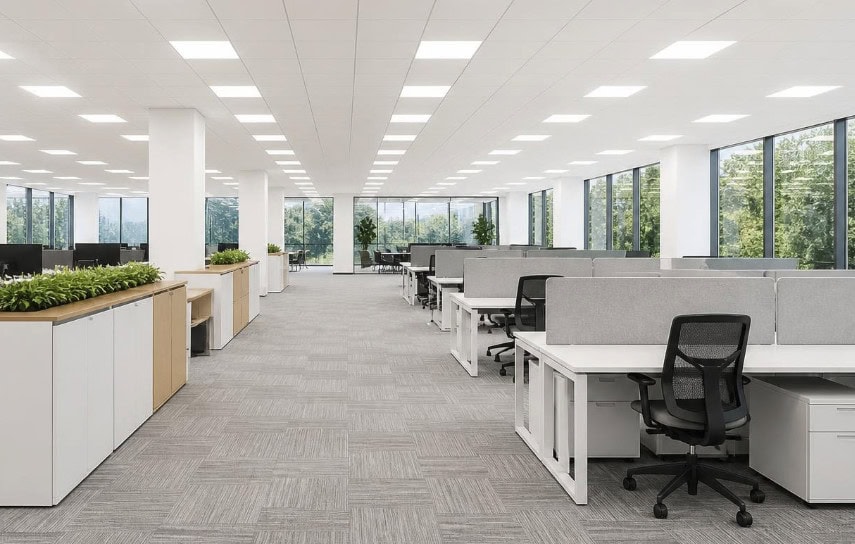
In open areas above roughly 300 square feet, a 2×4 panel usually reduces the total fixture count needed to hit your lux target. Fewer fixtures means fewer drivers, fewer connection points, and less labor during installation.
Classrooms and open-plan offices often have regular ceiling grids that suit 2×4 spacing well. Longer panels align naturally with the grid module and produce more even coverage across wide, unobstructed floors.
The trade-off is flexibility. If the room layout changes later, repositioning a 2×4 panel is less forgiving than moving a 2×2.
Hybrid Layouts for Mixed Ceiling Configurations
Many buildings have a mix of large open areas and small enclosed rooms, and using one size everywhere forces a compromise. A hybrid approach uses 2×4 panels in the main open floor and 2×2 panels in perimeter offices and meeting rooms.
The key is consistency in light quality. Keep CCT and CRI identical across both sizes, since panels of different sizes from the same line still may differ slightly in output.
Order a few spare units of each size. Driver batches change over time, and matching a discontinued batch later is harder than storing extras up front.
Turn Your Decision Into a Procurement Spec
Once you’ve decided on size and performance specs, put it in writing. A clear spec sheet protects you from panels that look identical on paper but perform differently on delivery.
Required Spec Sheet Data (Lumen Output, Efficacy, Driver Type, IP Rating)
List lumen output and efficacy (lm/W) separately — not just wattage. Note the driver brand and IP rating if the space has moisture exposure.
LM79 Photometric Reports and LM80 Lifetime Data
LM79 verifies actual light output and color performance. LM80 backs up lifetime claims like “50,000 hours.” Ask for both, tied to the exact model you’re ordering.
Third-Party Certifications and Safety Listings
UL/ETL confirms electrical safety; DLC is often required for utility rebates.
Procurement Note: Certifications listed online don’t always match what’s printed on the shipped product. Confirming the model number on the certification document against the purchase order, before shipment, has prevented rebate issues on past projects.
Warranty Terms and L70 Lumen Maintenance
L70 marks when output drops to 70% of original brightness. Warranty periods are usually much shorter than the L70 rating, so check what’s actually covered — full replacement, driver-only, or prorated credit.
FAQs
What’s the difference between edge-lit and backlit panel construction?
Edge-lit panels place LEDs along the frame edge, with a light guide plate spreading illumination across the surface — this keeps the fixture thin, often under 0.5 inches. Backlit (direct-lit) panels place LEDs across the full back surface, which allows higher lumen output but adds thickness.
Edge-lit panels are more prone to uneven brightness near the light guide plate seams if the plate is low quality. Check for consistent surface brightness at the panel’s edges, not just the center, before approving a sample.
Does panel thickness affect whether it fits in my ceiling?
Yes. Edge-lit panels typically run 0.4–0.7 inches thick, while backlit panels can reach 1.5 inches or more depending on driver placement.
This matters most in retrofits, where the plenum clearance above the grid may be shallow due to ductwork, sprinkler lines, or existing wiring. Measure the clearance above your grid before selecting a panel type, not just the grid opening itself.
Can I mix panels from different production batches without visible color differences?
Not always. LED panels are binned in production, and panels from different batches can vary slightly in CCT and tint even when labeled the same (e.g., 4000K).
Ask suppliers for the SDCM (MacAdam ellipse) rating — a 3-step SDCM keeps color variation imperceptible to most people, while a wider tolerance can show visible mismatch when panels sit side by side. This matters most in open ceilings where multiple panels are visible together.
If one panel fails, can I replace just the driver?
Usually yes. Drivers are generally serviceable as a separate part, which costs far less than replacing the whole fixture — and the driver is the most common failure point on an LED panel.
The catch is that driver form factors, connectors, and mounting brackets aren’t standardized across suppliers. Keep a few spare drivers in the original spec on hand, since matching a discontinued driver years later is difficult.
Conclusion
Size is where the decision starts, not where it ends. A 2×2 or 2×4 panel that fits your ceiling grid can still perform poorly if the CCT, CRI, or UGR rating doesn’t match how the space is actually used.
Confirm ceiling compatibility first, then work through photometric requirements, then lock the choice into a written spec sheet. That order avoids the most common mistake: ordering based on size and wattage alone, then discovering after installation that the light quality doesn’t suit the room.
Keep one spec sheet per project, even if you’re mixing 2×2 and 2×4 panels across different areas. It’s the easiest way to make sure every fixture you order — now or in a future phase — matches what’s already installed.
Discuss Your Project With RC Lighting
Comparing 2×2 and 2×4 options for an upcoming project?Reach out to RC Lighting to discuss your space, ceiling layout, and lighting needs.