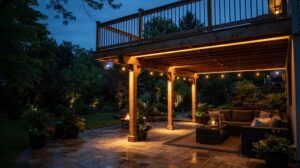
Have you ever walked into a room without any fancy lighting fixtures but still got awestruck by charming lighting design? That’s the magic of proper lighting layout. It makes the place comfortable and appealing. The good news is you don’t have to be an expert lighting designer to nail it.
Lighting layout is a blend of aesthetics, intuition, and calculation, forming the basis of excellent lighting design. This guide explores what lighting layout is and how you can design it. Let’s get started!
Lighting Layout: Basic Overview
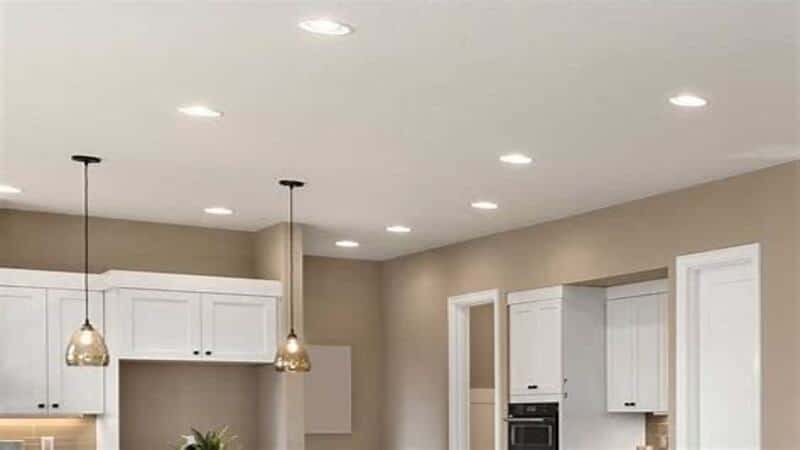
Lighting layout refers to the placement and positioning of lights in any place. A good lighting design layout is made considering the application, theme, lighting requirement, and budget. A well-thought lighting layout can transform the ambiance of the place significantly.
It covers all fixture details including spacing, height, light temperature and beam angle, rather than simply mounting random lamps. Designers divide spaces into functional zones and match suitable light types to satisfy both practical use and aesthetic effects.
How to Design a Lighting Layout? — In 8 Easy Steps
Step:1 Ask Yourself the Right Questions
The best way to start designing a lighting layout is to ask yourself the right questions.
A lighting layout for a home needs a different approach than lighting a commercial place. So, here is a list of questions to help jump-start your creative process.
- What type of place are you lighting? A house, office, or retail store?
- Is the place used for work? Or to relax and spend time with friends and family.
- What is the ceiling height? Is it easy to change the lamps for regular maintenance?
- Would you like to change the lighting arrangement in the future?
- How much sunlight comes in through windows? Natural and artificial light need to complement each other.
- What is your budget? Can you afford to install intelligent controls in the place?
Step:2 Lighting Requirements
The next step is all about figuring out the correct lighting requirement. We will use the “Lumen Method” to give you a good guess of your lighting needs.
- Start by calculating the area. Multiple the length and width of the place. You’ll get some value in the square foot (sq. ft.)
- Multiply the area with the lumen required for specific places mentioned in the following table. These values are taken from IES and OSHO standards for general illumination.
Note:
You can also calculate a specific area within a place, like an area covered by a cooking range in the kitchen, and calculate the task lighting requirement using the same process.
| Area | Lumens per sq.ft |
| Residential drawing rooms, bedrooms, lounges | 10-20 |
| Dining rooms | 30-40 |
| Kitchens (General) | 30-40 |
| Kitchen (Work) | 70-80 |
| Retail shops | 30-50 |
| Offices | 50-75 |
| Conference rooms | 15-30 |
For example, an 8 ft by 12 ft kitchen covers an area of 96 sq. ft., so the lumens required for general illumination will be (96*40) 3840 lm, the total lumens required.
3. Now, find the number of fixtures required by simply dividing the total lumens needed for the lumen rating of a single bulb. You can easily find the lumen rating of a lamp on its package.
Now you know the total light requirement and the number of fixtures needed. It’s time to plan the lighting layout for your place.
Step:3 Evenly Spaced Lighting vs. Cluster Lighting
There are two common lighting approaches that lighting designers go for.
Evenly Spaced
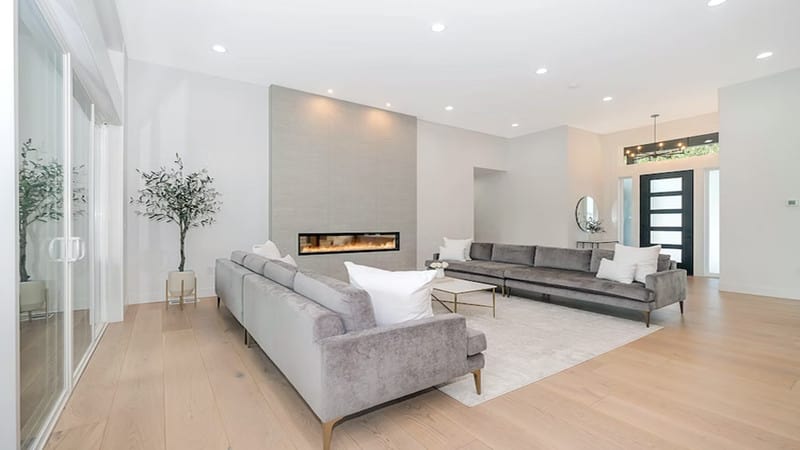
In the above example, the light sources are installed evenly, which gives balanced lighting.
Cluster
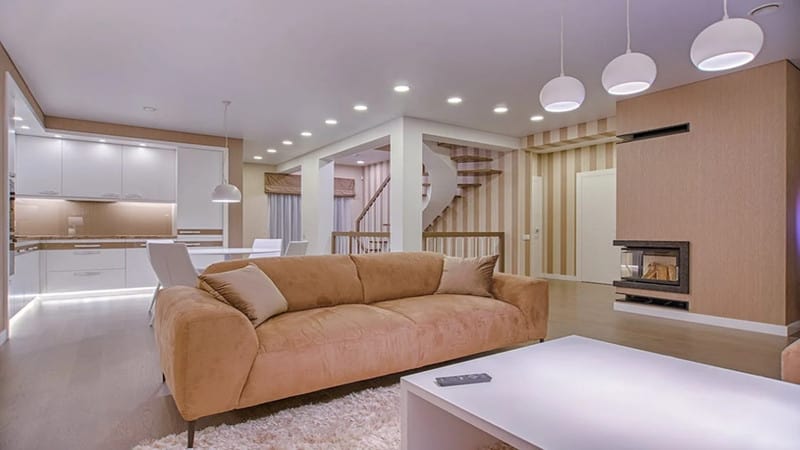
In the second image, you’ll see a cluster of light sources over certain areas, creating emphasis.
Both approaches work fine, but we prefer even lighting as you may need to change the furniture and decor in the future, which can disturb the whole lighting setup.
Step: 4 Start by Drawing a Floor Map
Once you have the basic lighting design, it’s time to put your ideas on paper.
Start by drawing a floor map. We will take an example of a typical home kitchen for easy understanding.
This is what a typical floor map looks like. We have scaled the dimensions in the drawings. 1 in depicts 2 ft in reality.
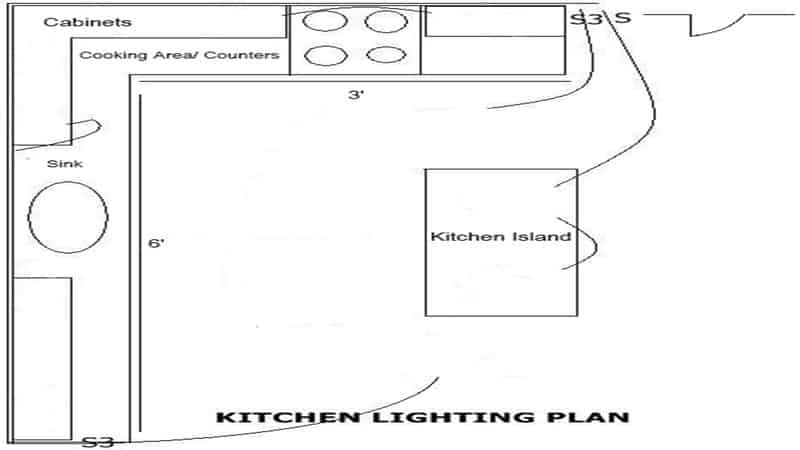
You have to mark the furniture, counters, cabinets, and electric sockets where the connection will be.
Step: 5 Play with Lighting Layers
The three lighting layers that are crucial to any functional light layout are:
Task Lighting
Always start your lighting layout by designing task lighting. This type of lighting is for areas where tasks are performed.
In the home kitchen, the lighting over the cooking counter and burners are called task lighting. Another example would be a cutting station in a hair salon. These areas require higher illumination for better work performance.
Ambient Lighting
Ambient lighting refers to general lighting in any room. The primary purpose of this light is to illuminate the place, and it should be high enough for people to move around quickly. Such general lighting also sets up the mood and vibe of the site.
Warmer temperature lights create a more relaxing environment, while cooler daylight lighting makes the place classy and elegant. You can use direct or indirect lighting to light up the area. Indirect lighting uses reflective surfaces like ceilings to spread the light beam.
Accent Lighting
Lastly, focus on accent lighting to make the place stand out. Accent lights highlight certain features like cabinets, decor, furniture, or painting. Try maintaining a 10:1 accent to general lighting contrast for elegant lighting design.
Step: 6 Choose the Lighting Fixtures
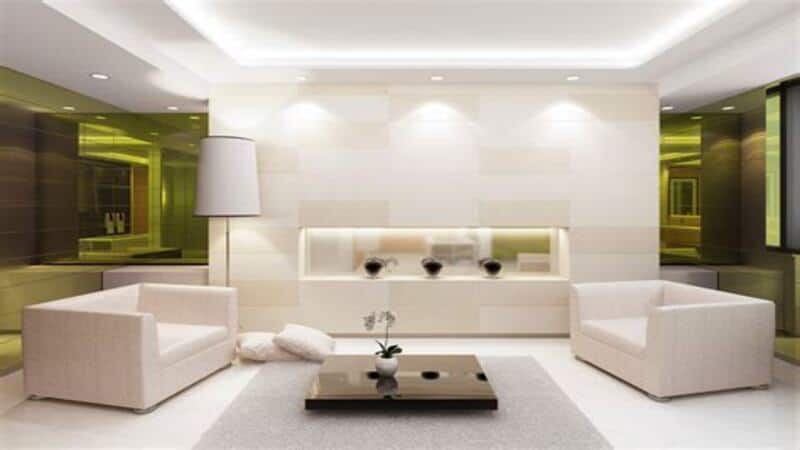
Here are some general lighting fixtures that work fine in any scenario.
Recessed Lighting
Recessed lights have fixtures inserted in the drywall, giving a unique, minimalistic feel. They are excellent for general and accent lighting.
Surface Mounted Lights
Surface-mounted lights are available in beautiful and sleek fixture designs. They’re alternatives to the recessed, panel, and linear lights.
Pendants and Chandeliers
Pendant lights and chandeliers can turn an average-looking area into a spectacular place. These lights come in elegant designs, and there are tons of options to choose from. Pendant lights are excellent for general as well as decorative lighting.
Track and Spotlights
Track lights are excellent for task lighting. It’s easy to adjust the beam direction according to your liking.
Spotlights are great for highlighting a specific feature. It could be a stand-in retail store or some painting in an art gallery.
Step: 7 Proper Placement
After going through steps 1-6, you must figure out the theme, function, and lighting requirements.
As a rule, all the lights should be 2-3 ft from the side walls. Also, the gap between light fixtures should be half the ceiling height. For example, for a 14 ft high ceiling, the institutions should be 6 to 7 ft apart.
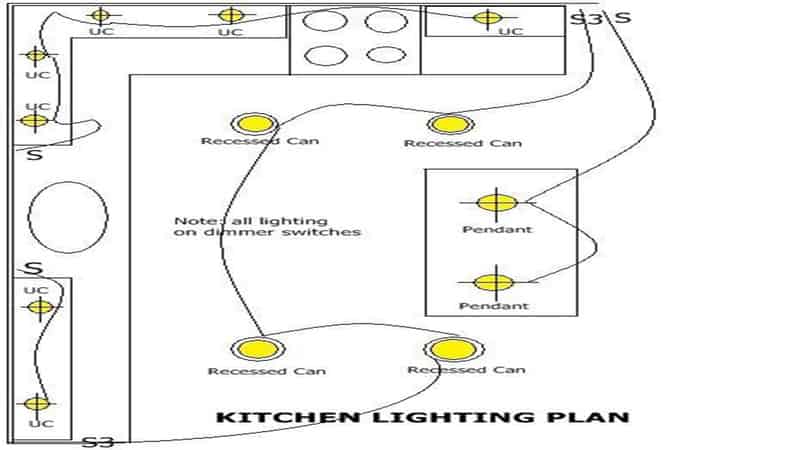
In the above example, under-cabinet (UC) lights illuminate the counters. They also give extra light to the cooking area making the task easier.
Recessed can lights are evenly distributed to illuminate the general area. To add the flare pendant lights are added above the kitchen island.
Step: 8 Be Creative
Make use of colors and temperatures to create a unique ambiance. Use lights with compatible dimmers to adjust the brightness depending on the mood.
Nowadays, multi-functional lighting with motion sensors, changing colors, and temperatures can convert an ordinary lighting plan into a masterpiece. Highlight special features like sloped ceilings, nooks, and furniture.
Common Mistakes to Avoid in a Lighting Layout
Before you start drilling holes in the drywall, make sure your blueprint doesn’t fall victim to these three frequent layout blunders.
Placing Recessed Cans Directly Above Ceiling Fan Blades (The Strobe Effect)
One of the most disruptive errors in residential and commercial layouts is misjudging the placement of ceiling fans relative to downlights.
When a recessed light is positioned directly above or too close to a fan’s kinetic path, the spinning blades chop through the light beam continuously. This creates a high-frequency, strobe-like flickering across the entire room that causes instant eye strain, headaches, and a highly uncomfortable environment for occupants.
Always ensure downlights are spaced well outside the total diameter of any ceiling fan blades.
Positioning Fixtures Too Close to Walls (Accidental Hot Spots)
When mapping out an even grid, it is easy to accidentally place recessed or surface-mounted fixtures too close to vertical surfaces.
If a standard downward-facing light is installed less than 2 to 3 feet from a wall, it creates intense, distracting arcs of concentrated light known as “hot spots” or severe wall washing.
Unless you are intentionally trying to highlight a texture or artwork with specialized accent fixtures, keeping your general ambient lights properly spaced away from the walls ensures smooth, uniform light distribution without harsh visual glare.
Creating “Shadow Zones” by Ignoring Furniture and Countertop Positions
A perfect geometric layout on an empty floor plan often fails once the actual furniture is moved into the space.
For instance, if you position overhead downlights directly behind a person standing at a kitchen counter or sitting at an office desk, their own body blocks the ambient light layer, casting a dark shadow over their hands, paperwork, or cutting boards.
A successful layout must cross-reference fixture placement with the functional workspaces marked on your floor map, ensuring task lights shine directly onto the work surface from the front or sides rather than from behind.
Why Are LED Fixtures Best for Functional Lighting Layouts?
We have come a long way when it comes to lighting technologies. It all started with incandescent bulbs, and then halogens, metal halides, and fluorescent lights dominated the lighting scene.
However, light-emitting diodes, commonly called LEDs, evolved lighting to new heights in the last decade. LED lights are perfect for your lighting layout because they are long-lasting, durable, energy-efficient, and cost-effective.
Furthermore, you can select from hundreds of fixtures and power ratings. Such flexibility gives you room to be highly creative with the lighting layout. LED doesn’t heat up efficiently, so they can be installed in tight places.
An average LED bulb lasts 50,000 hours, so you don’t have to worry about maintenance much.
Frequently Asked Questions
What is the ideal beam angle for fixtures in a general ambient lighting layout?
For standard ambient lighting layouts, fixtures with a wide beam angle between 90° and 120° are ideal because they distribute light broadly to ensure even coverage across the room. If your layout features higher ceilings (above 10 feet), you should switch to narrower beam angles between 45° and 60° to ensure the light punch reaches the floor effectively. Using the wrong beam angle can ruin a layout, either by creating blinding glare or leaving massive dark spots between your fixtures.
How do I choose between track lights and recessed downlights for my layout?
Recessed downlights are the best choice for clean, minimalistic layouts where you want uniform general ambient illumination without visual clutter. Track lights, on the other hand, offer ultimate layout flexibility because you can slide, adjust, and aim individual fixtures toward changing artworks, displays, or workspace countertops. Many modern spaces combine both, using recessed cans for the foundational light layer and track systems for adjustable accent or task zones.
What happens to a lighting layout if I use fixtures with a low Color Rendering Index (CRI)?
Even if your fixture layout is perfectly spaced and calculated, choosing lights with a low CRI (below 80) will make the entire space feel dull, unnatural, and sterile. Low-CRI fixtures fail to render colors accurately, causing vibrant interior decor, wall paint, and furniture fabrics to look muddy or grayish under the layout. For residential, retail, or hospitality layouts, choosing high-CRI LEDs (≥90) is essential to make the physical environment look rich and visually appealing.
Can standard catalog LED fixtures fulfill a complex lighting layout, or are custom models necessary?
While standard catalog fixtures work perfectly for uniform grids in square or rectangular rooms, architectural layouts with sloped ceilings, circular perimeters, or precise linear runs often demand tailored solutions. Opting for a manufacturer like RC Lighting gives you access to reliable standard downlights for core areas, alongside custom lighting services for tailored linear lengths, specific housing colors, and unique optic configurations. This ensures every physical fixture adapts seamlessly to your layout blueprints rather than forcing you to compromise your design.
The Bottom Line
Lighting layout doesn’t have to be a difficult or complex process. Simpler is always better. By going through this guide, you now have the idea about calculating lighting requirement and using it to craft a lighting layout. We also discussed what different lighting strategies you can use to enhance the lighting layout.
Don’t worry! If you didn’t get it right the first time. A little practice goes a long way.
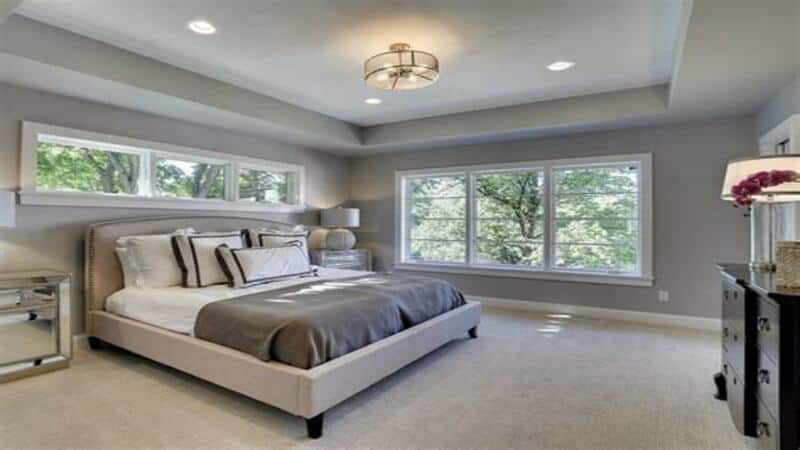
RC Lighting Is Your One-Stop-All for Functional Lighting Solutions
A good “Lighting Layout” alone isn’t practical without high-quality luminaires. At RC lighting, we consider the market demand, delivering premium quality LED lights to our clients.
What makes our products so unique? We produce LED lights in state of manufacturing plants that comply with international quality standards. Our catalog includes a variety of LED recessed lights, surface-mounted lights, linear lights, track lights, and spotlights.
RC lighting even offers customization of the lighting options according to your demand so that you get maximum benefit. Our rates are market-competitive, and our delivery service is top-notch. Moreover, all LED lights have high-quality drivers with five years of warranty.
So, what are you waiting for? Contact our 24/7 customer service and get a FREE project evaluation now!